How to draft a half circle skirt sewing pattern with Seamly2D (+ Video Tutorial)
I’ve been meaning to write a a step-by-step tutorial on how to draft a half circle skirt using Seamly 2D (also works on Valentina) for a while now and I’m happy to have gotten to it, finally.
I’ve already written about the maths behind any circle skirt variation, so if you want to understand the radius formula, head there first. However, this tutorial will show you how to digitally draft a half circle skirt from start to finish on Seamly.
The Seamly circle skirt tutorial video below covers everything, but I’ve written out the full steps underneath if you prefer to follow along in text.
Step 1: Create a new pattern file
Open Seamly2D and go to File > New. Give the pattern a name and choose your preferred units. Click OK and Seamly will create your first point named A.
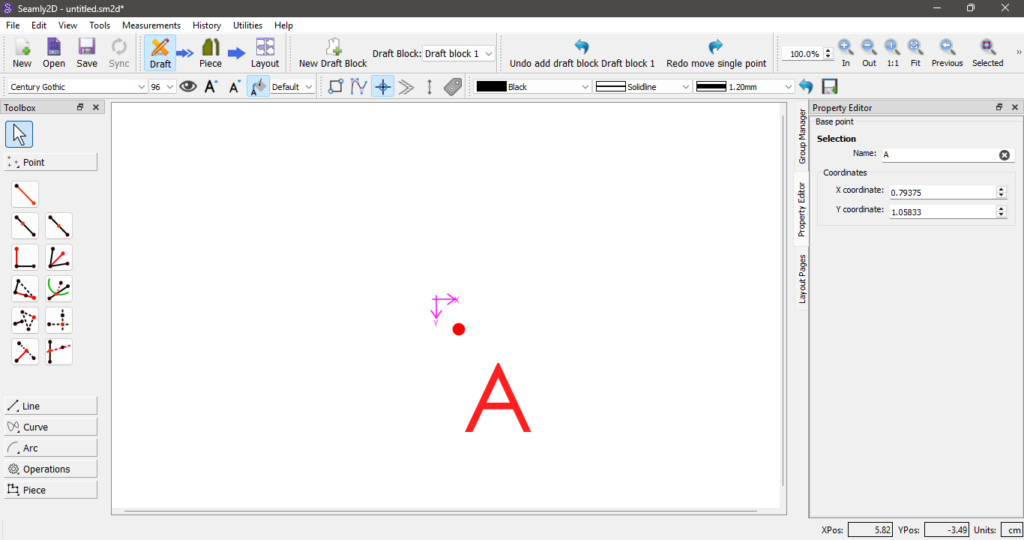
Now save the file by clicking File > Save As.
Step 2: Set up the measurements file in SeamlyMe
In the Seamly menu, click Measurements > Open Seamly Me. In Seamly Me, click New and for the measurement type choose Individual and choose your preferred units (leave the other fields blank).
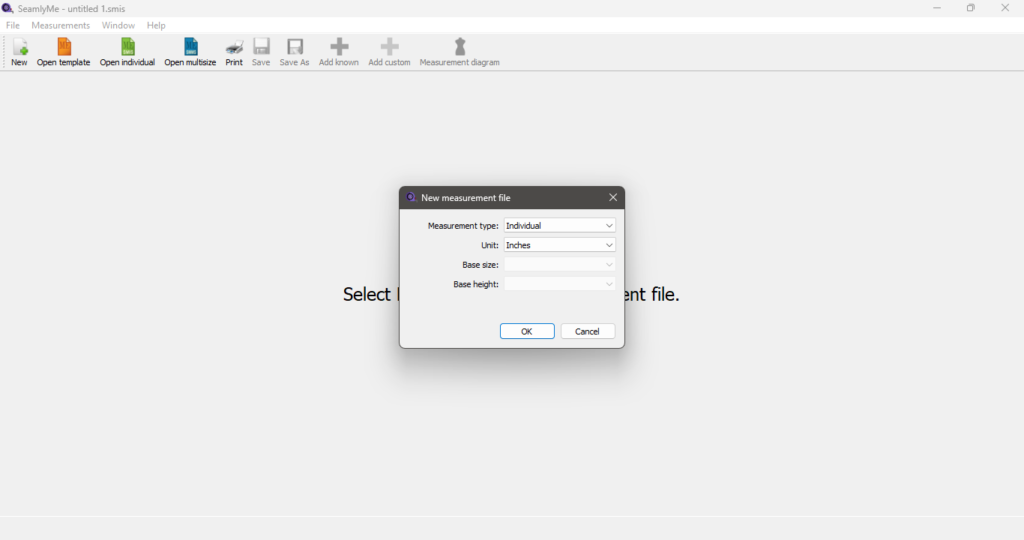
Click Add Known (the red cross) and find G07 — Waist Circumference by searching for it or under the Circumference and Arc section.
Now enter your waist measurement in the formula field (e.g. 82 cm) and click Save. You may now close Seamly Me.
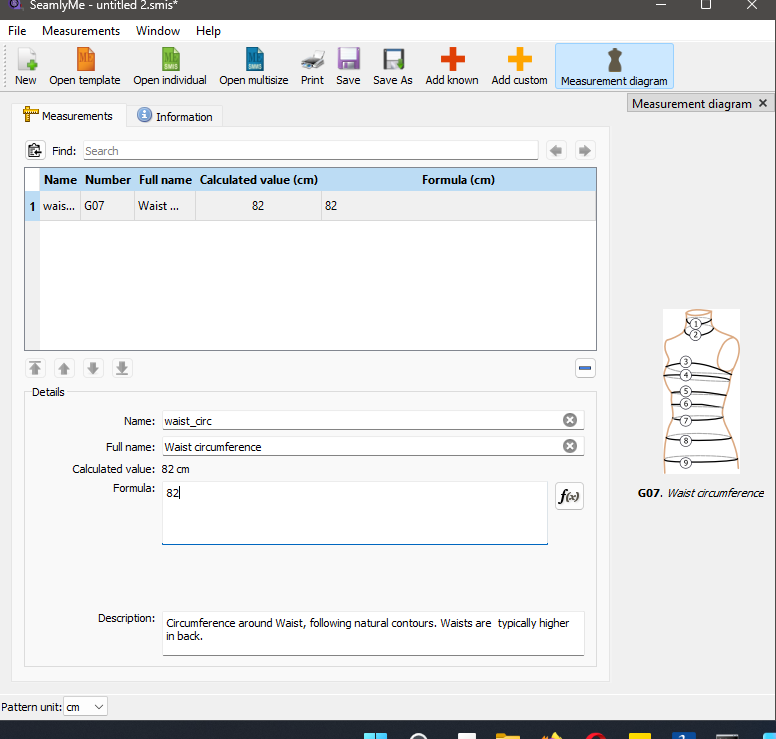
Back in Seamly2D, go to Measurements > Load Individual and load the file you just saved to make your waist circumference available as a variable throughout the pattern.
Quick note on the formula
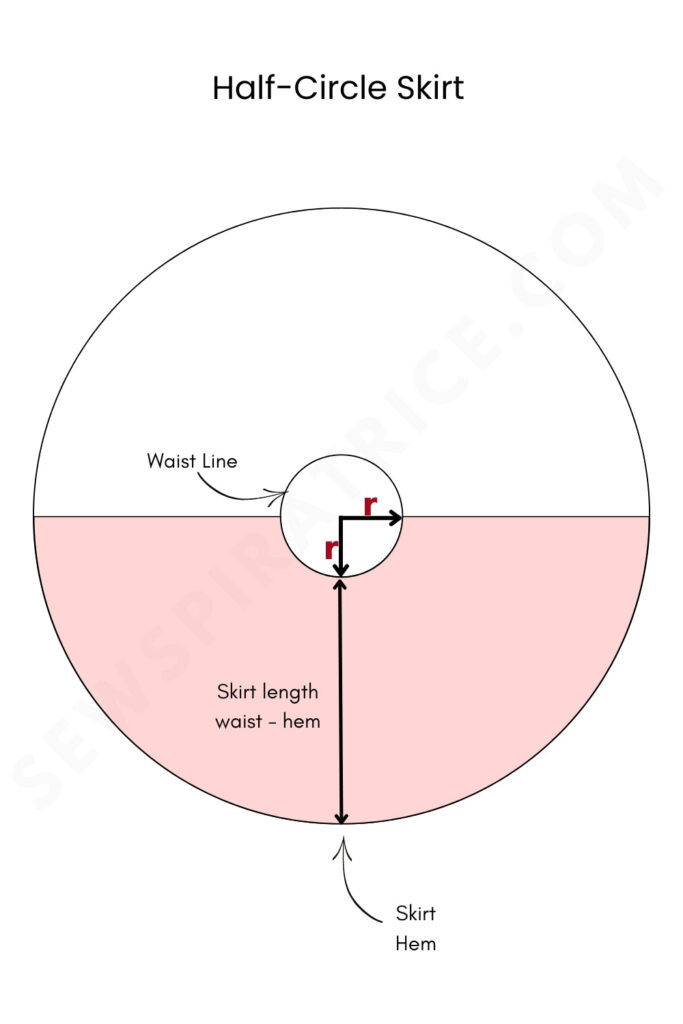
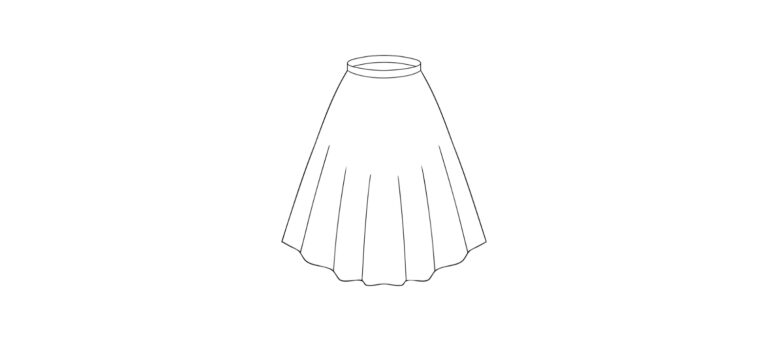
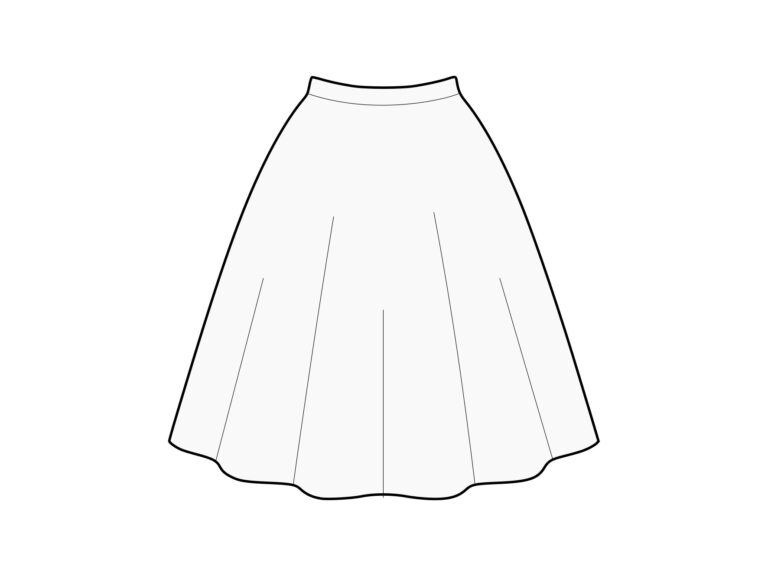
The diagram below shows what exactly we’re trying to draft. A half circle skirt works by fitting your waist circumference into half the circumference of a circle. The simplified radius formula for the is:
radius = waist circumference ÷ π
So for a waist of 82 cm: 82 ÷ 3.142 = approximately 26.1 cm.
You’ll also need to decide on your skirt length. I’m using 60 cm.
Step 4: Drafting the half skirt piece
We now need to add several points, starting from point A. In your tool box, choose the point tool.
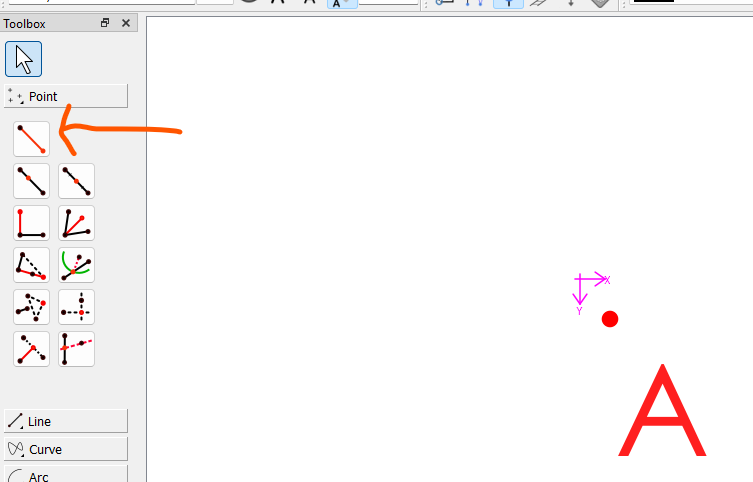
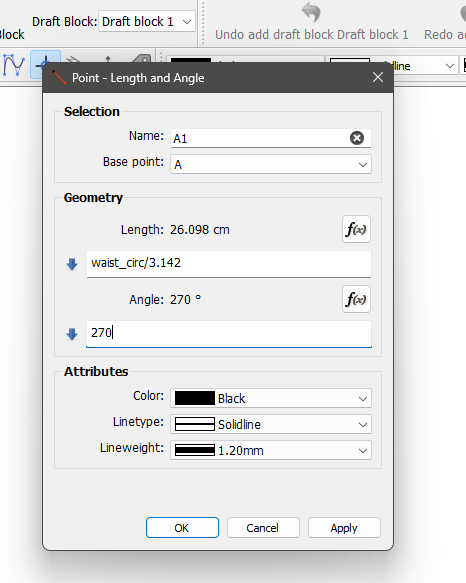
Click A and bring the line that appears to any position straight below A to form A1. A dialogue box will appear which you need to fill in.
For the length, click the formula icon. Your waist measurement will appear as waist_circ in the measurements. Clear the number in the formula and double click waist_circ to populate the formula field with your waist measurement. Then divide it by 3.142.
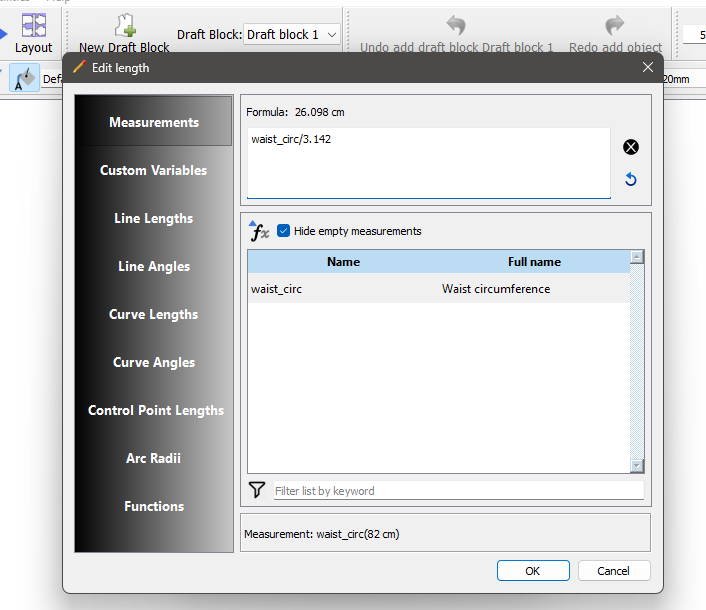
Click Ok to close the window. In the Angle field in the Point -Length and Angle window, enter 270°. Click ok to close the this window.
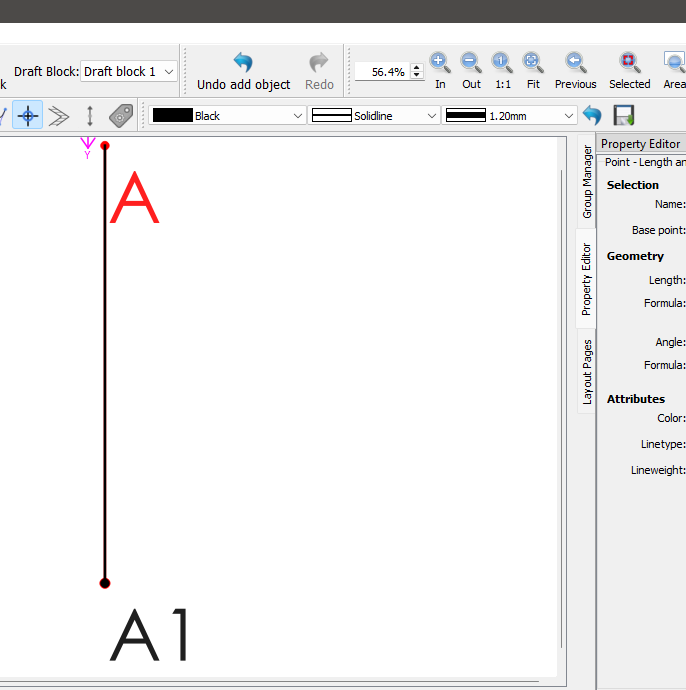
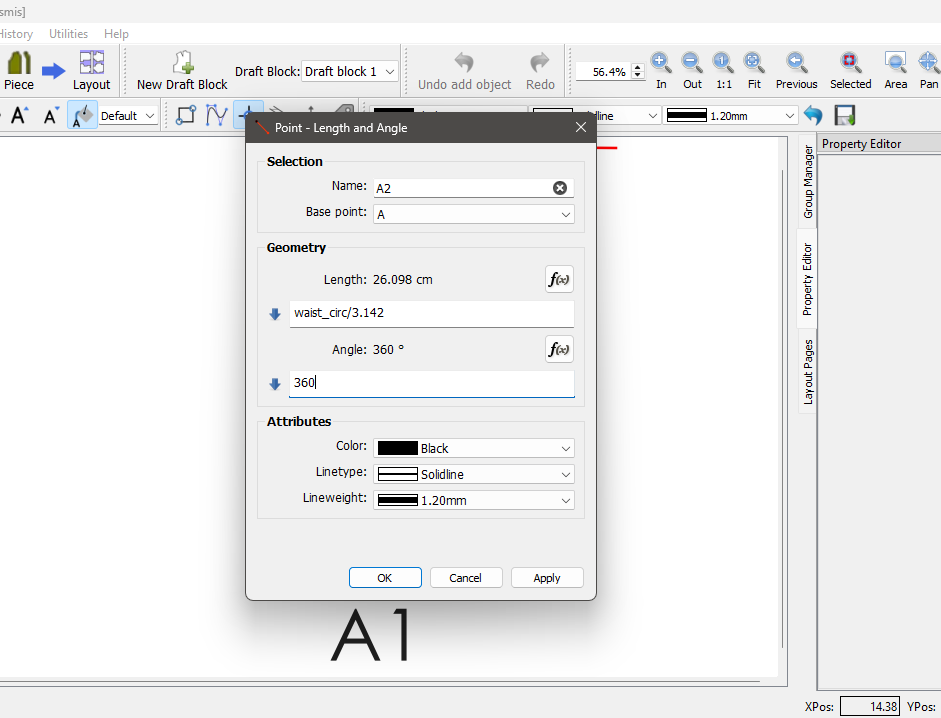
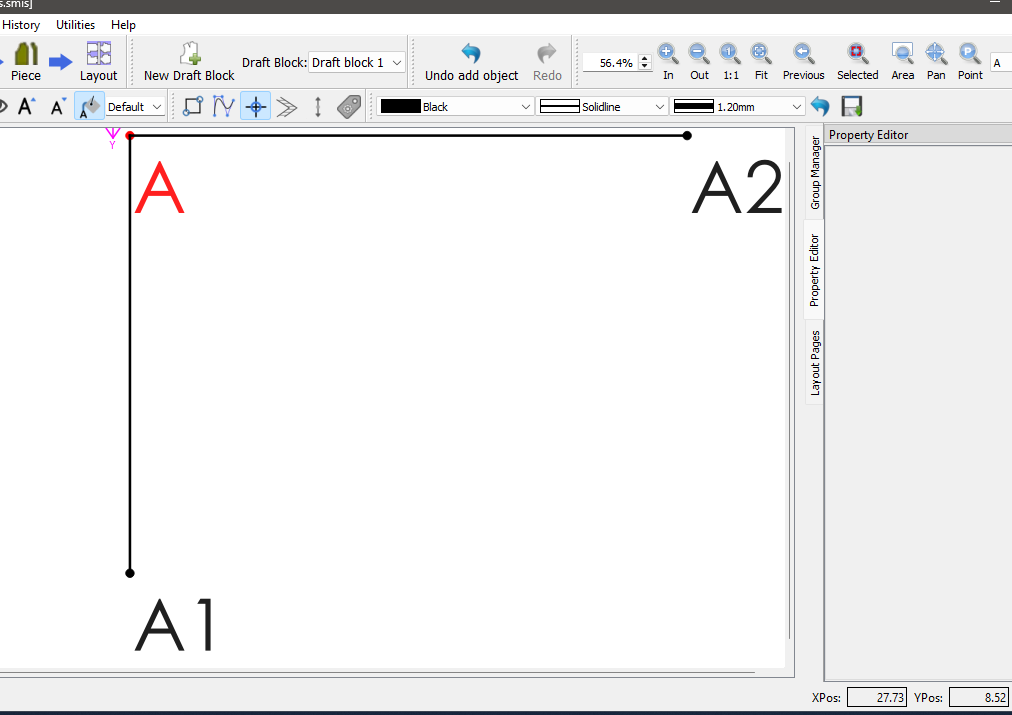
Now for A2 create a new point to the right of A. Put in the same formula and for the angle put in 0 or 360°.
From A1, straight downward, create Point A3 and for the length put in your desired skirt length (e.g. 60 cm) and for the angle 270°.
From A2, to the right, create Point A4. Put in your skirt length for the length and 360° for the angle
Use View > Fit at any point to see everything on screen.
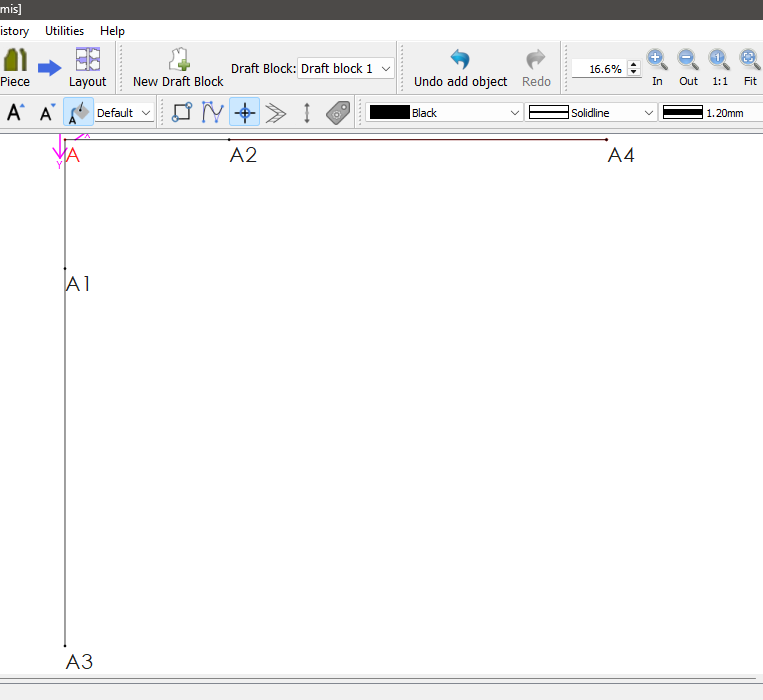
Step 5: Draw the arcs
To form the waistline, we need to join A1 to A2, go to the Arc menu in your toolbox and choose the Arc Tool (the first option).
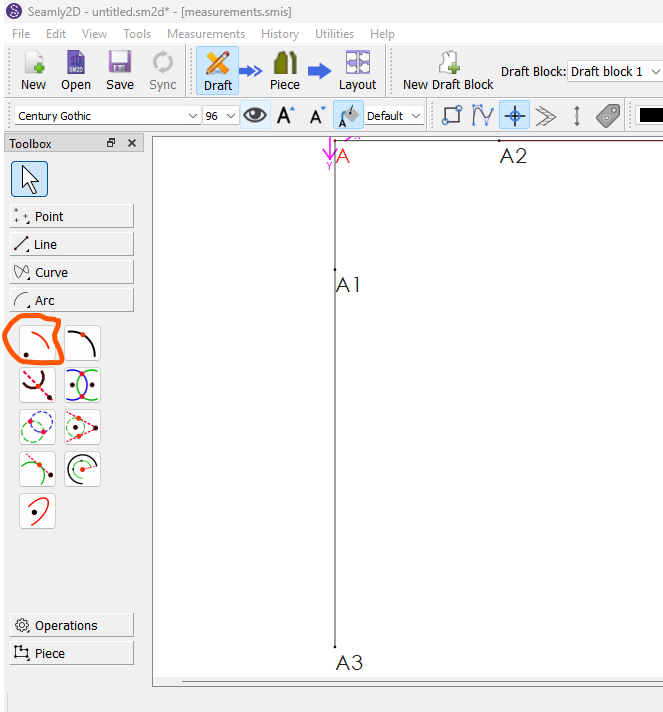
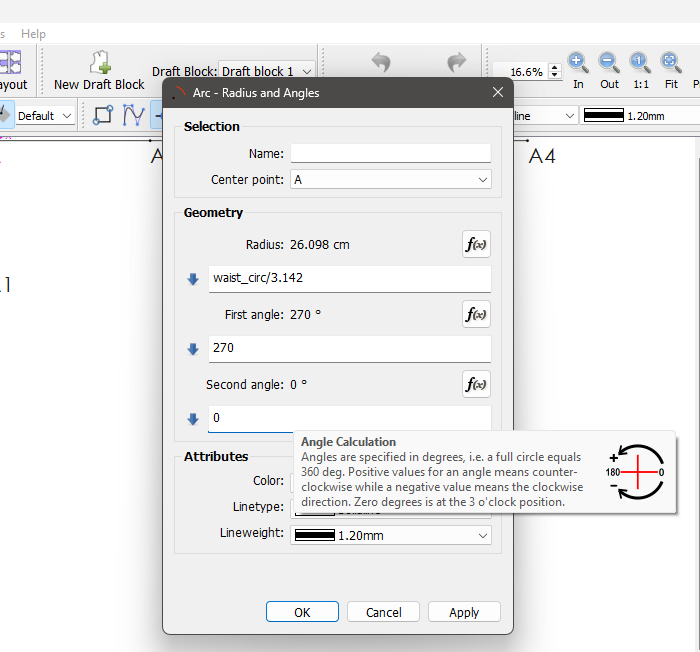
Click A, the center of the arc. A window will open up. For the Radius, put in the same formula we’ve been working with waist_circ/3.142. For the first angle, enter 270° and the second angle, 0°. Click OK.
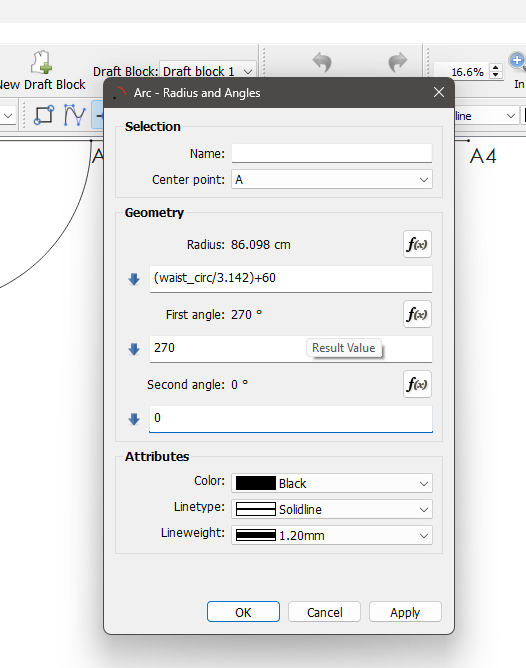
We now need another arc at the hemline that joins A3 to A4.
Click A, the center of the arc. A window will open up. For the Radius, put in the formula, (waist_circ/3.142)+60 (or your desiredskirt length). For the first angle, enter 270° and the second angle, 0°. Click OK.
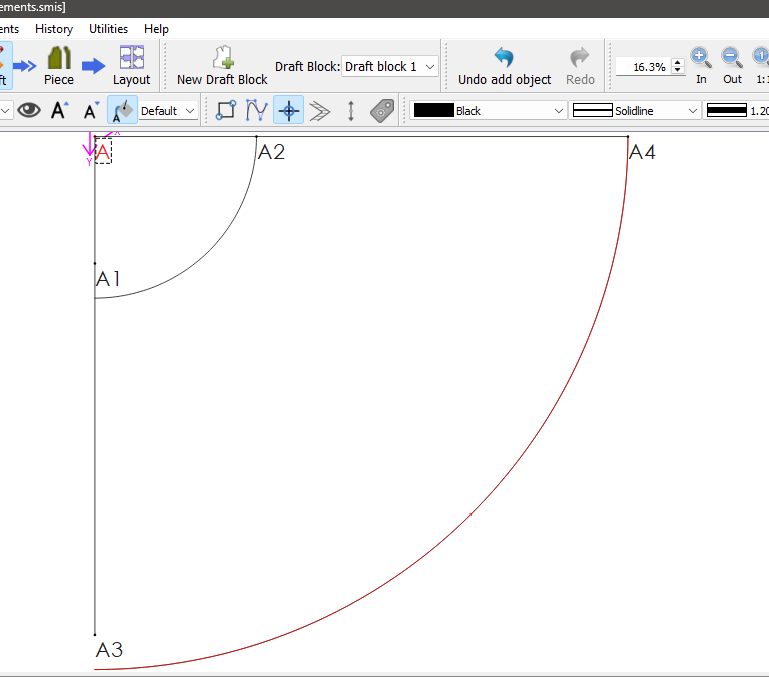
Step 6: The pattern piece layout
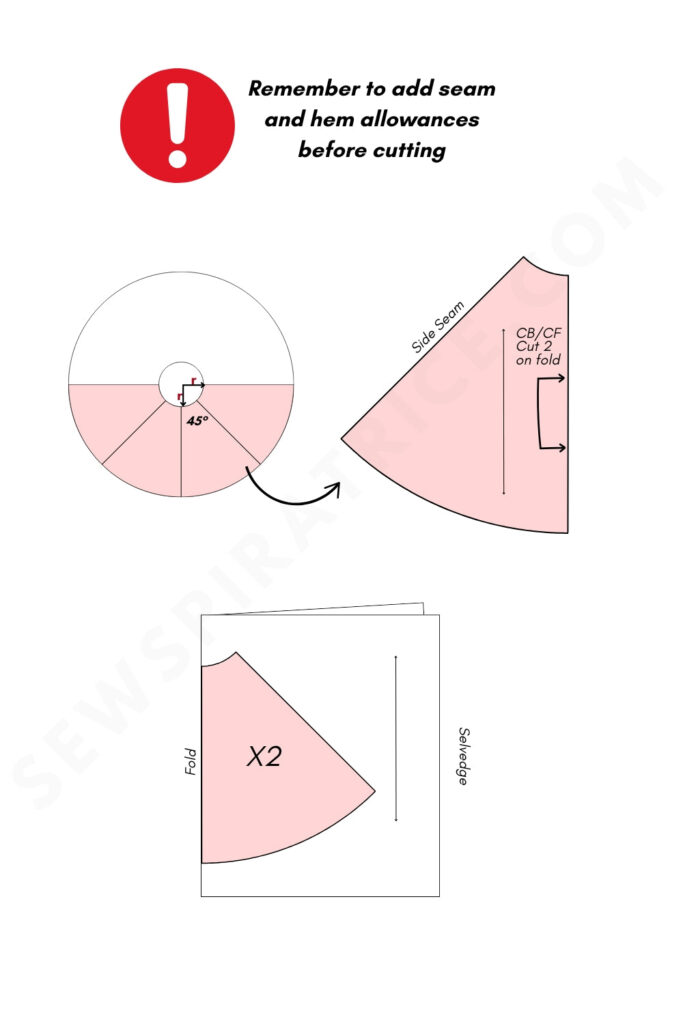
To make the actual pattern piece we need to bisect the 90° angle of our current pattern piece to get a 45-degree piece that you cut on the fold twice.
To do this, we need to add two more points: one halfway on each arc.
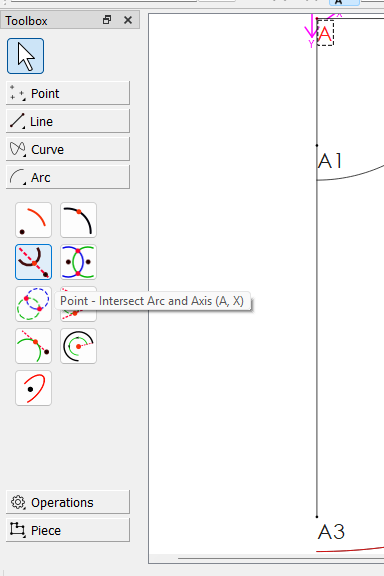
Use the Point Intersect Arc and Axis tool under the Arc menu.
Click the arc at the waist, then point A. A dotted line will now appear. Move your cursor outside the arc until the line roughly intersects the line halfway. Right click once. In the property editor, put in the angle 315° (which comes from 360°-45°) to get a point exactly halfway on the arch at the waist, A5.
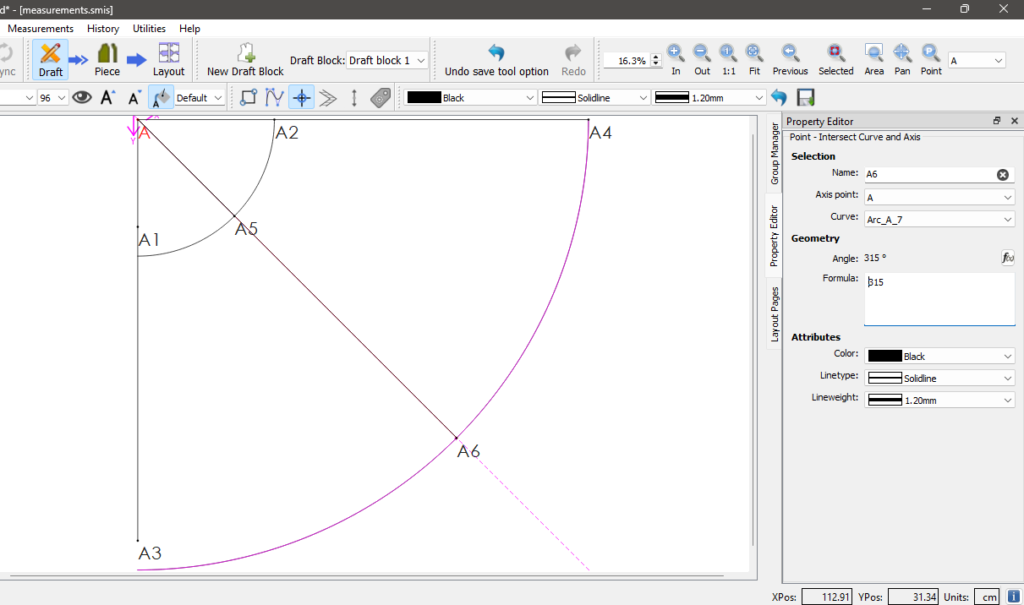
Repeat this step for the hem arc. Edit the angle to 315°. This gives you point A6.
Step 7: Draft the waistband piece
Go to Piece > New Draft Block and name it “Waistband.” This gives you a new starting point, B.
The waistband is drafted as a quarter piece, cut 4 on the fold (2 outer, 2 inner). The length formula needs to account for a small extra allowance that helps ease the curved skirt waist onto the straight waistband.
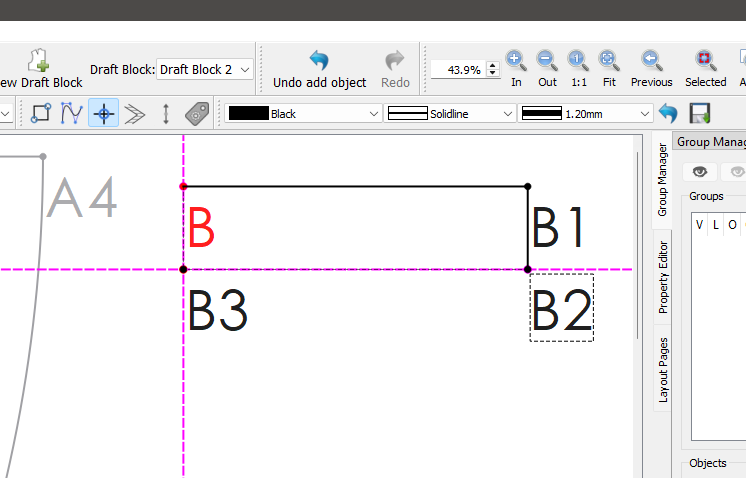
Using the Point Tool create B1 to the right of B (Angle: 0°, length: (waist circumference + 1 cm) ÷ 4). Then create B2 below B1 (angle 270°, length: 5 cm recommended).
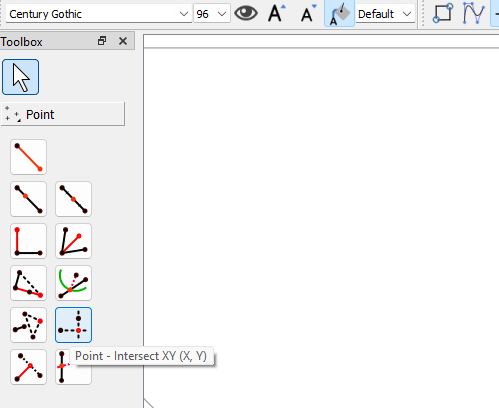
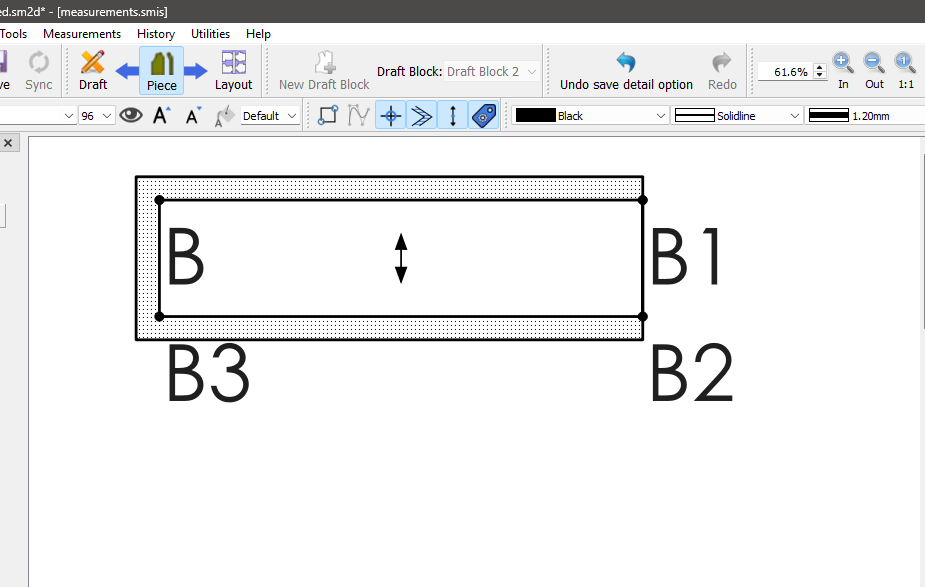
Use the Point – Intersect tool to create point B3 at the intersection of B and B2, by clicking B1, then B2. That’s all for the waistband.
Step 8 : Create the pattern pieces
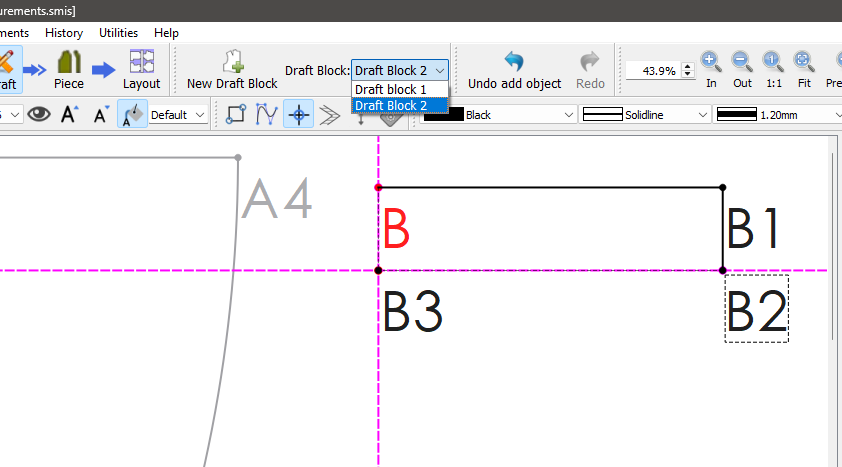
Navigate back to the circle pattern piece by choosing it in the Draft Block drop down.
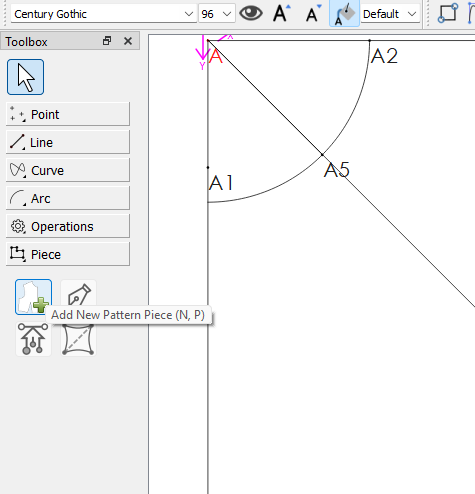
In the toolbox, select piece and choose the Add New Pattern Piece tool.
Pieces need to be traced pieces in a clockwise direction. For the skirt click the following in this particular order.
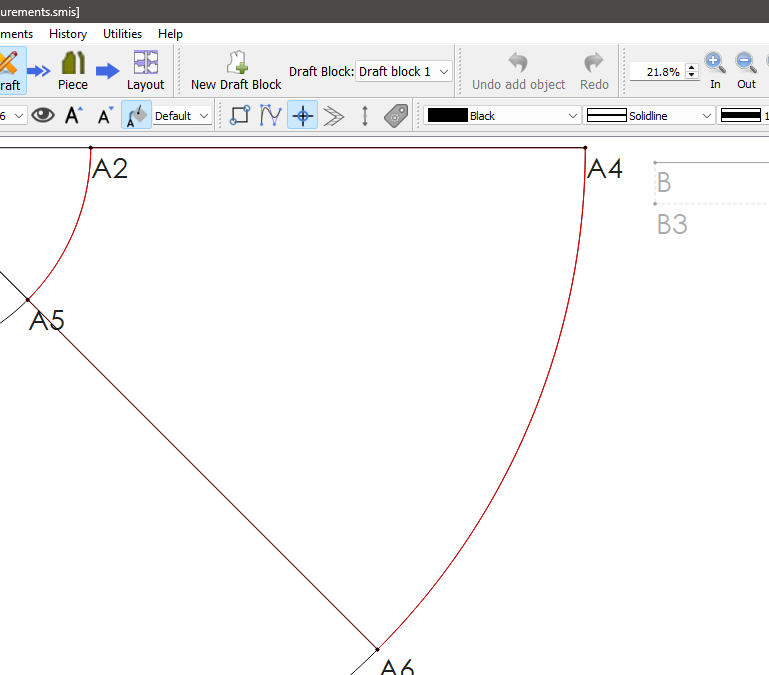
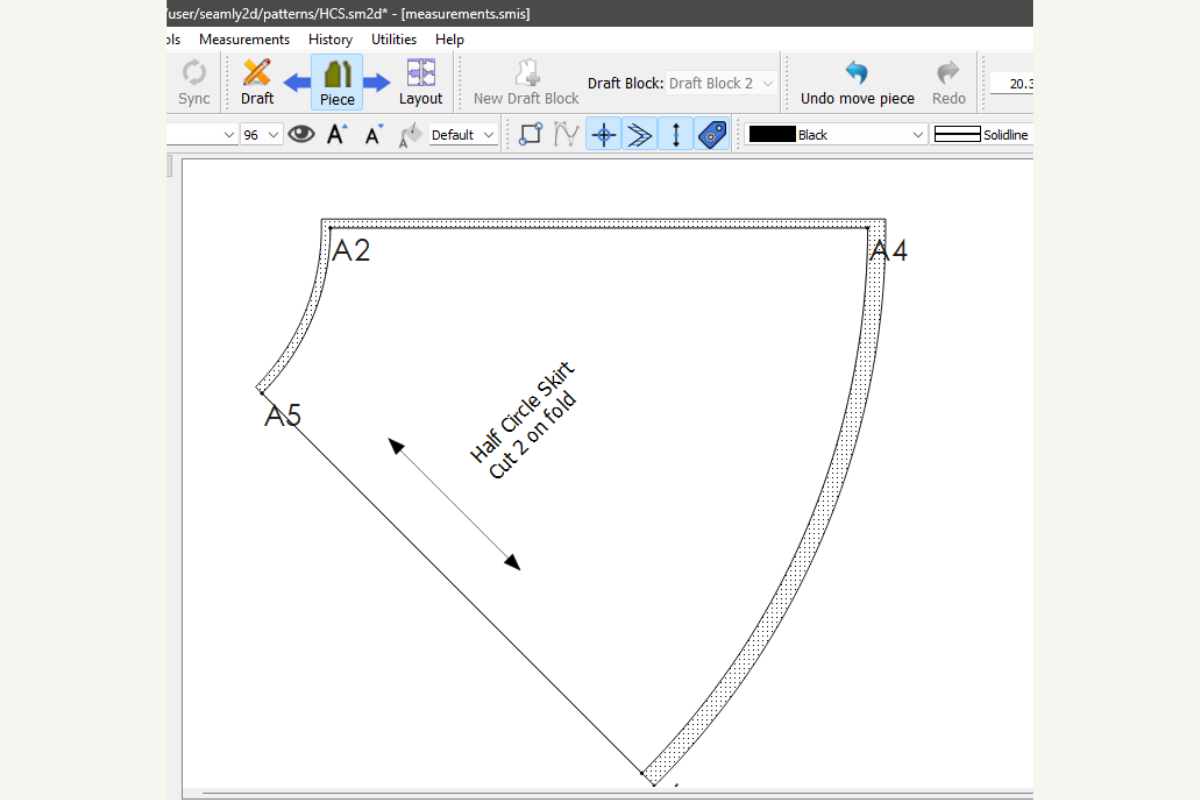
A2 → A4 → click the hem arc → A6 → A5 → click the waist arc → Enter.
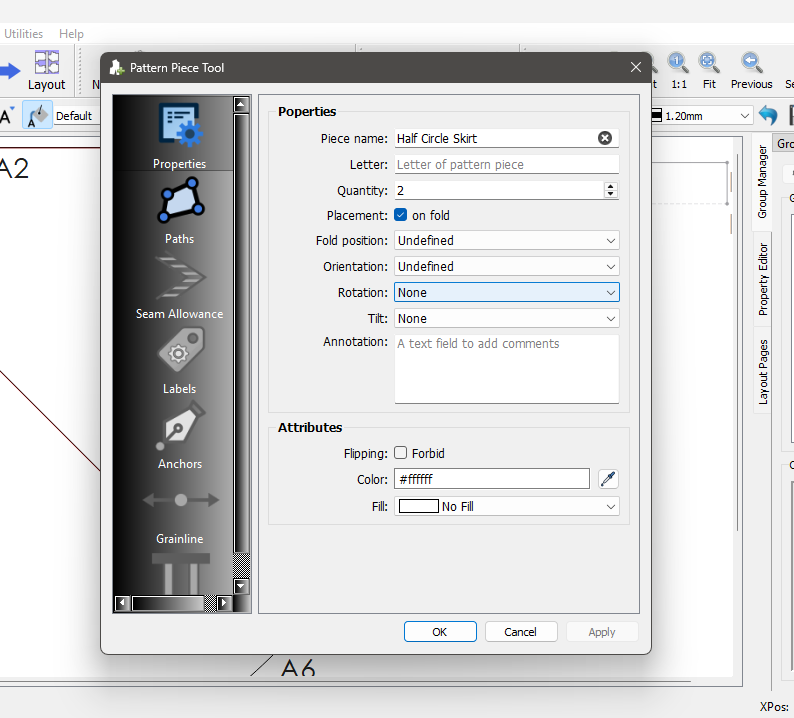
Name the pattern piece “Half Circle Skirt” in the Properties of the pattern piece tool, change the quantity to 2 and check the on fold placement. Now click Ok.
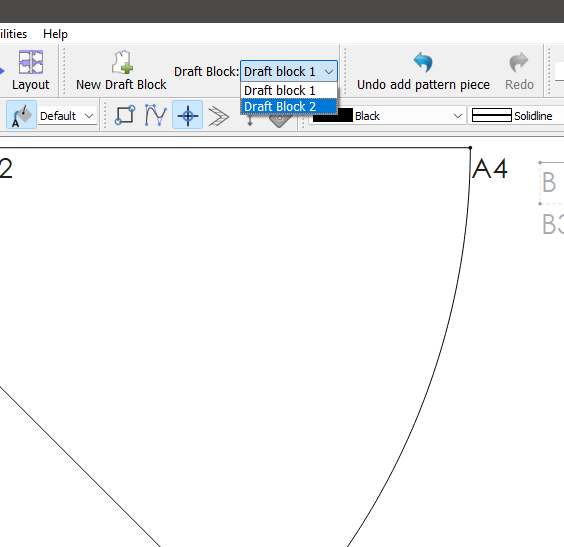
In the Draft Block drop down, choose the waistband pattern piece.
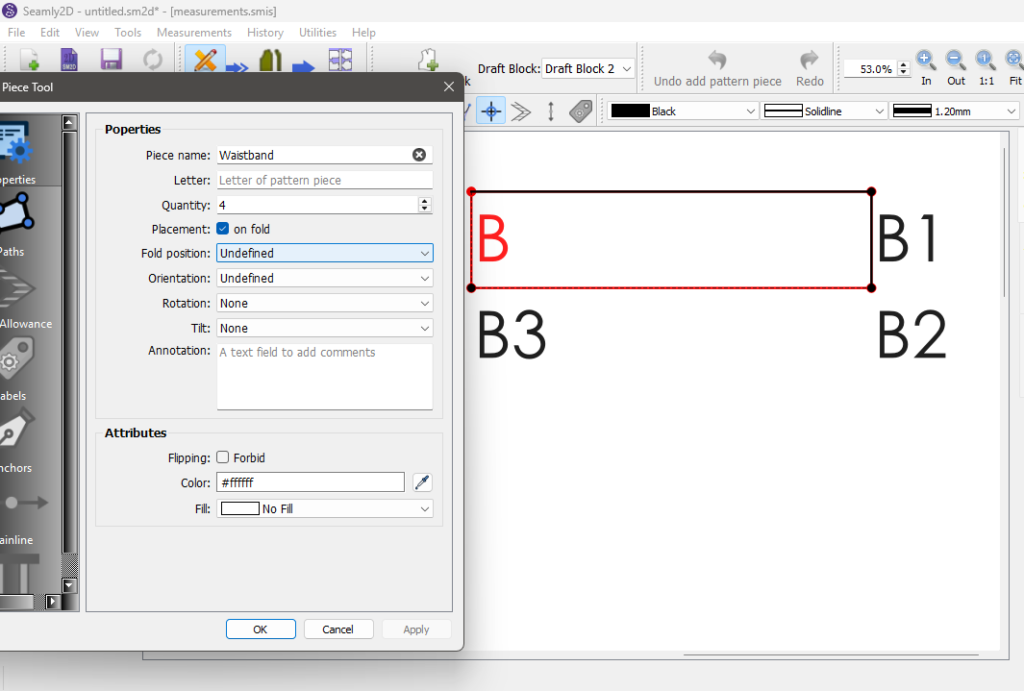
In the toolbox, go to Piece > Add New Pattern Piece and trace clockwise: B → B1 → B2 → B3 → Enter.
Name the pattern piece “Waistband”, set the quantity to 4, and check on fold. Click OK.
Step 8: Prepare the pattern pieces
Modifying the seam allowances
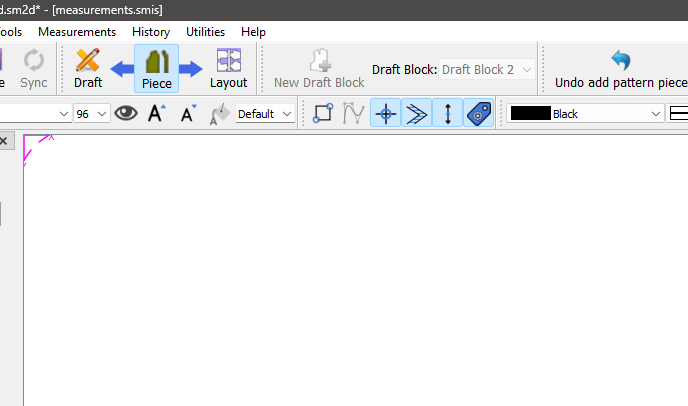
Click ‘Piece’ below the top menu as shown in the image below. In the View menu, choose Fit all to see all the pattern pieces.
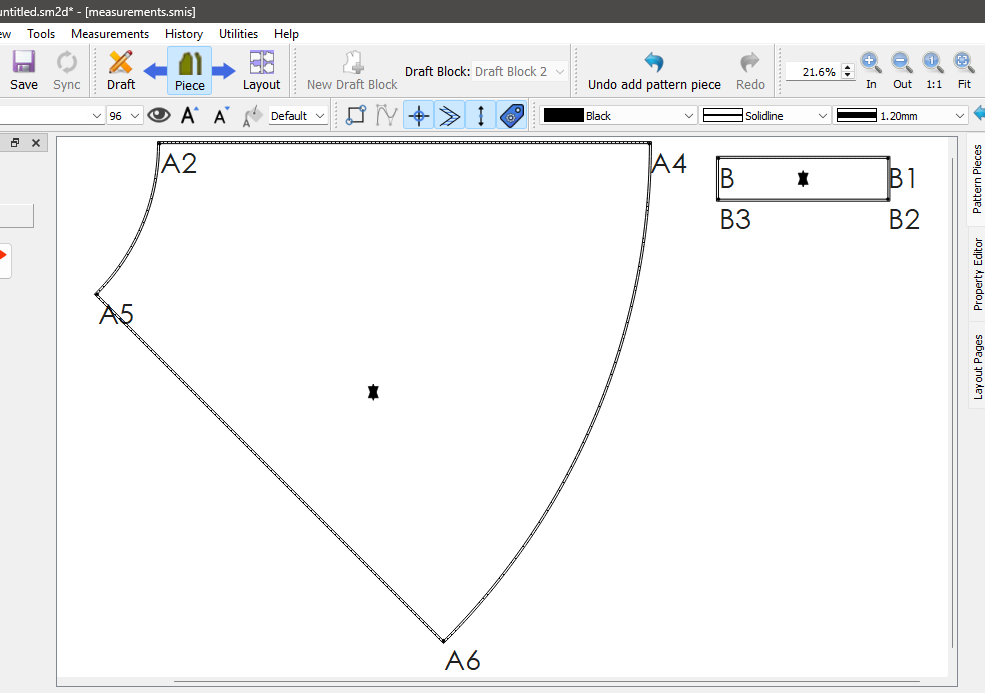
Right-click the skirt pattern piece and go to Properties > Seam Allowance. I’m choosing to use a default of 1 cm throughout.
In the nodes section, choose Node A4, set “after” to 2 cm for a wider hem allowance then click Apply. For Node A6, set “before” to 2 cm. Click Apply.
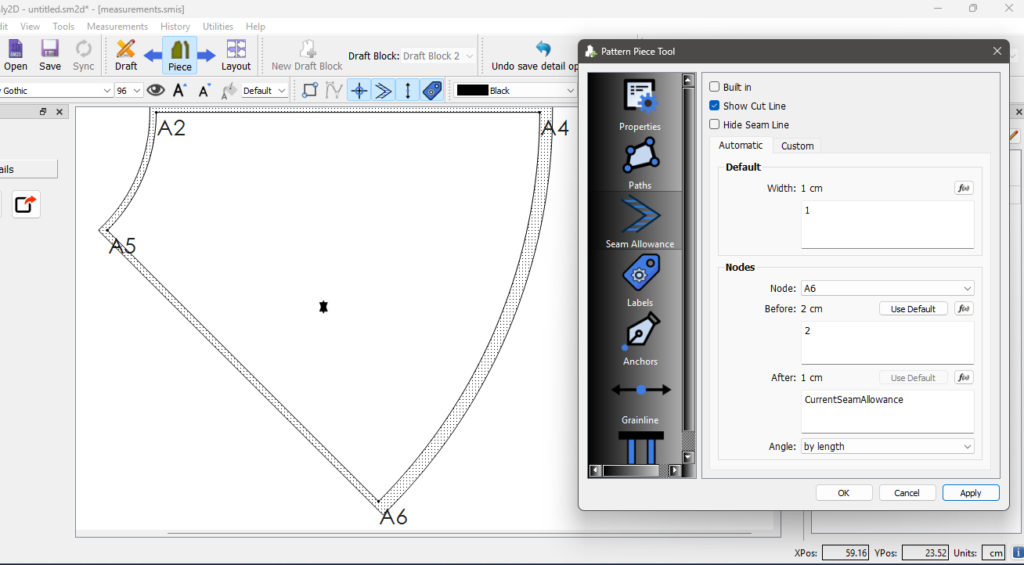
We now need to remove the seam allowance at the foldline.
In the nodes section, choose Node A6, set “after” to 0 cm and click Apply. For Node A5, set “before” to 0 cm and Click OK.
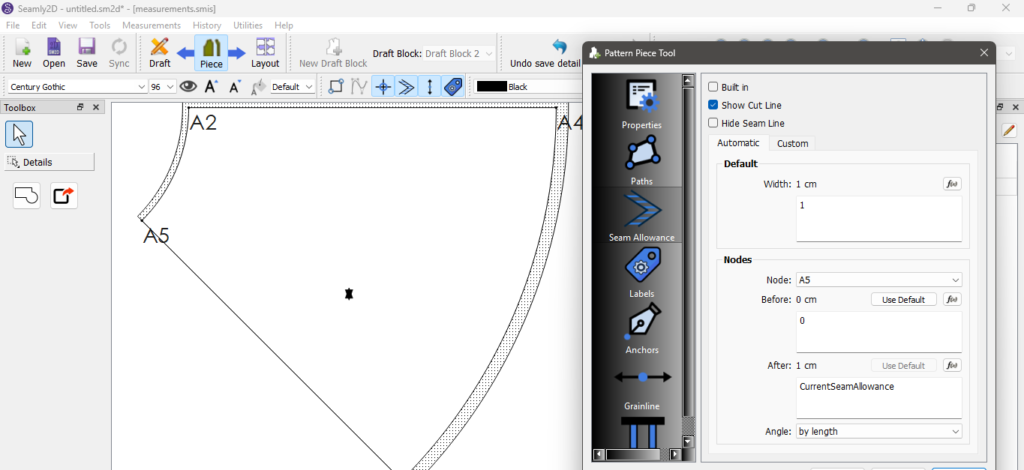
Right-click the waistband pattern piece and go to Properties > Seam Allowance. Again, I’m choosing to use a default of 1 cm throughout.
To remove the seam allowance at the fold, choose the Node B1 and set “after” to 0 cm and click Apply. For Node B2, set “before” to 0 cm and Click OK.
Adding the grain lines and labels
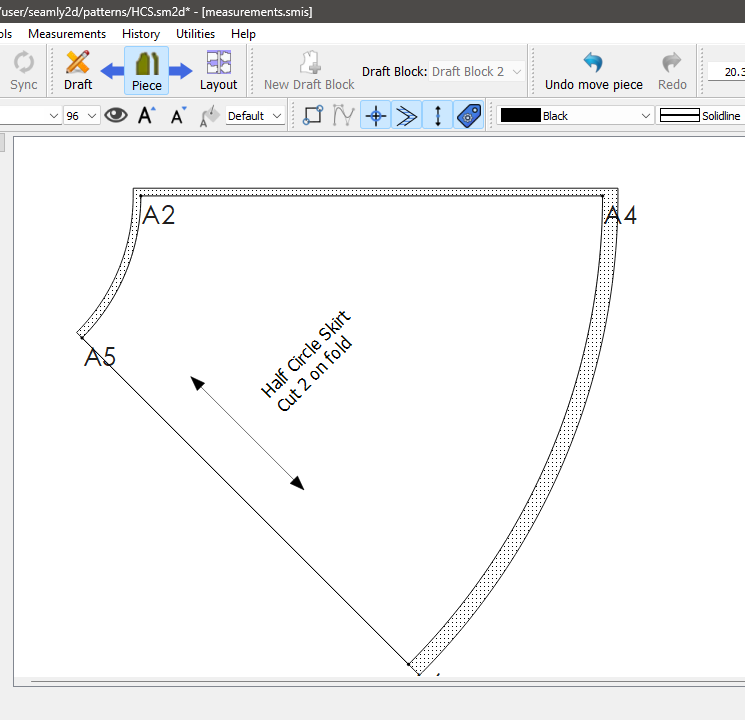
Right click skirt pattern and head over to Properties > Grain Line and set the angle to 315°. This places the grain line at the foldline. You can adjust the grain line to a length and position you like later.
For the label, go to Properties > Labels > Piece Label > Edit Template:
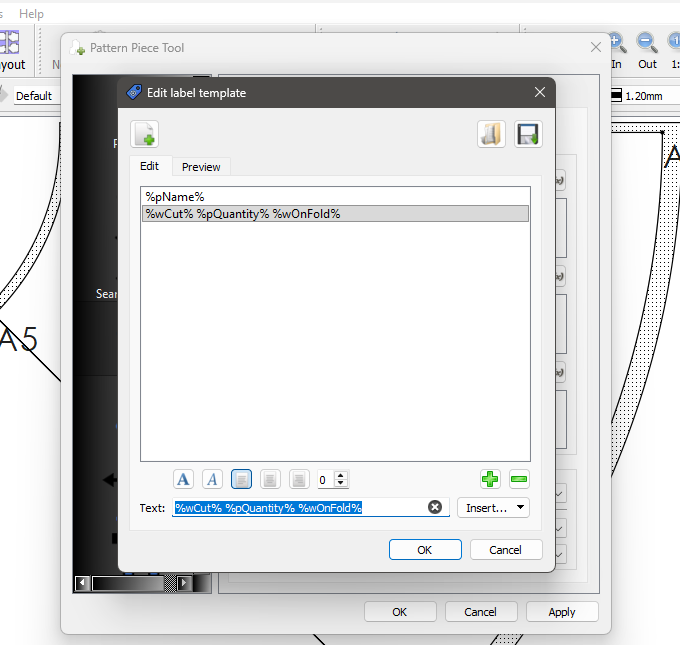
Add a field (plus sign). Insert the Piece Name from the drop down menu. Add another field and insert the word “cut”, add a space, then insert the Quantity variable, then insert the word “on fold”
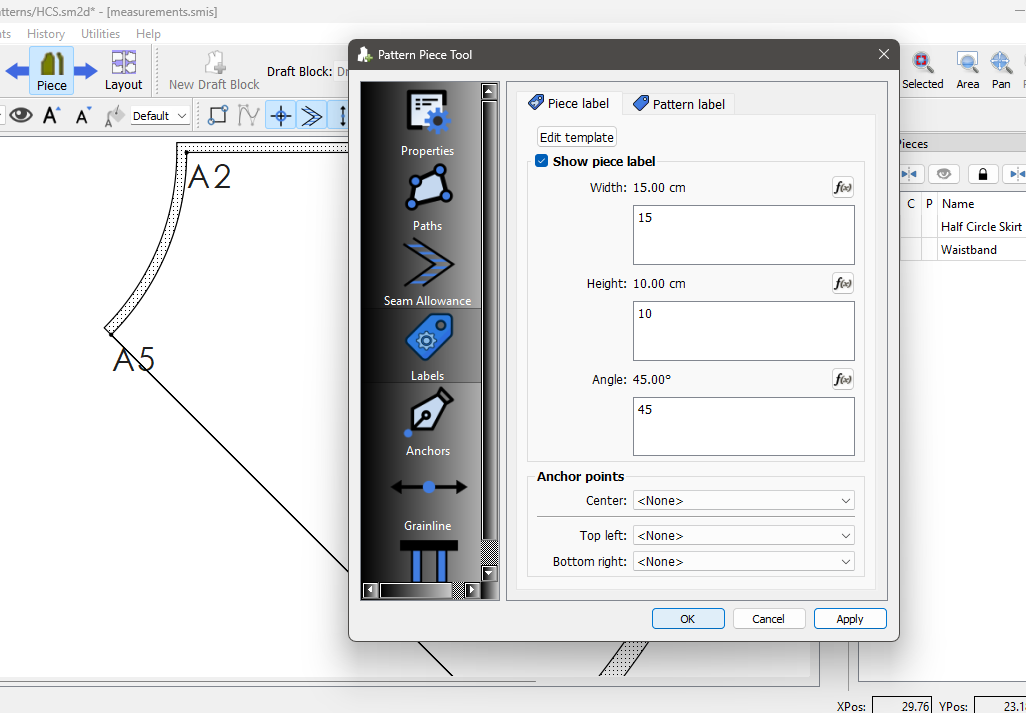
The preview should read something like “Skirt cut 2 on fold.” Click Ok. Play around with the width, height and angle of the piece label to get something you like.
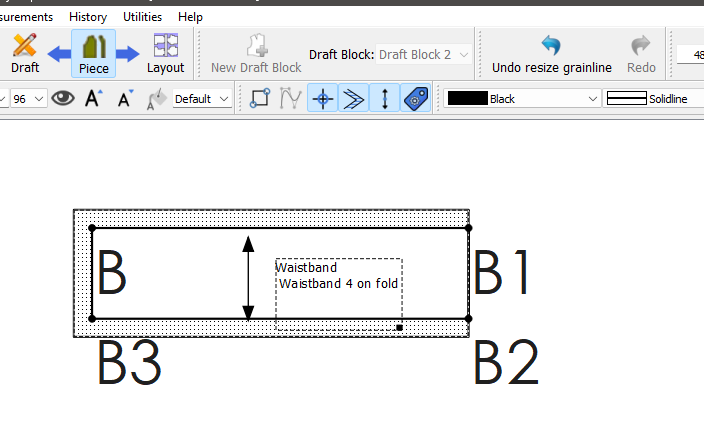
Click the waistband pattern and head over to Properties > Grain Line and adjust its length.
Change the label as well in Labels > Piece Label > Edit Template.
Add a field (plus sign). Insert the Piece Name from the drop down menu. Add another field and insert the word “cut”, add a space, then insert the Quantity variable, then insert the word “on fold”
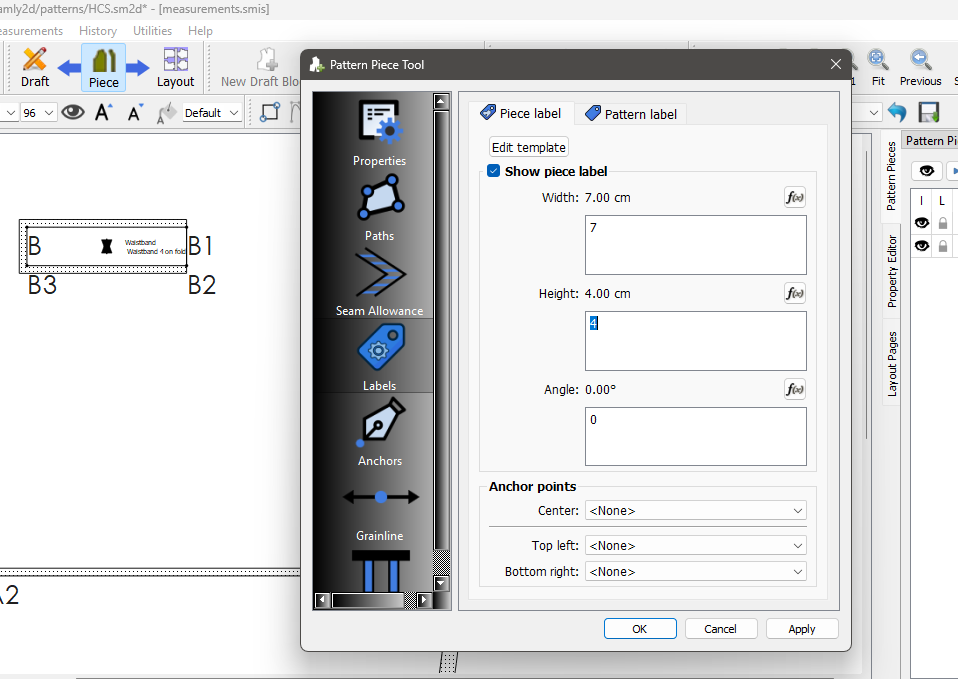
The preview should read something like “Waistband cut 4 on fold.” Click Ok. Play around with the width, height of the piece label to get something you like. Adjust the grainline length too.
Check out my 3/4 circle skirt drafting tutorial if you’d like to learn more about drafting waistbands.
Step 9: Add a scale test box
The purpose of this test box is to help you check that the pattern has printed at the correct scale. Go to back to Draft. Choose New Draft Block that will create point C.
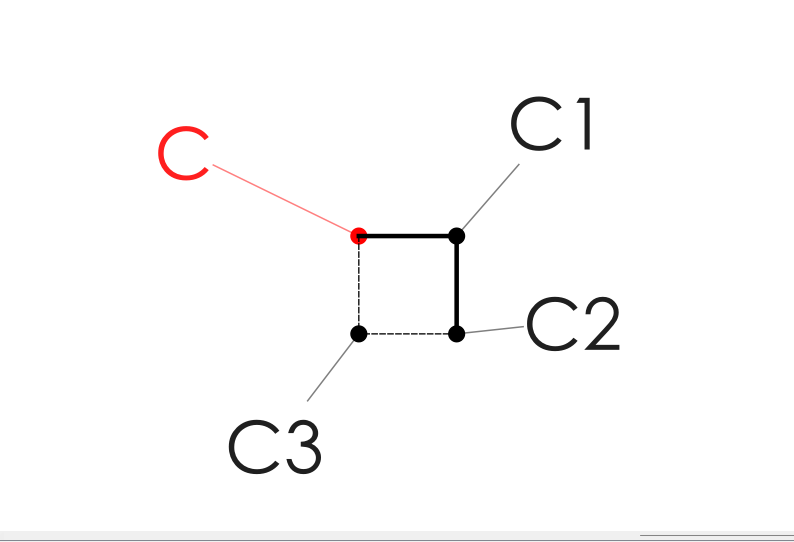
Draft a square that goes from C to C1 (angle: 0°, length: 2.5 cm (or whatever you prefer)). C1 to C2 (angle: 270°, length: 2.5 cm). Use the intersection tool to create point C3 from C and C2.
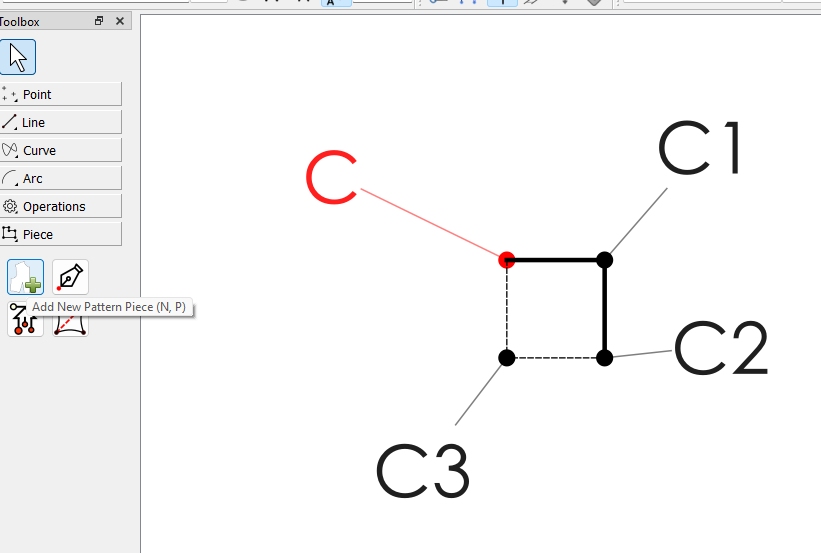
Create a pattern piece by tracing the four corners clockwise and clicking Enter. In Properties > Seam Allowance, set the default to 0 cm. This gives you a 2.5 cm square to measure when you print.
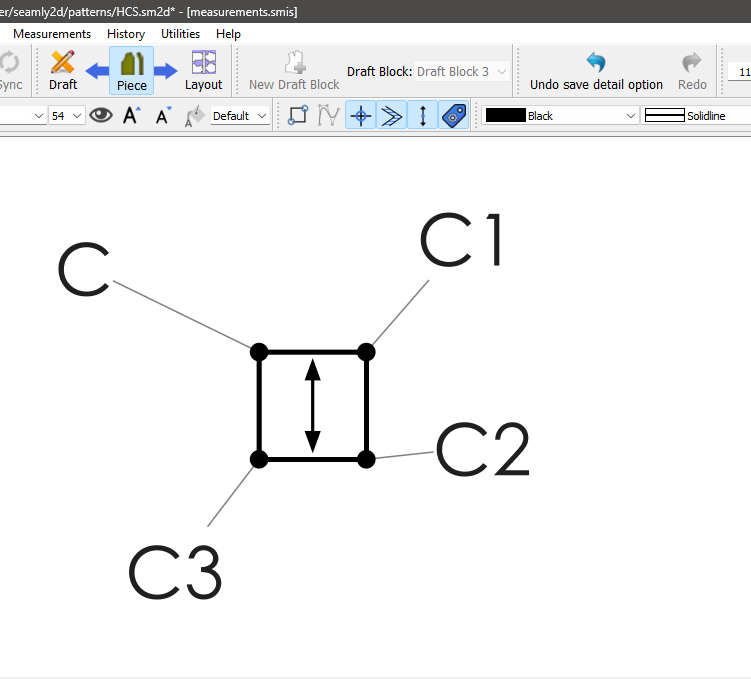
Step 10: Export your finished pattern
A0 format (copy shop printing)
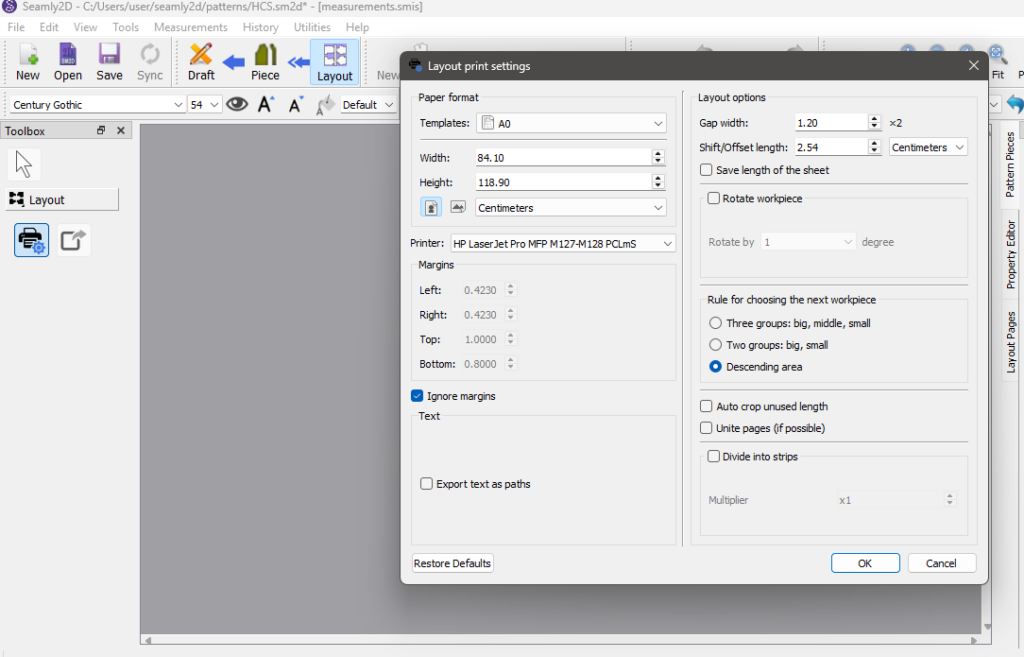
Go to the Layout panel. When prompted, choose A0 and click OK — leave “auto crop unused length” unchecked for a copy shop file. Go to File > Export As and save as a PDF.
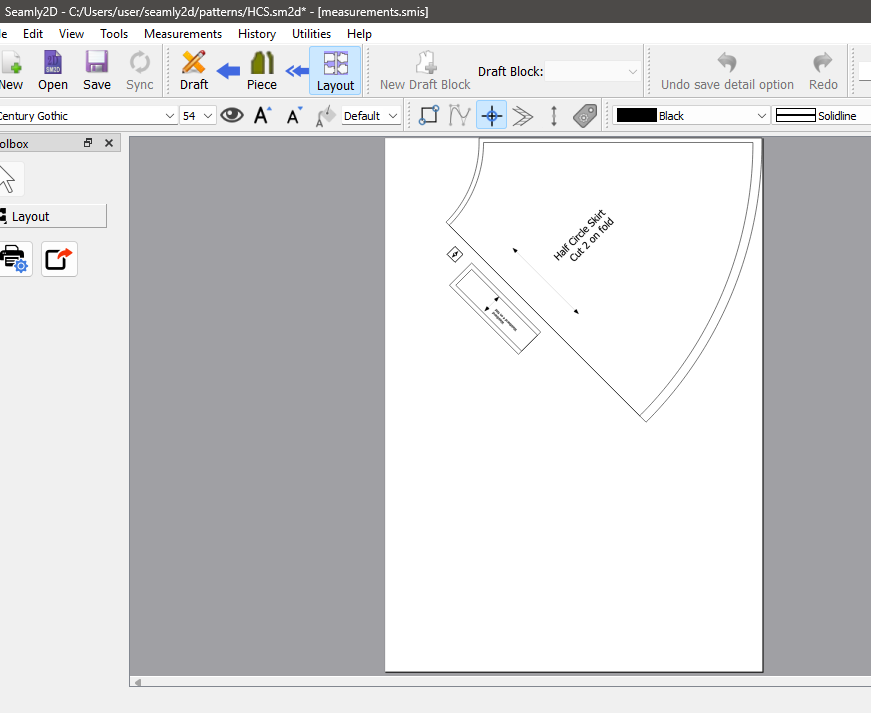
Tiled PDF (print at home)
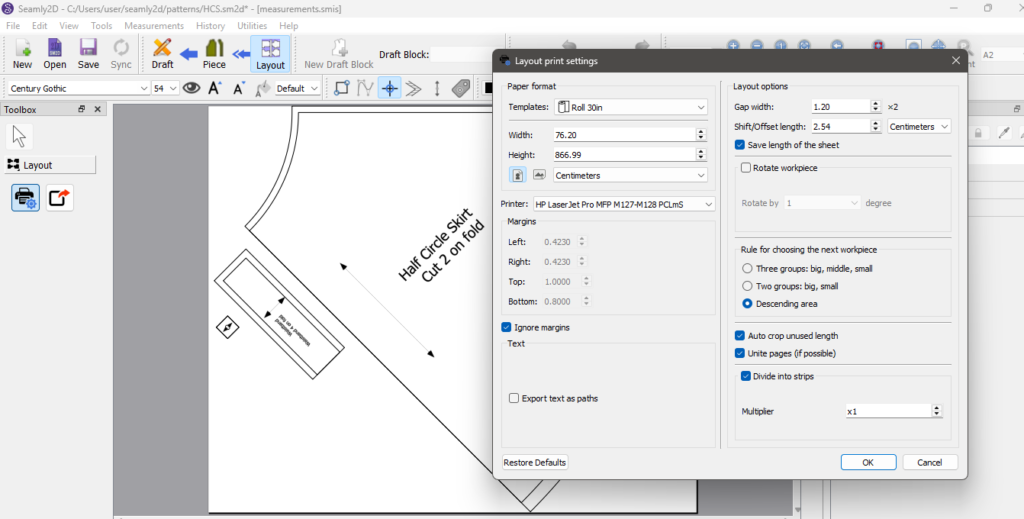
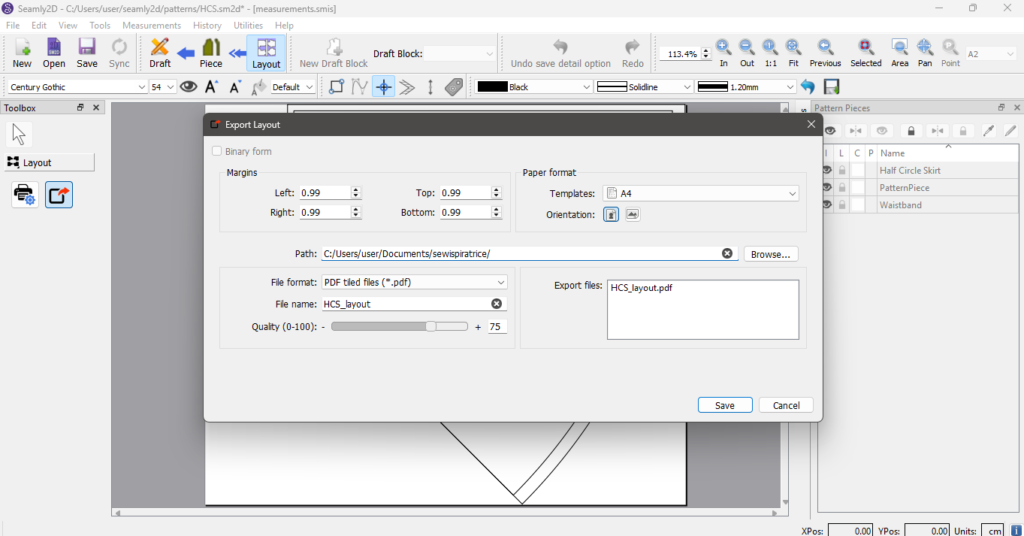
In the layout, choose a wide roll size (30 inches) and check Auto crop unused length. Go to Export and choose PDF tiled files in the File format, set the template paper format to A4 or letter and save your pattern.
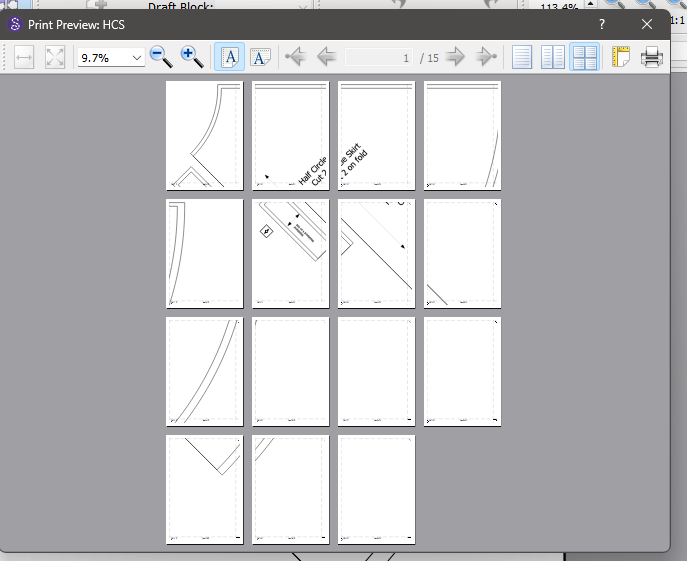
Once you open the tiled PDF, check each page and identify any blank pages before printing so you don’t waste paper. A good PDF viewer will let you see the page grid layout so you can work out which pages you actually need.
If you have any questions, drop them in the comments and I’ll do my best to help. You may read my blog post on how to sew a 3/4 circle skirt for sewing instructions.
Be sure to check my circle skirt resource page that has lots of tutorials and free patterns.
Happy Sewing!