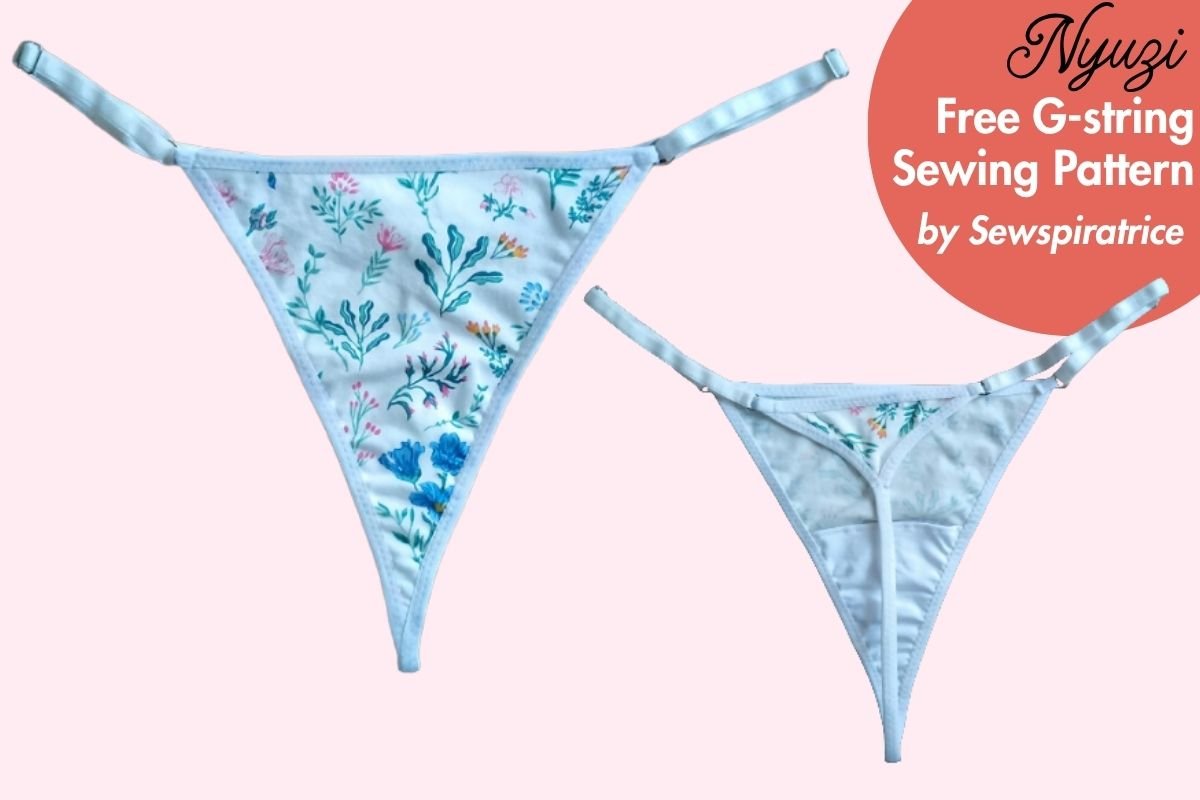
Free Nyuzi G-string Sewing Pattern and Step-by-Step Tutorial
I’m so excited to share with you my free g-string sewing pattern, the Nyuzi pattern. If you’ve been wanting to dip your toes into making your own lingerie, this is a good project to try. It uses very little fabric and comes together quickly.
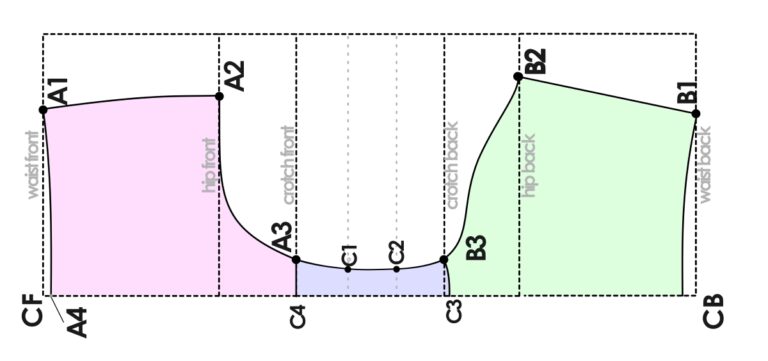
I drafted this g-string pattern from a basic panties block which I teach you how to draft here. It took me a couple of tries to get it right and now I’m finally ready to share it in different sizes so you can sew your very own.
So let’s get right to it. I will take you through the sizing first and then the step-by-step tutorial.
Table of Contents
Disclosure: This post contains affiliate links for a couple of tools I personally use and genuinely recommend. I may earn a commission if you purchase through these links at no extra cost to you.
Sizing
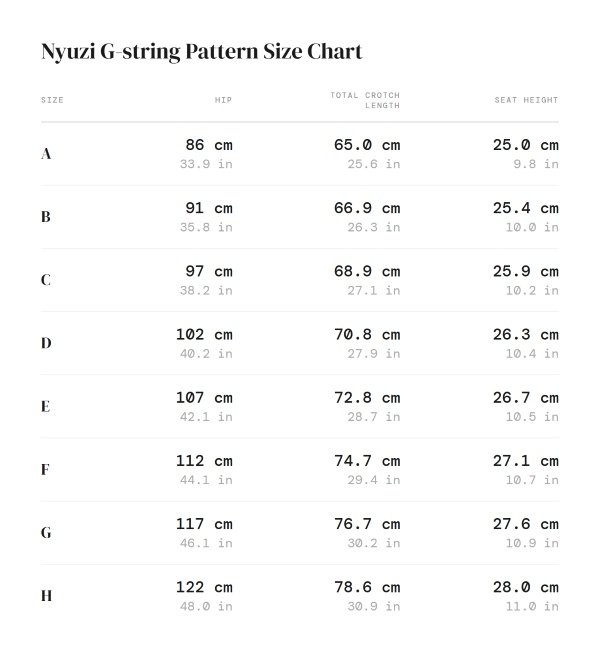
The Nyuzi G-string is drafted parametrically from three measurements: hip circumference, total crotch length, and seat height (as seen in the table above). The pattern covers hips from 86 cm (34 in) to 122 cm (48 in) across eight sizes, A through H. Because the straps are fully adjustable, it’s fairly forgiving pattern.
To find your size, measure around the fullest part of your hips and match it to the chart below.
If your hip measurement genuinely falls outside the 86–122 cm (34–48 in) range, send me an email and I’ll draft a version to your measurements. If you’re within that range, the existing sizes will serve you well.
Download & Print the Pattern
The Nyuzi G-String sewing pattern is available as a free download from my store.
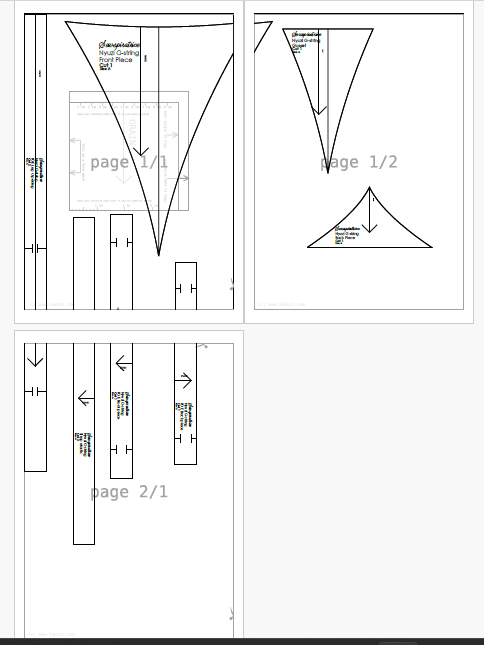
The download includes a separate tiled PDF for each size, so you only need to print the size you’re making.
Before printing the entire pattern:
- Select the correct paper size (A4 or US Letter) in your printer settings.
- Set the print scale to ‘Actual Size’ or 100%. Do not select ‘Fit to Page’ or ‘Scale to Fit’.
- Print the first page only and check that the test square measures correctly.
- Once you’ve confirmed the scale is accurate, print the remaining pages.
- Arrange the pages as shown below and tape them together before cutting out your pattern.
Materials & Supplies
You will need the following:
- Cotton knit fabric with a bit of elastane (or spandex)*️
- 2.1 m of fold-over elastic (FOE)
- 1 m of 10 mm (⅜ in) bra strap elastic
- Two 10 mm sliders and four 10 mm rings (or six 10 mm sliders if you don’t have rings)
- Matching polyester thread
- A sewing machine with a zigzag stitch
- Stretch, ballpoint or universal needle (70/10 or 80/12)
*️ For fabric, just look for stretch cotton that stretches a bit in both directions. A cotton knit without elastane might also work. Feel free to experiment with other fabrics but just don’t use super stretchy fabrics with low recovery.
How to sew the Nyuzi g-String pattern
Step 1: Cutting your fabric & preparing your pieces
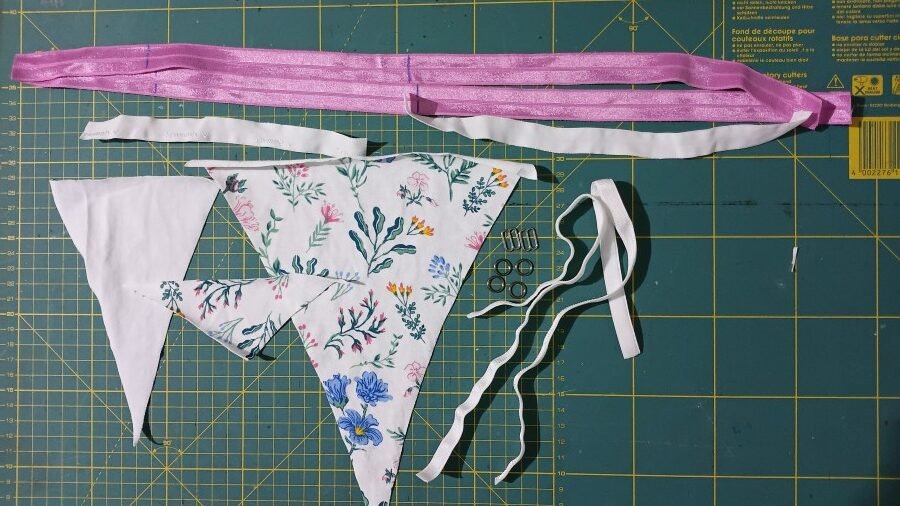
Cut each of the following pieces and mark the notches where given. You can mix and match the colours to make a more fun g-string.
- 1 x Front piece
- 1 x Gusset piece
- 1 x Back piece
- 2 x Strap elastic piece
- 1 x FOE front piece
- 1 x FOE back piece
- 2 x FOE leg opening piece
Take your gusset piece and fold its top edge onto the wrong side by 0.6 cm or 1/4 in and press using a press cloth. Topstitch the fold down about 0.3 cm or 1/8 in away from the folded edge.
If you are struggling with the fabric stretching out, try using a knit presser foot. It’s the foot I used for most of this tutorial and is an affordable substitute for a walking foot.
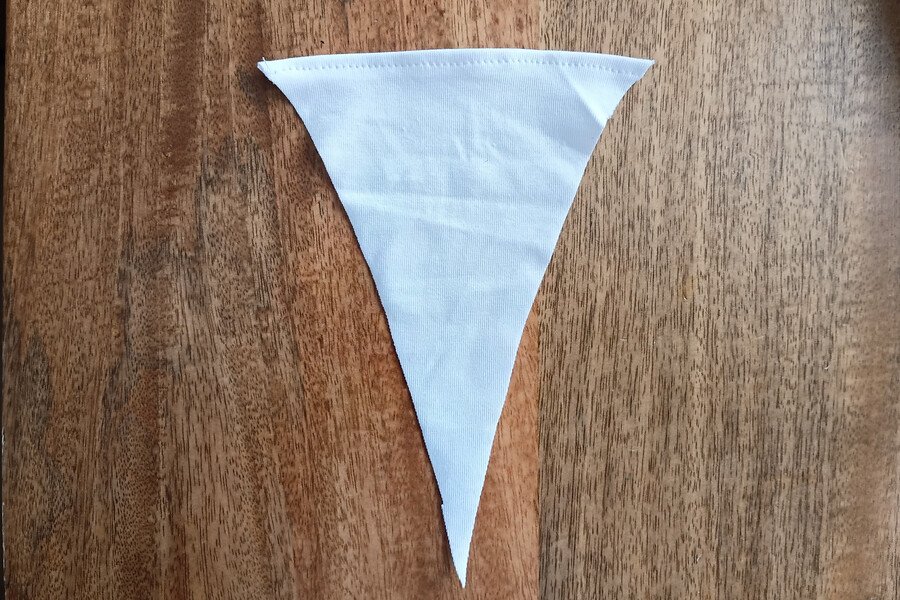
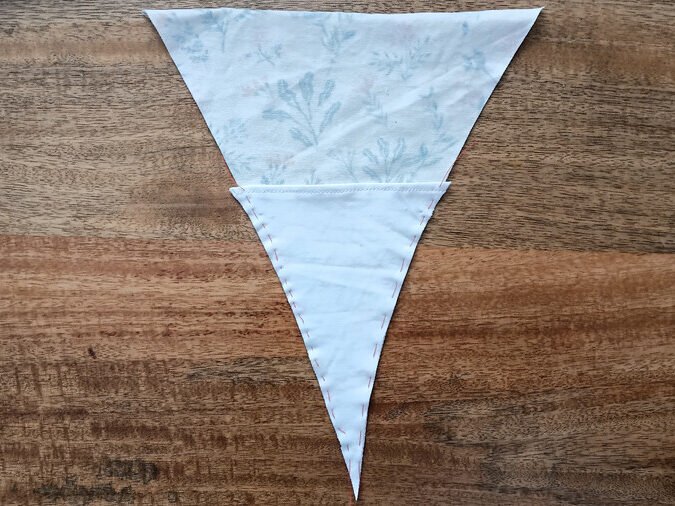
With wrong sides facing, place the gusset piece on the front piece. Line the gusset up with the front piece at the bottom point and match the side edges.
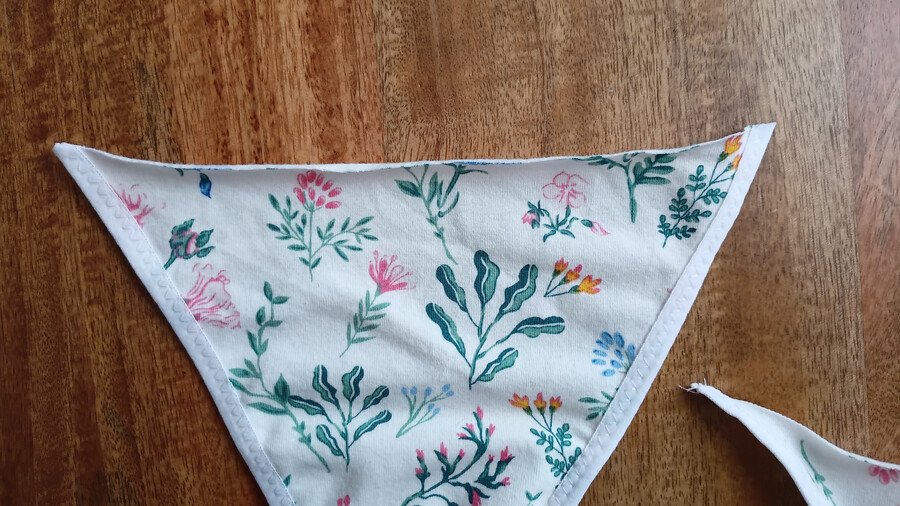
Hand baste the gusset to the front piece along the two curved side edges. Don’t skip this step as it ensures that the layers will stay in place when you apply the elastic. Trim any gusset overhang.
Step 2: Attaching fold over elastic to the leg openings
Take one of the fold-over elastic pieces for the leg opening and transfer the two notches from the pattern if you haven’t already.
The two notches divide the elastic into three sections. The longest section encloses the side edge of the front piece, the middle section remains unattached to form the ‘string’ of the g-string, and the shortest section encloses the side edge of the back piece.
Starting with the front piece, align one of the top corners with the free end of the longest section of elastic. The corner should sit flush with the raw end of the fold-over elastic (FOE), while the raw edge of the fabric should just meet the centre crease of the FOE without extending past it. Clip the FOE to the fabric at this point.
Now align the bottom point of the front piece with the first notch, again making sure the raw edge of the fabric just meets the centre crease before clipping. Leave the middle section of elastic unclipped.
Next, align the bottom point of the back piece with the second notch and clip it in place, with the raw edge meeting the centre crease. Finally, align the top corner of the back piece with the remaining free end of the elastic and clip.
Now that you have anchor points, gently stretch the fold-over elastic to fit each fabric edge, adding a few more clips as you go.
We’re now going to sew the FOE using a zigzag stitch. I used a 3.5 mm wide × 3.5 mm long zigzag, but feel free to adjust your stitch based on the width of your FOE.
If you’re getting skipped stitches, I highly recommend using high quality fine thread. To sew this sample, I used Superior Threads So Fine thread in Blizzard. It’s the best for sewing lingerie elastic and tricky fabrics like microduoplex when sewing bras. Make sure you’re also using the needles recommended in the supplies section.
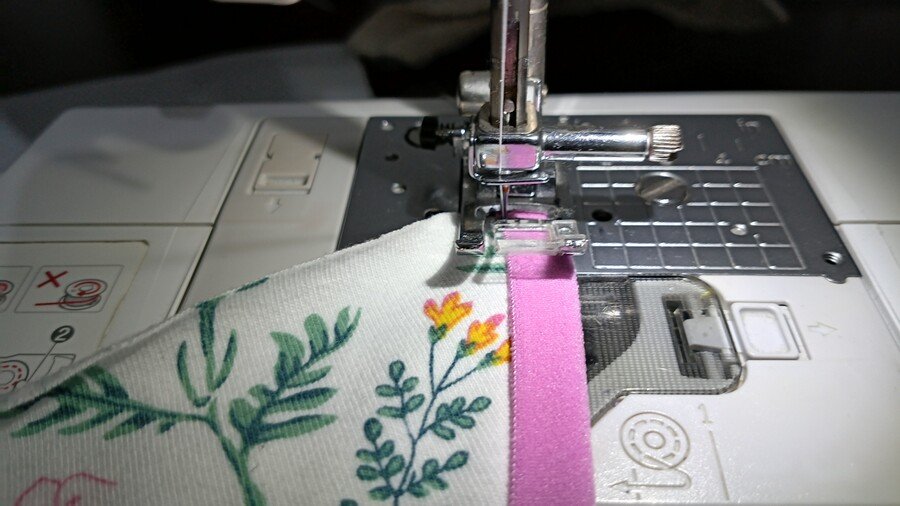
You may start on the front or back piece. Aim to position the stitch so that the valley of the zigzag lands is close to the inner edge of the FOE.
As you sew, remove the clips one at a time. Gently and evenly stretch the fold-over elastic to match the length of the fabric (don’t stretch the fabric, just the FOE). Continue sewing in one continuous pass from the front piece, across the bare section of elastic, and onto the back piece. Where there’s no fabric to enclose (length between the two notches), sew the FOE onto itself.
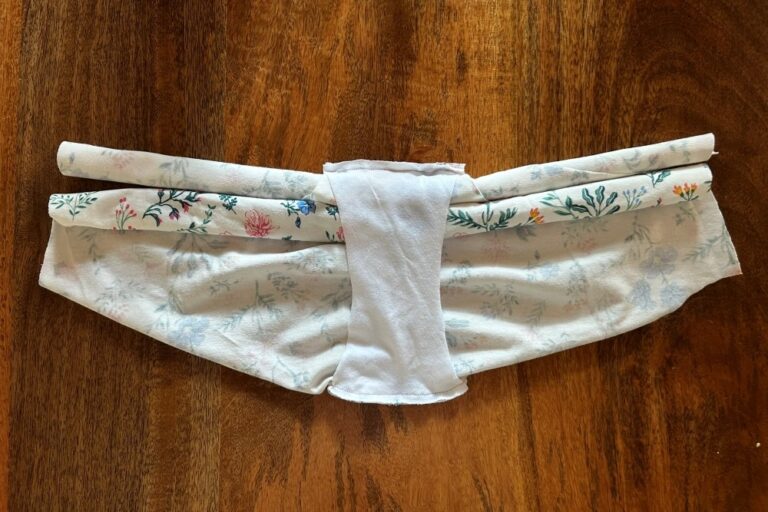
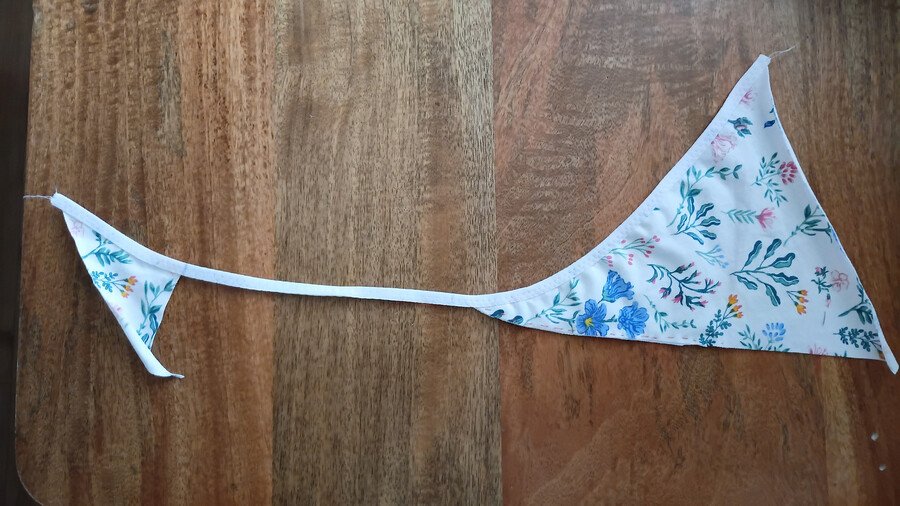
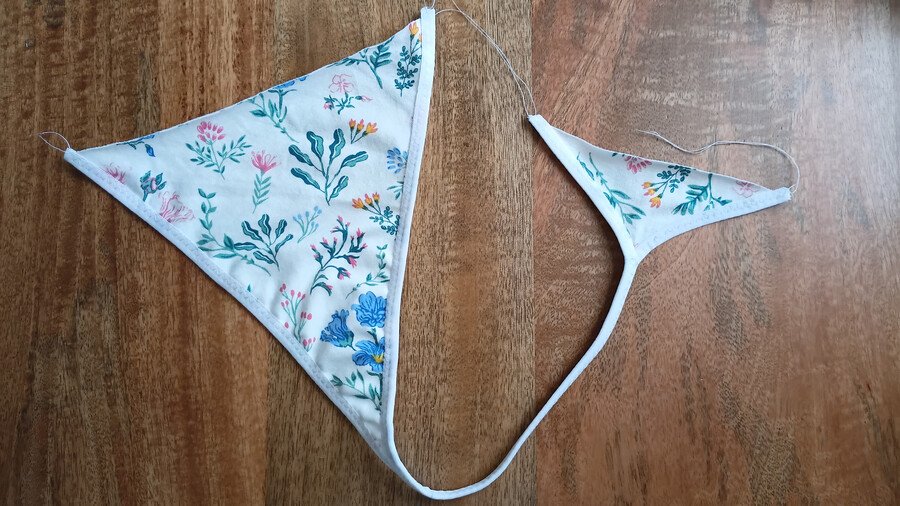
Remove the basting stitch on the side you’ve just attached the FOE to. You should have something similar to the photograph below.
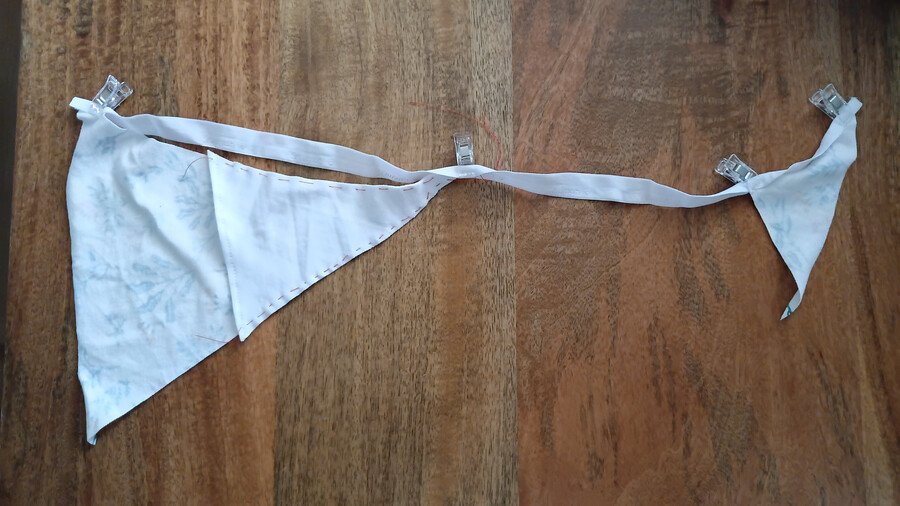
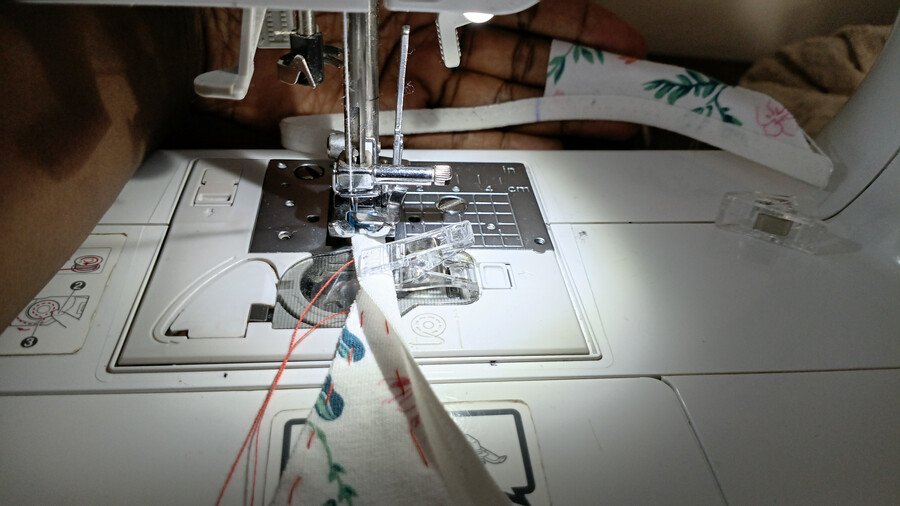
Repeat the previous steps on the opposite side. The only difference is that, as you sew across the bare section, you’ll enclose FOE that you previously zigzag-stitched inside the second strip of FOE. Remove the basting stitch.
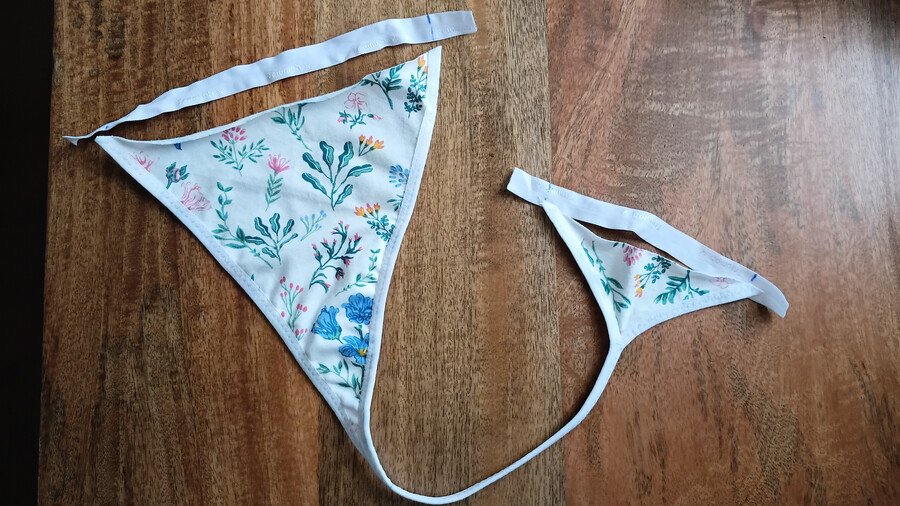
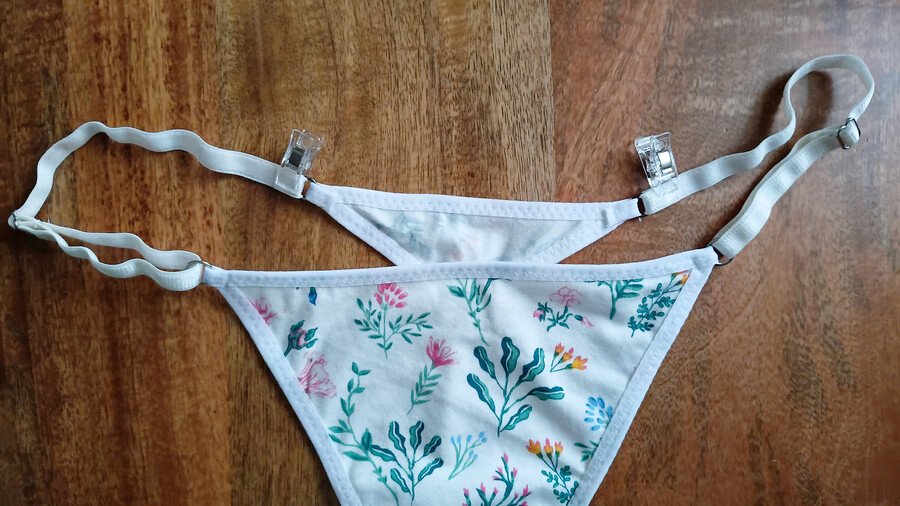
When done, your project should look like what’s in the photo below. Trim off the little tiny bit of elastic overhang and trim your threads.
Step 3: Attaching fold over elastic to the front and back of the g-string
Now we’ll work with the two remaining lengths of FOE to enclose the top edges of the front and back pieces. Mark the notches on these if you haven’t already.
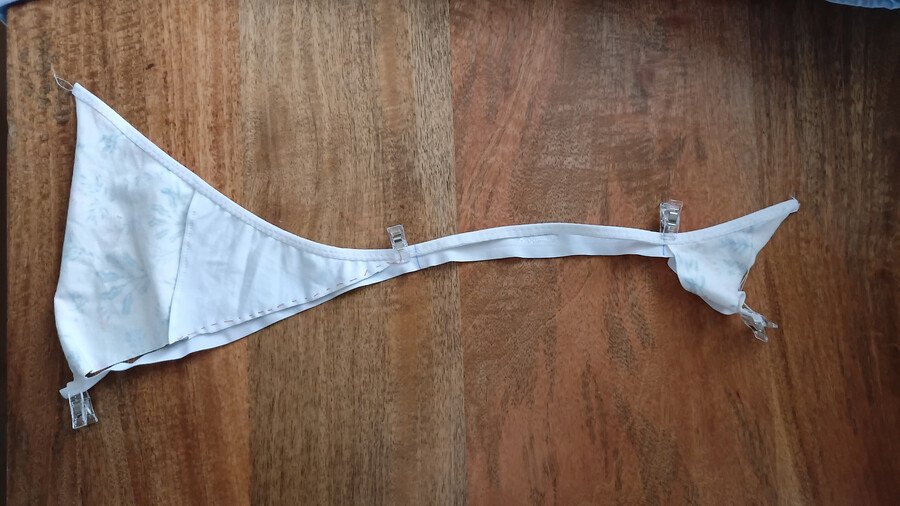
Take the FOE for the front piece and fit the top edge of the front piece between its two notches. Do this by aligning one corner with the first notch and the remaining corner with the second notch.
The raw edge of the fabric should just meet the centre crease of the fold-over elastic without extending past it. Clip these two points in place.

If you need more anchor points, stretch the FOE to match the length of the fabric edge and add one or two clips.
Repeat with the remaining length of fold-over elastic and the back piece.
Sew across the entire length of the fold-over elastic using a zigzag stitch. You’ll start at one end, removing the clips one at a time and stretching the elastic as you sew.
Repeat this step for the back piece.
Step 4: Sewing the straps
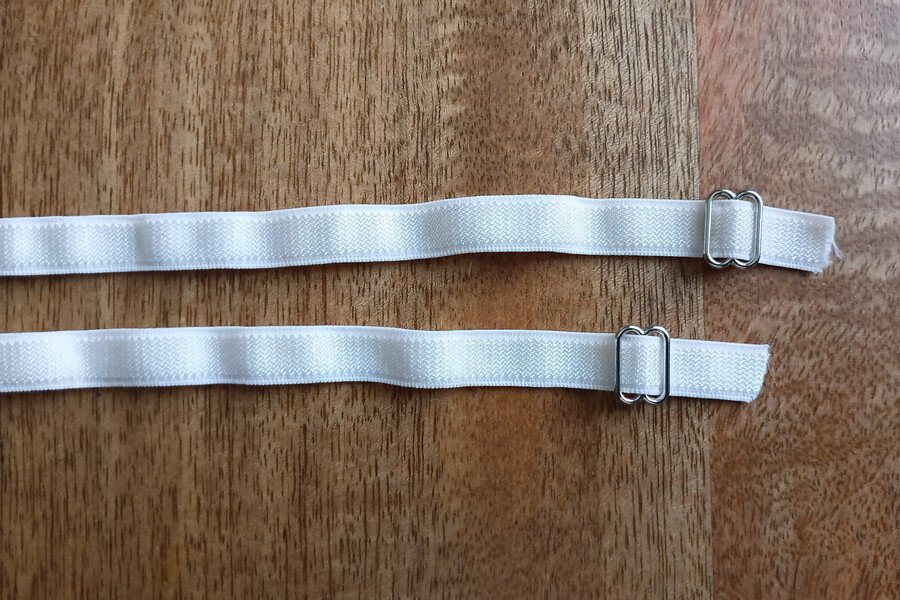
To make the adjustable straps, grab one strap and follow these next few steps. Hold the strap such that the plush side is facing down and bring it up through the slider from the bottom, over the middle bar of the slider and then back down through the slider. The plush side should be what is in contact with the middle bar on the slider.
Repeat for the second strap elastic.
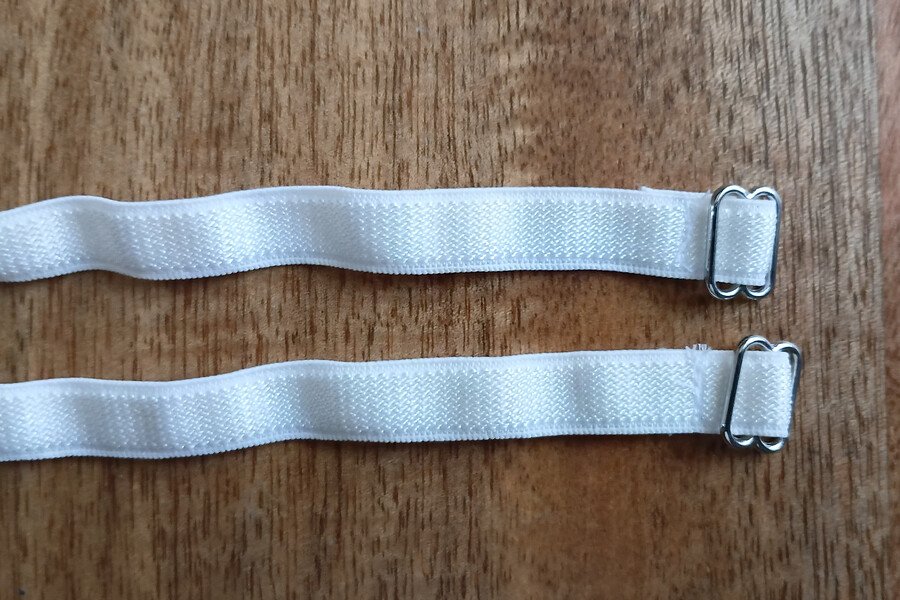
Fold the short raw edge of the elastic back onto the plush side about 1 cm past the slider, and sew across both layers three times. Repeat for the second strap elastic.
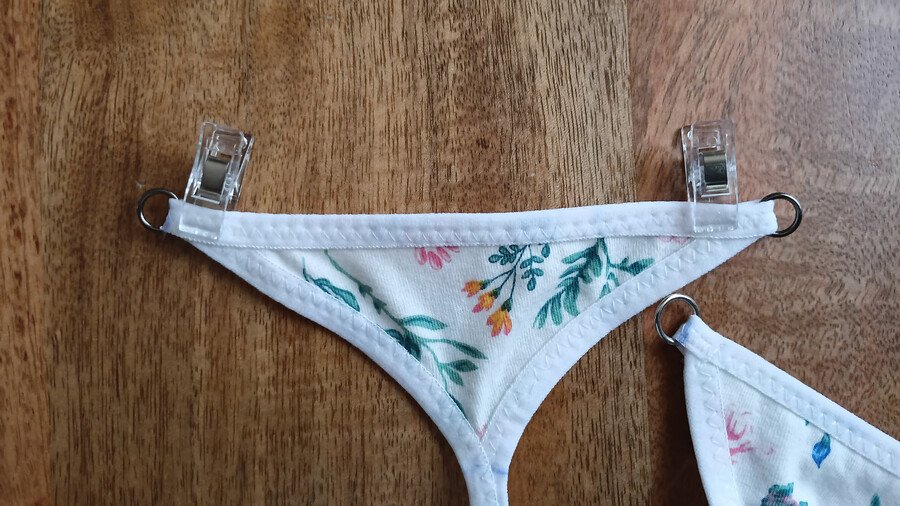
Step 5: Attaching the rings to the front and back of the g-string
We now need to attach the rings to the front and back of the g-string. Remember, if you don’t have rings you can use sliders. Just follow the same instructions but use one hole in the slider.
Take one of the leftover FOE tails of the front piece and pass it through a ring. Fold the tail back onto the wrong side of the front piece and clip it in place. Repeat for the other FOE tail.
Sew a diagonal straight stitch below the ring and go over it about three times so the ring is firmly secured. Repeat on the other side.
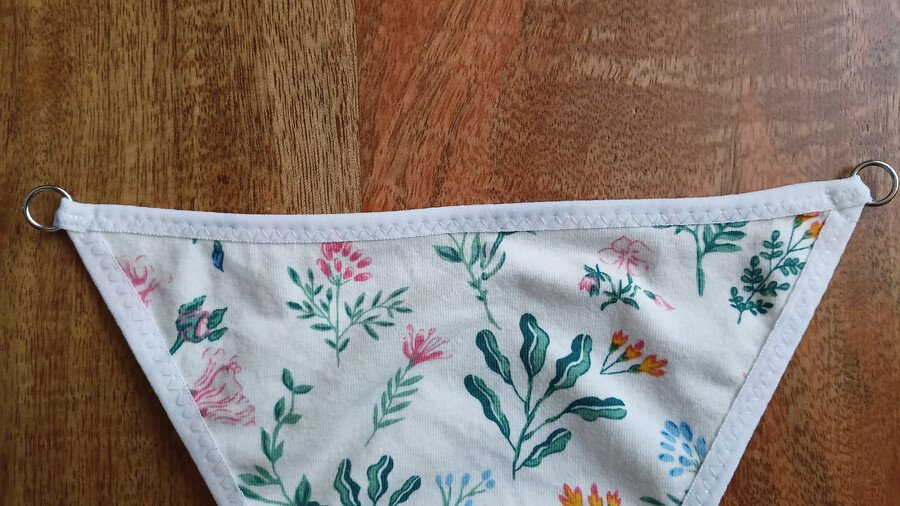
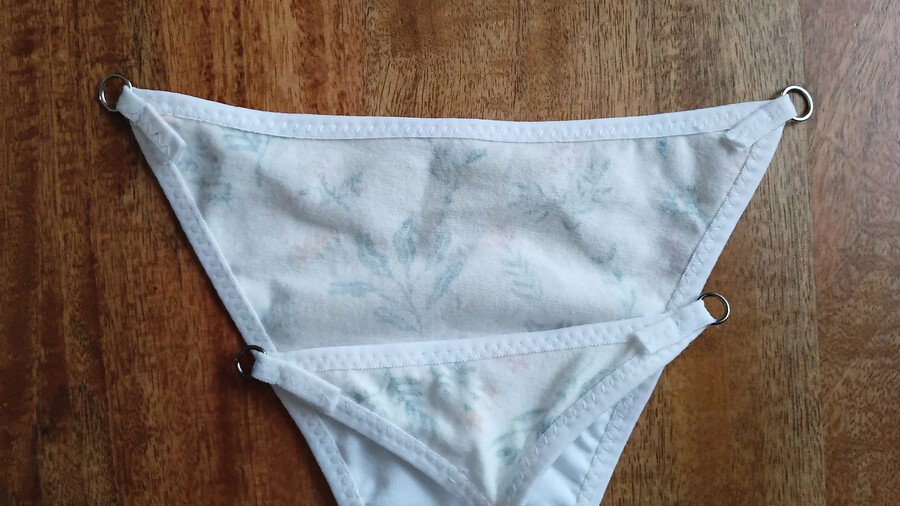
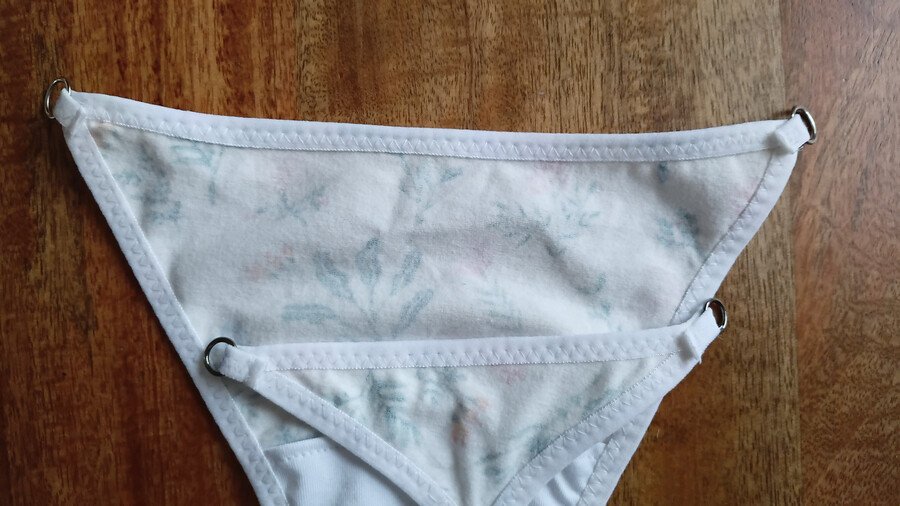
Repeat the steps above for the back piece. Clip the rings in place and secure them by sewing.
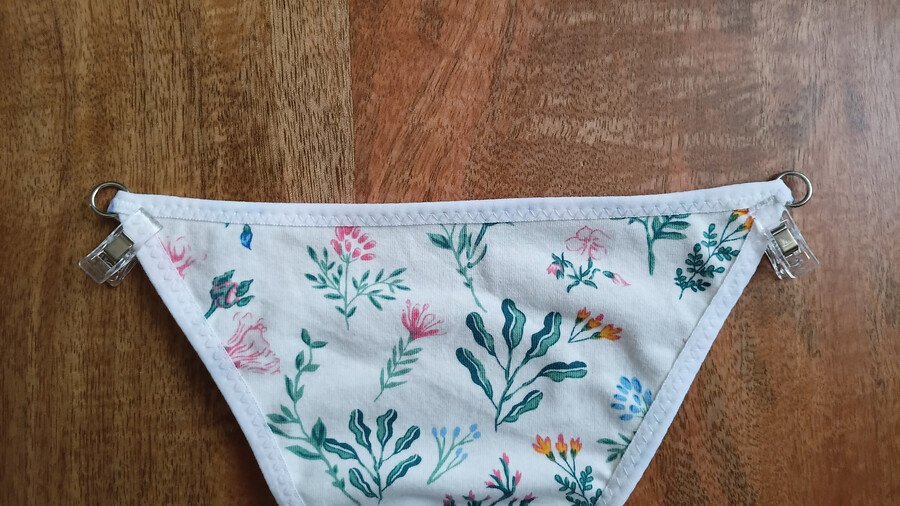
Once done, trim away the excess FOE on the wrong side of both the front and back pieces. This is what you should have.
Take one strap and turn it so the plush side is facing up. Thread the free end of the strap up through one of the front piece’s rings from underneath
Step 6: Assembling the adjustable straps
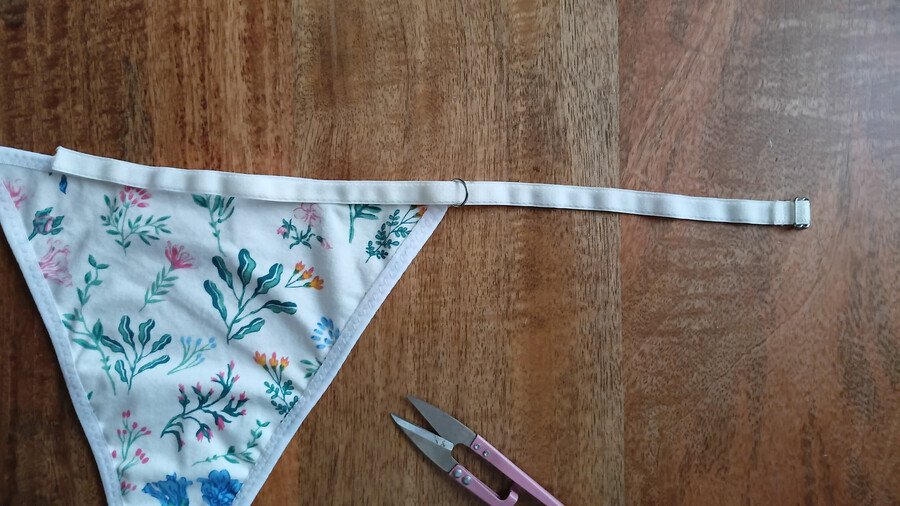
Fold the elastic back over on top of the rest of the strap and feed it through the gap in the slider, over the centre rod and through the other hole of the slider. You’ve now created an adjustable strap. Repeat the same for the remaining strap on the other ring on the front piece.
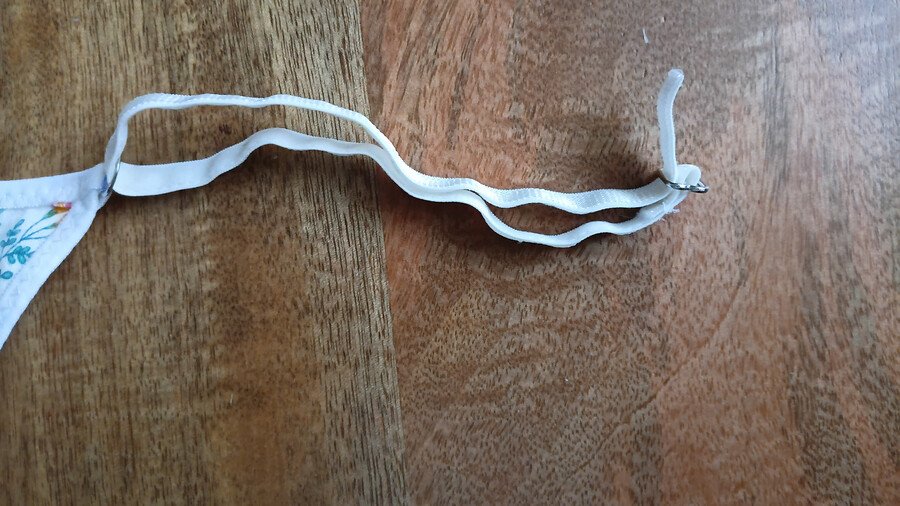
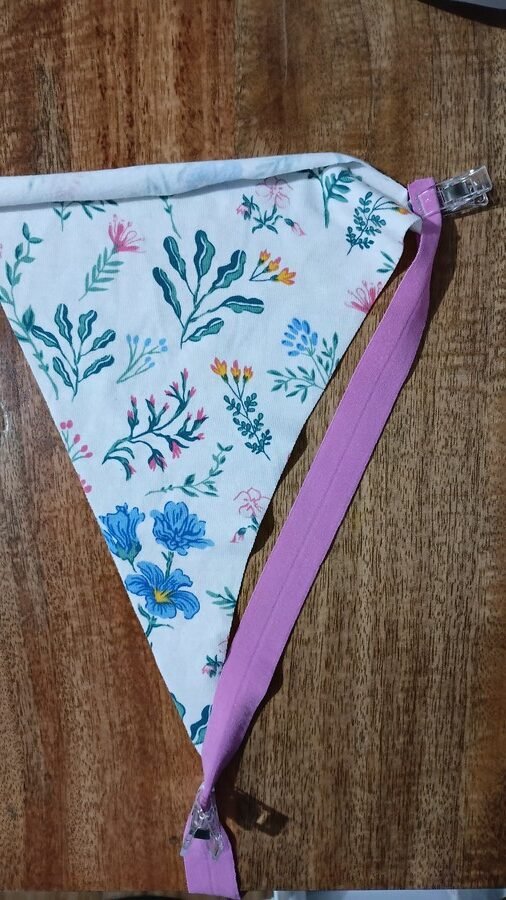
You still have a free end on each of your straps. We need to attach those to the rings on the back piece. Place the front of the g-string right side up and the back wrong side up as in the photograph below.
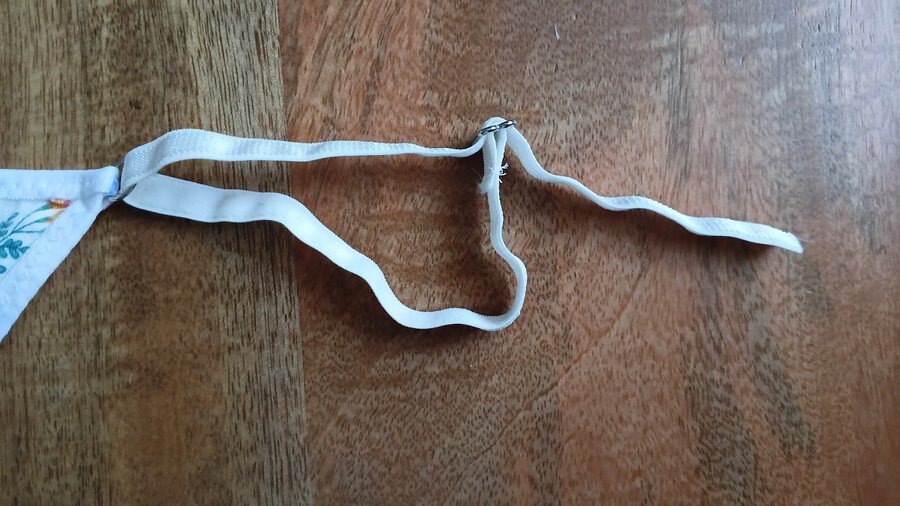
Take the free end of one strap and feed it through the ring on the back of the g-string, plush side up.

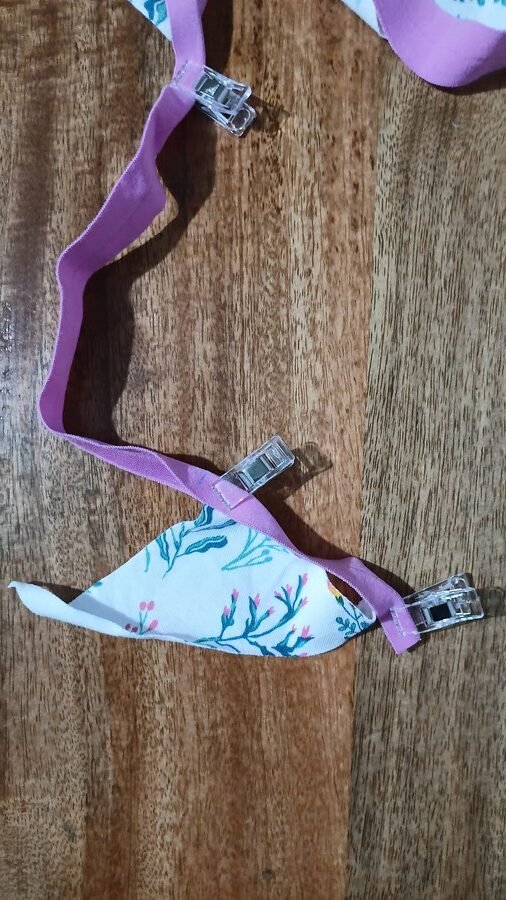
Fold the free edge back onto the strap (plush sides facing) and clip. Just to be clear, the clipped end should be inside the g-string/ same side as the wrong side of the g-string back. Repeat for the other strap.
Sew the strap next to the ring to secure the adjustable strap. Trim away any excess strap elastic sticking out past the line of stitching.
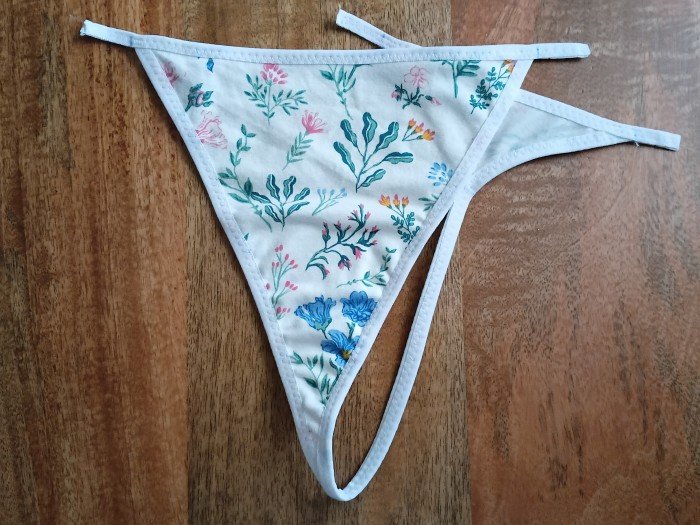
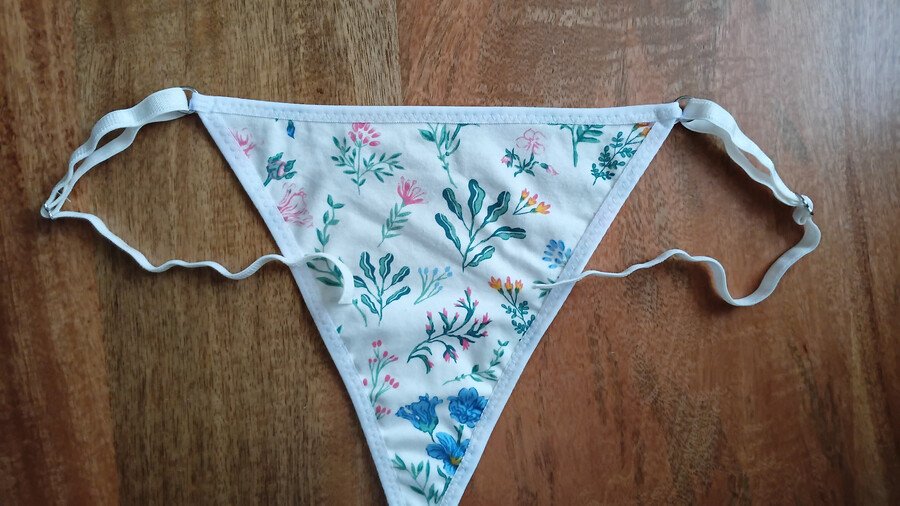
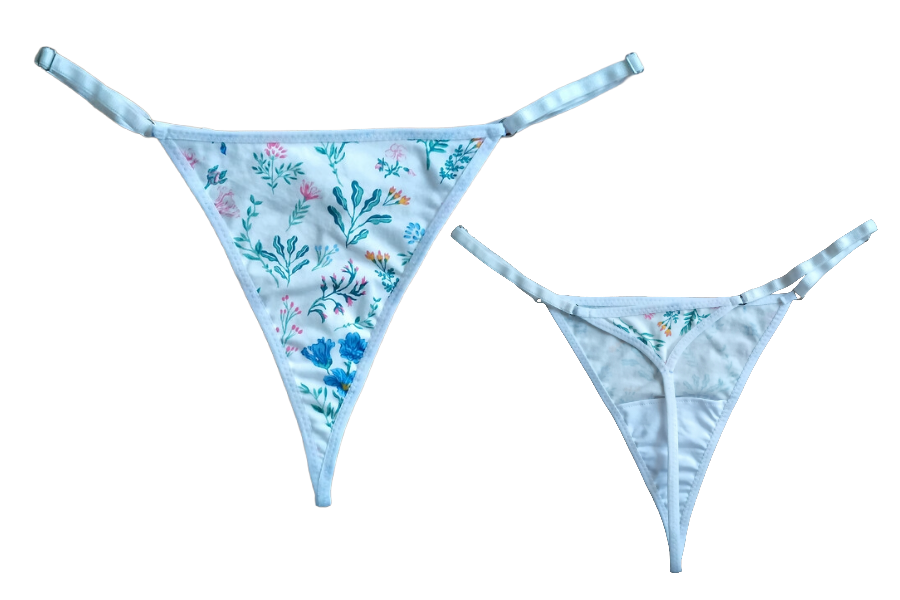
That’s it! You’ve finished your sewing your very own g-string.
Adjusting the pattern
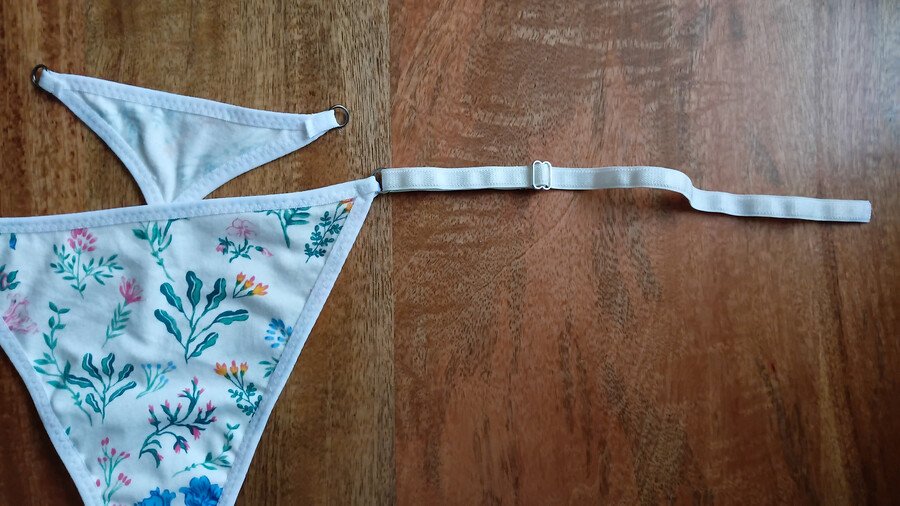
Because the side straps are adjustable, the Nyuzi G-string is quite forgiving around the hips.
If you want to make adjustments in the vertical direction, slash the FOE leg opening piece between the no notches and either overlap to reduce the length or slide a bit of paper underneath and spread to add length. In most cases you will be adjusting for a few millimeters and a couple of centimeters at most.
If your size isn’t on the chart
If your measurements fall outside the chart and you find nothing here fits, drop me an email. I’m happy to draft a version using your measurements and build out the pattern to include more sizes over time. Just a gentle ask: please only reach out if the chart truly doesn’t cover you.
Do leave a comment to let me know how your your g-string sewing pattern came out or if there are any issues with the pattern.
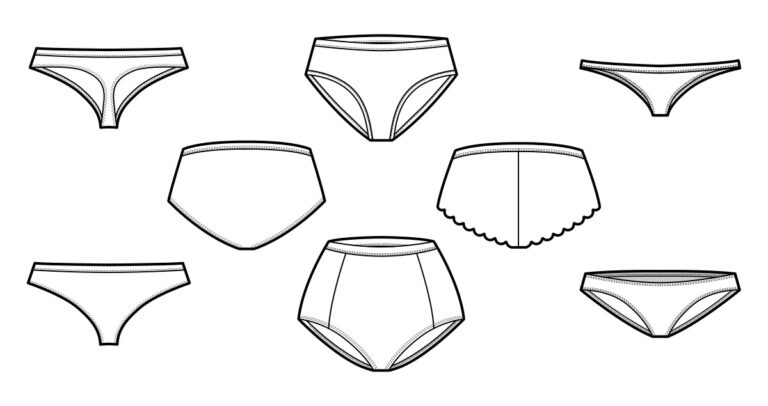
Ps: Check out my round up of 15 free panty sewing patterns if you want to sew underwear in a different style.
Until next time
Happy sewing!