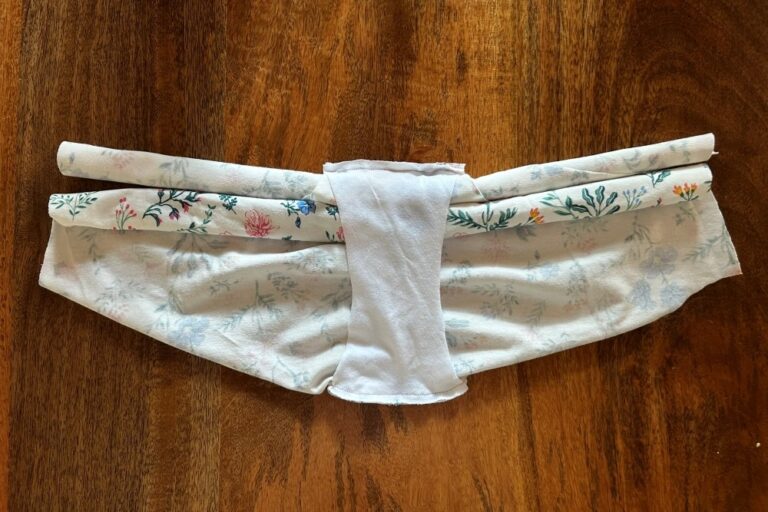
Sewing underwear: How to draft a basic panties sewing pattern
This is a tutorial on how to draft a panties sewing pattern, and before you begin, I would really like to emphasise that drafting your own underwear is a lot easier than you think. Once you get started, the process will make sense and feel intuitive because it pretty much just follows your body’s contours as they are.
I wrote up this drafting tutorial in the hopes that you, as a sewist, can draft your own panties regardless of your size. Many ready made sewing patterns are limited in their size range (ask me how I know) and that can be frustrating. So being able to draft your own panties is very empowering.
I’ve read a lot of lingerie sewing books over the past two years and have found that each one explains things differently. What I’m showing here is a mix of what I’ve learned from different sources, along with my own way of thinking through it. So that’s really the point of this tutorial. Remember, it’s super easy and you’ll have an panties pattern drafted in no time.
Ready for more coverage? Learn how to draft a custom boyshorts pattern from scratch using your own measurements.
Read the Drafting Tutorial →Measurements needed
To draft this panties sewing pattern, you’ll need to take five measurements.
The descriptions and diagrams referenced here are taken from SeamlyMe, a free and measurement tool that pairs with Seamly2d.
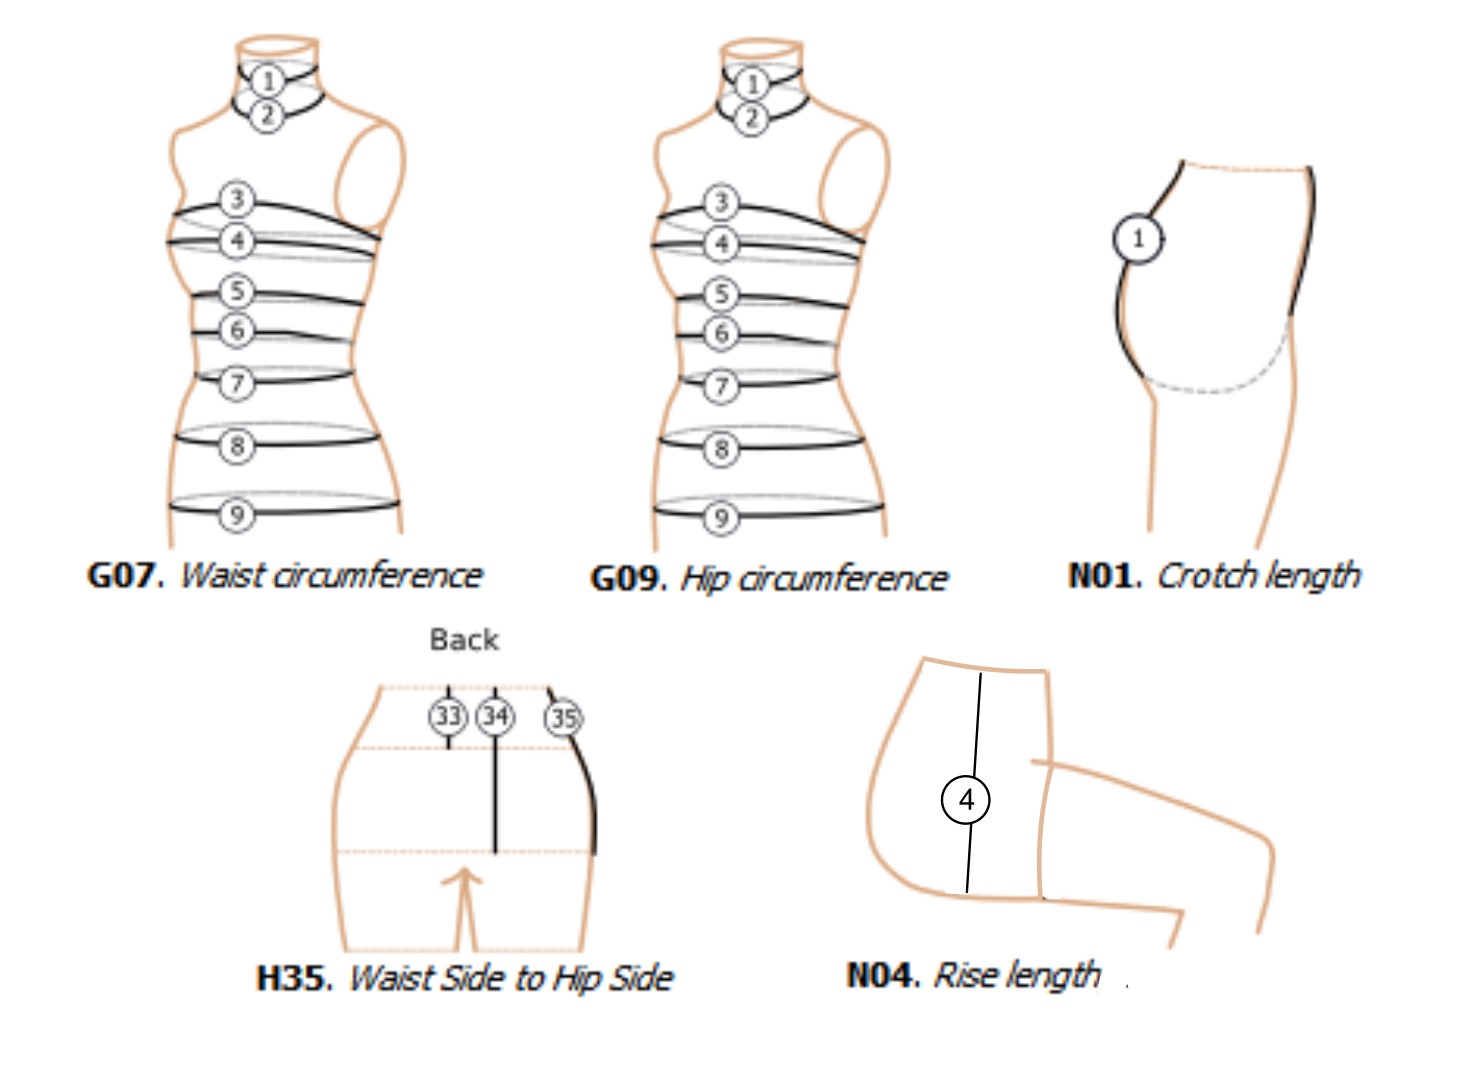
- Waist circumference: Circumference around Waist, following natural contours.
- Hip circumference: Circumference around Hip where Hip protrusion is greatest, parallel to floor.
- Crotch length: Put tape across gap between buttocks at Hip level. Measure from Waist Front down between legs and up to Waist Back.
- Waist to hip (side): From Waist Side to Hip Side.
- Crotch depth: From Waist Side around hip curve down to surface, while seated on hard surface.
Tools and materials
You’ll need simple tools that you likely have on hand: Paper, pencil/pen/sharpie, ruler and a pair of scissors.
A note on paper dimensions: For this pattern drafting method, you’ll need paper with the following minimum dimensions.
- Length: your crotch length, plus 2.5 cm (1 inch) of extra space
- Width: a quarter of your hip circumference, plus 2.5 cm (1 inch)
Just tape pieces of paper together if you don’t have a roll of paper and you’re good to go.
Drafting the pattern
Drawing the basic pattern frame
To begin with, we’ll draw a frame that represents a quarter of your body. This will serve as a guide for drafting the actual panties pattern.

- Start by drawing a rectangle with your total crotch length as the height and a quarter of your hip circumference as the width.
- From the top edge of the rectangle, measure down by your crotch depth and draw a horizontal line across the rectangle.
Then, from the bottom edge, measure upward by the same crotch depth and draw another horizontal line. - Next, from the top edge of the rectangle again, measure down using the waist to hip measurement – 1.5 cm and draw a horizontal line.
Repeat this from the bottom edge, measuring upward by the waist to hip measurement – 1.5 cm, and draw another horizontal line.
The extreme left of this frame is the center front (CF)/center back (CB)
We now have a basic frame to start drafting!
Marking points at waist level
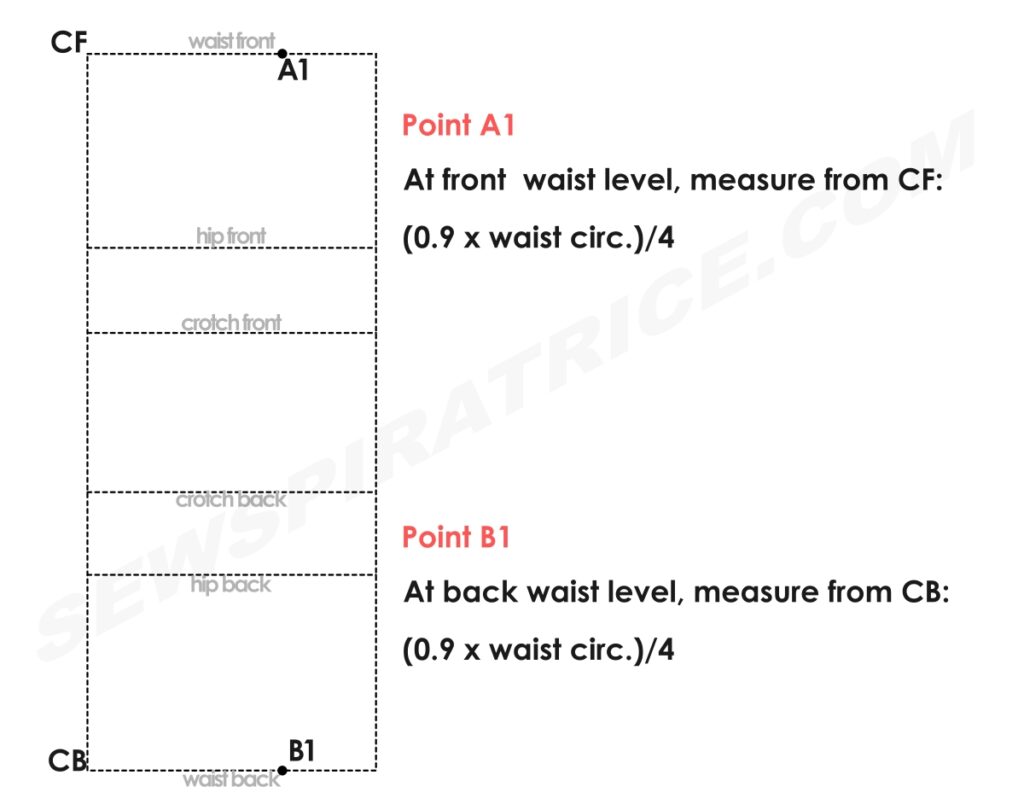
We’re going to reduce the waist measurement by 10% then divide that by 4.
For example, if your waist measurement is 82 cm, multiply it 0.9, then divide by four:
Using the adjusted quarter waist measurement now:
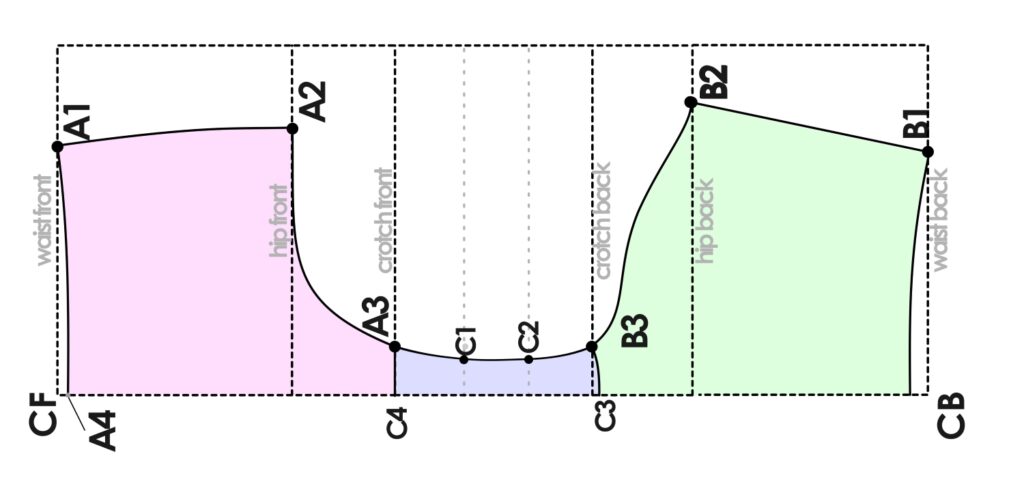
From the CF at waist level, measure out the adjusted quarter waist measurement and mark this point A1.
Likewise, from the CB at waist level, measure out the adjusted quarter waist measurement and mark this point B1.
Marking points at hip level

To mark the hip, we’ll reduce the hip circumference by 80% and then divide that by 4. In some underwear drafting resources, I’ve seen 1 cm removed from the front at the hip level and put in the back since butts need a bit more room.
Therefore, if your hip measurement is 106 cm, the adjusted quarter hip measurement needs to be multiplied by 0.8, then divided by four:
From the CF, at the hip level, measure out the adjusted quarter hip measurement – 1 cm or 3/8 ” and mark this point A2.
Now from the CB, hip level, measure out the adjusted quarter hip /measurement + 1 cm or 3/8 “ and mark this point B2.
Marking points at crotch depth level
Crotch width is typically measured across the full width at the base of the crotch. I’ve come across different standard crotch width measurements in various books but I’d say a good range is between 7 cm and 9 cm.
Since we are drafting the panties pattern on the fold, you will use half of the crotch width measurement.
You can use 3.5 cm for smaller sizes, 4 cm for medium sizes and 4.5 cm for larger sizes. If you are not sure use 4 cm.
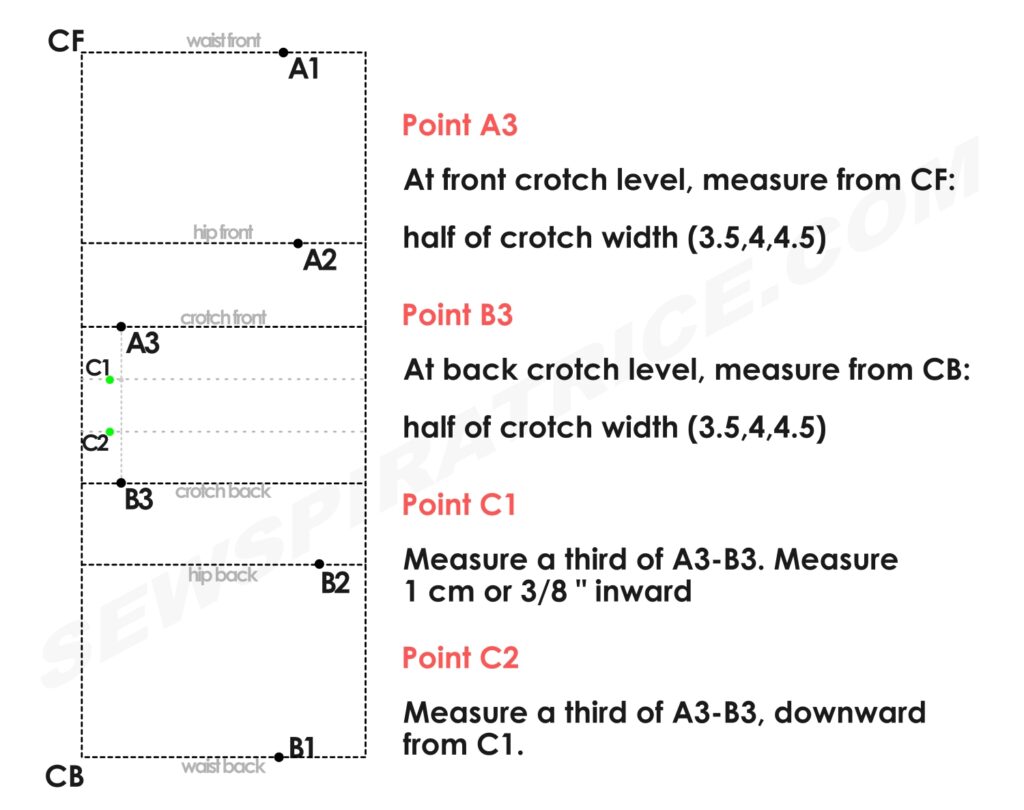
From the center, at the front crotch level, measure out half the crotch width and mark this point A3.
Do the same from the center at the back crotch level, measuring out half the crotch width and marking this point B3.
Next, measure the vertical distance between A3 and B3. Divide that distance into three equal parts. From A3, go down one third of that measurement (line A3-B3) and make a small mark. From that mark, square out 1 cm (or 3/8″) to the left and mark this new point as C1. Add a second point C2, a third of line A3–B3 below point C1.
Shaping your panties pattern
Shaping the front piece

Start by drawing a straight line connecting point A1 to A2 that will serve as just a guide. Use it as a reference to now draw a slightly curved line between A1 and A2.
Now, draw a curve from point A2 to A3 but as you start, make sure you are doing so at a 90° angle to curve A1-A2.

At the waistline level, at CF, measure 1 cm downward and mark this as A4.
Join A4 to A1 with a gentle curve making sure you start of at a 90° angle to the CF line. You also need to have a 90° angle between the A1-A4 and A1-A2 curves.
Shaping the crotch curve
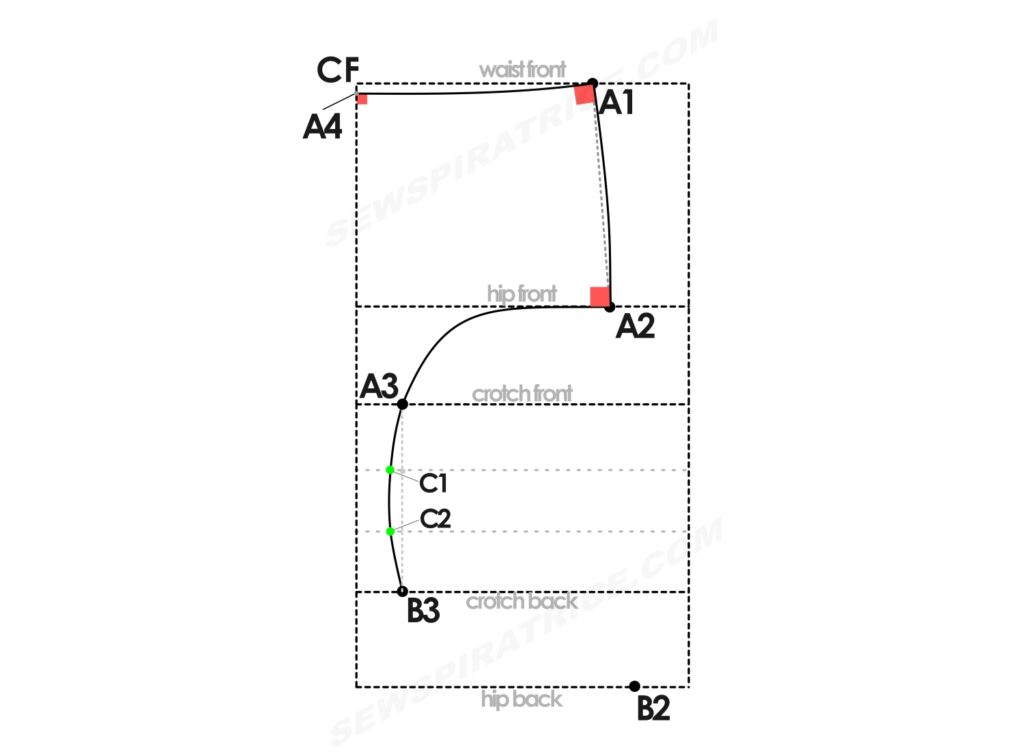
Join A3 to B3 via C1 and C2. Make sure this curve transitions smoothly from the front leg opening which is the A2-A3 curve.
Shaping the back piece
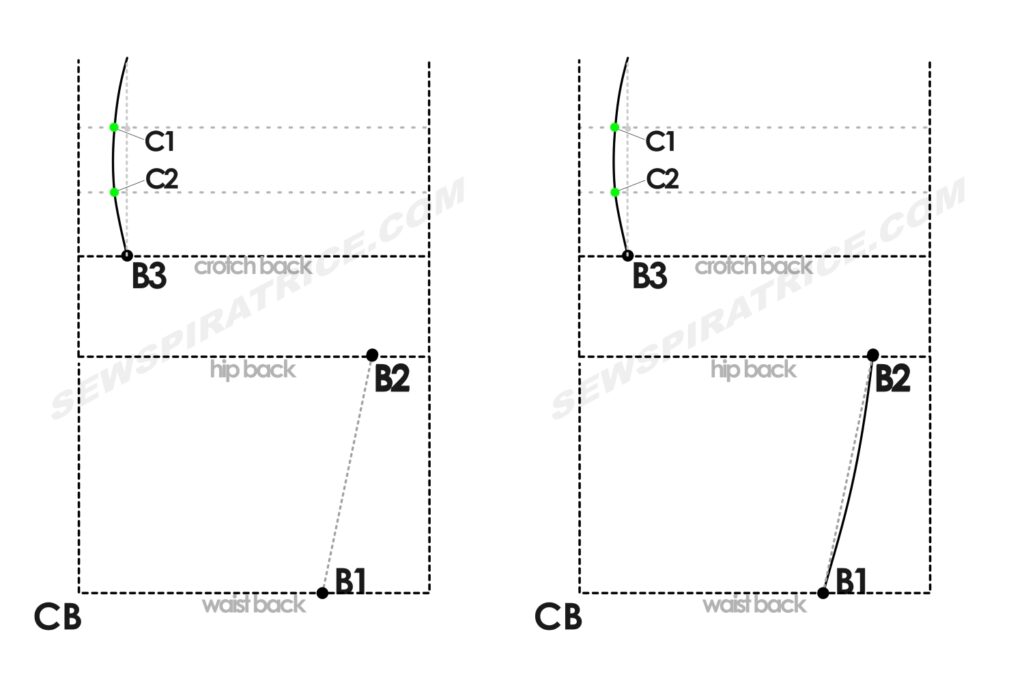
Draw a straight line connecting point B1 to B2 that will serve as a guide. Use it as a reference to now draw a slightly curved line between B1 and B2.
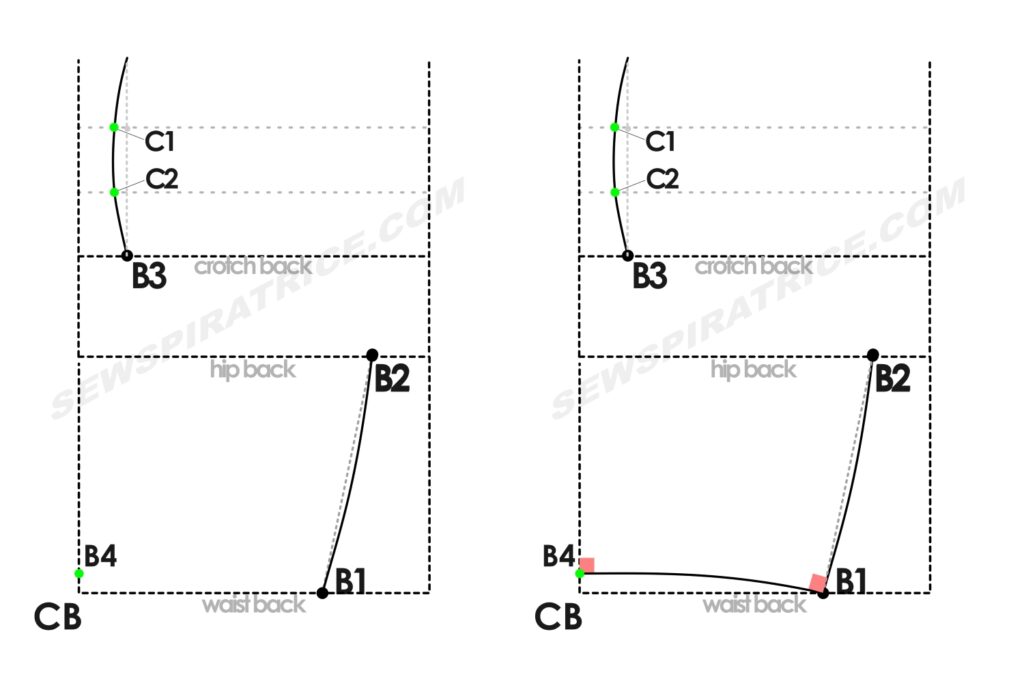
Draw point B4 about 1.5 cm upward from the CB at waist level. Draw a curve from B4 to B1 making sure you do so at a 90° angle to the CB line as demonstrated above. Meet the B1-B2 curve at a 90° angle.
Shaping the back leg opening
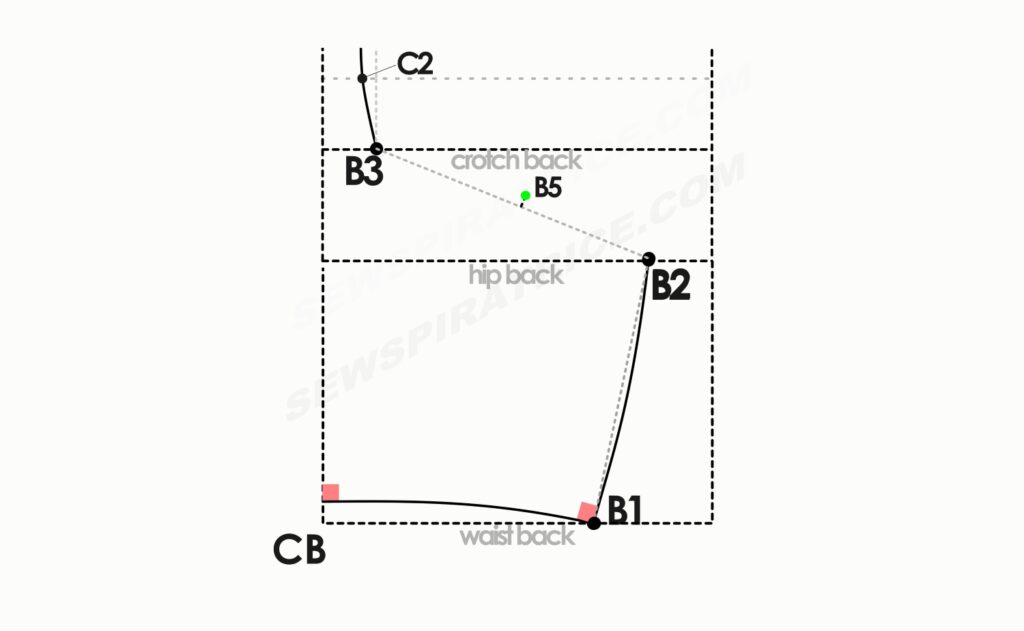
Draw a straight line connecting point B2 to B3. Find the midpoint of this line. Square a short line upward from the midpoint by 0.5 cm (or ¼ in) and mark this new point as B5.
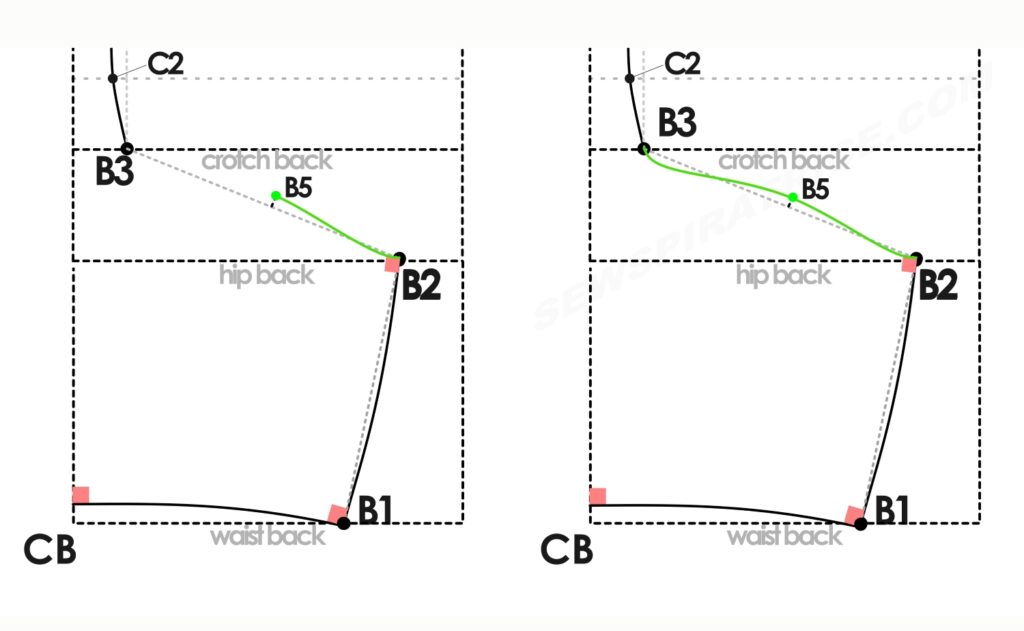
Starting at B2, draw a curve toward B5, as shown below. From B2, make sure the curve begins at a 90° right angle for about 1 cm (or ⅜ inch) before bending upwards toward B5.
From B5, continue the curve, dipping slightly below the B2-B3 line before turning upwards to join B3.
The idea is to create a smooth curve from the crotch to the back leg opening, without any sharp angles.

We are almost done! Add point C3 on the CB line just 0.5 cm (1/4 in) below the crotch back level. Add point C4 on the CF line at the crotch front level.
Join point B3 to C3 with a gentle curve. Join point A3 to C4 with a straight line.
Drawing your pattern pieces and adding seam allowance
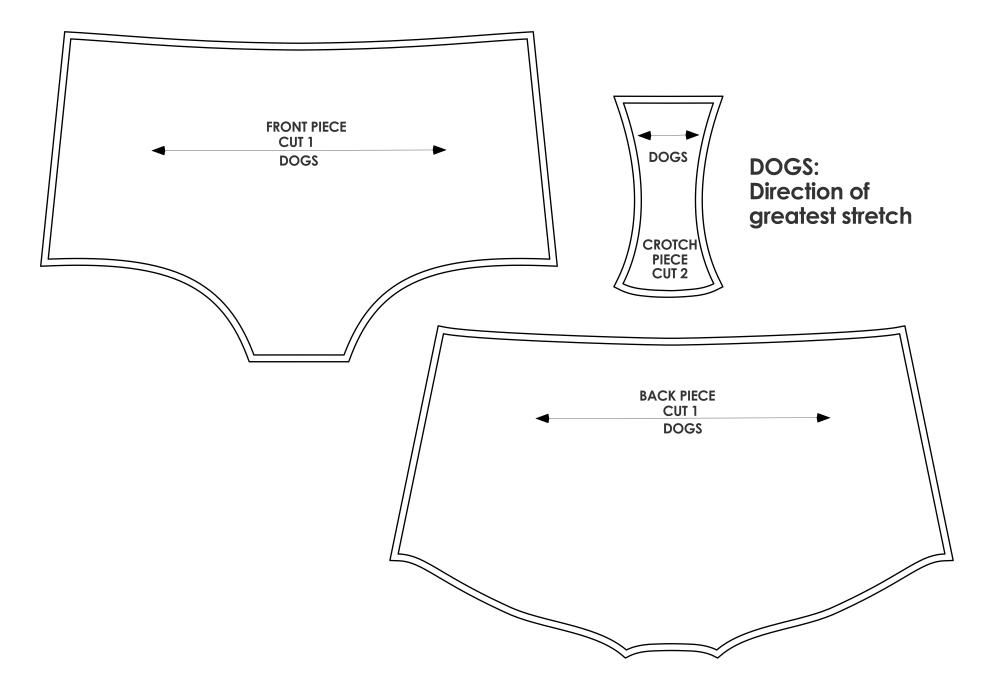
Trace the three pattern pieces onto pieces of paper. I suggest that you do this instead of cutting up your original draft. I’ve highlighted the pieces in the diagram below.
On the pieces you have just traced, add a seam allowance of 0.6 cm or 1/4 in around the pattern pieces except for the edges on the CB/CF as shown below. Feel free to use any seam allowance you are comfortable, my suggestion is just what is considered standard for sewing lingerie.
The seam allowance suggestion here works if you are using decorative elastic like picot elastic. If you are using fold over elastic, remove the seam allowance along the leg and waist openings such that you only have seam allowance where you’ll sew the side seams and the crotch to front and back piece
In the diagrams below, DOGS stands for direction of greatest stretch.

Since you’ll likely be working with stretchy and possibly slippery fabrics, I suggest using full pattern pieces instead of cutting on the fold. To do this, trace and mirror each pattern piece, to create the full front, back, and crotch piece. You can absolutely cut on the fold if you prefer but using full pieces makes it easier to cut your fabric accurately.
And we’re done! Congratulations if you made it to the end of this tutorial. I hope you have fun with your newly drafted panties sewing pattern.
The next step is how to assemble and sew the panties and you can find the tutorial on this blog post.
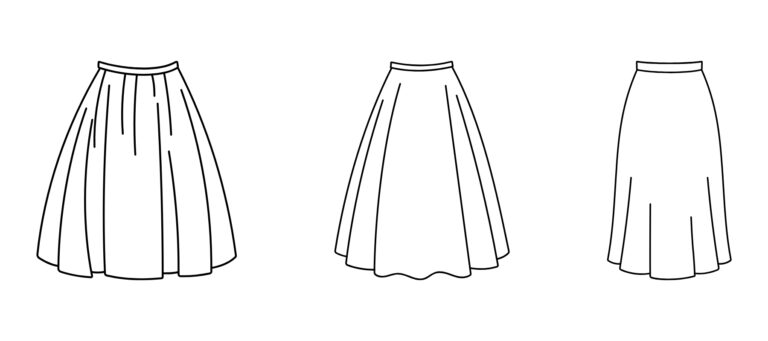
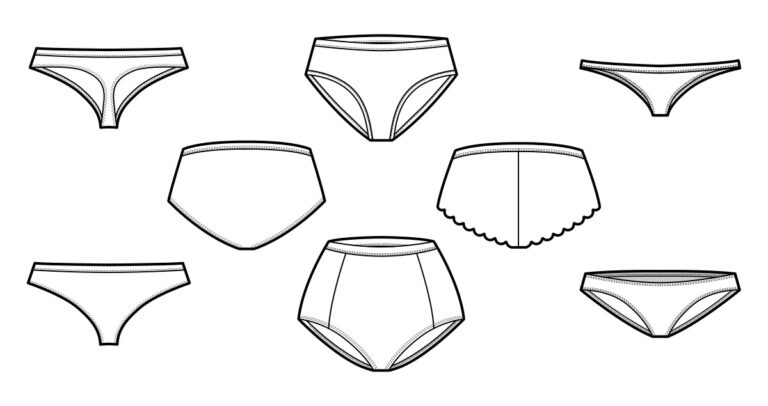
If you’d like more panties designs, grab a pattern from my 15 free panties patterns round up.
Browse Free Panties Patterns →Happy Sewing!