How to sew a 3/4 circle skirt pattern with a contoured waistband
I sewed my mum a 3/4 circle skirt from a thrifted cotton duvet cover from Ikea and thought I’d share the process with you. This sewing tutorial shows you how to sew a 3/4 circle skirt with a curved waistband. It’s the follow up blog post to the previous one I wrote on how to draft a 3/4 circle skirt with a contoured waistband. It also includes a fabric calculator to estimate how much fabric you’ll need.
Fabric calculator
The calculator assumes the foldline is on the grainline and you are cutting two pieces on the fold.
3/4 Circle Skirt Fabric Calculator
Enter your measurements to estimate fabric yardage.
Supplies
Here’s a general list of what you'll need to complete this project:
- Fabric
- Matching thread
- Invisible zipper (5.9 in/15 cm or any longer)
- Lightweight fusible interfacing (you could also opt for a lightweight cotton as your interfacing if you don't want fusible interfacing)
Cutting Your Fabric
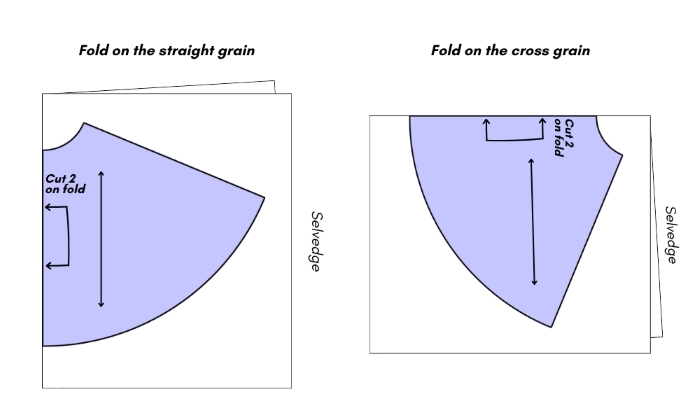
Earlier, when we drafted the pattern, we drew the foldline parallel to the grainline. Ideally, the fold should be placed on the straight grain, parallel to the selvedge of your fabric (as shown on the left).
However, if you are short on fabric, as I was for the skirt in this tutorial, you can place the fold on the cross grain (shown on the right). This means rotating the grainline by 90° so that it's perpendicular to the foldline.
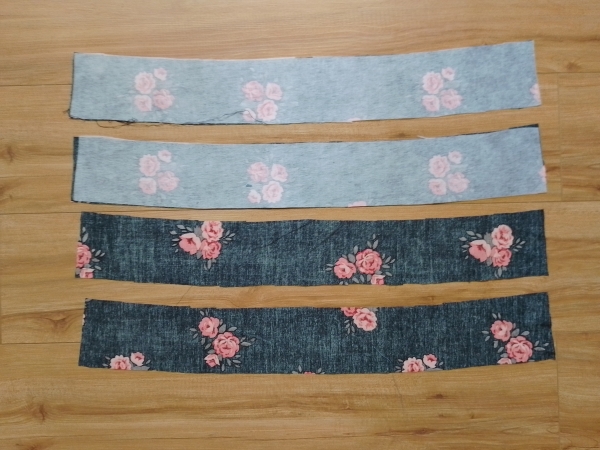
Here is what you need to cut.
- Main Skirt: Cut 2 on the fold.
- Waistband: Cut 4 on the fold.
- Interfacing: Cut 2 on the fold (from your waistband pattern).
Step 1: sewing the skirt piece
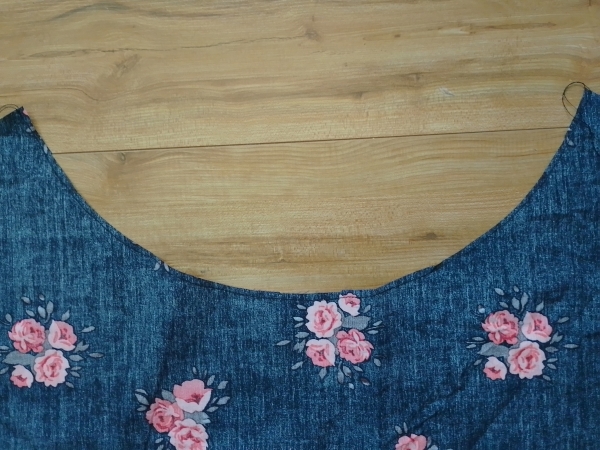
Staystitch the waist opening of both skirt pieces. This is just a line of stitching just inside the seam allowance to prevent the waistline from stretching out as you handle the fabric.
In the previous blog post, I drafted a skirt using a 1 cm (3/8 ") seam allowance, so that's what I'll be using here. Use whatever seam allowance you chose for your pattern.
With right sides together, pin and sew only one edge of the skirt pieces. Finish the seam with a serger, overlocking or zigzag stitch and press the seam open.
Place the skirt pieces aside for now. Let's move to the waistband pieces.
Step 2: preparing the waistband
You should have four identical curved waistband pieces.
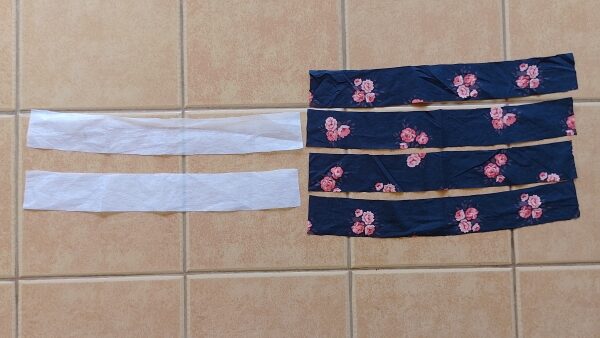
Take any two of these pieces and apply lightweight fusible interfacing to their wrong sides according to the manufacturer's instructions. If your interfacing is of a heavier weight, you may find it better to cut off the seam allowance before applying it to the waistband pieces.
From here on, the waistband pieces with interfacing will be our outer waistband and those without, our inner waistband.
Take the outer waistband pieces and join their short edges together on one side only. Sew these together, Finish the seam with a serger, overlocking or zigzag stitch and press it open.
Do the same for the inner waistband pieces.
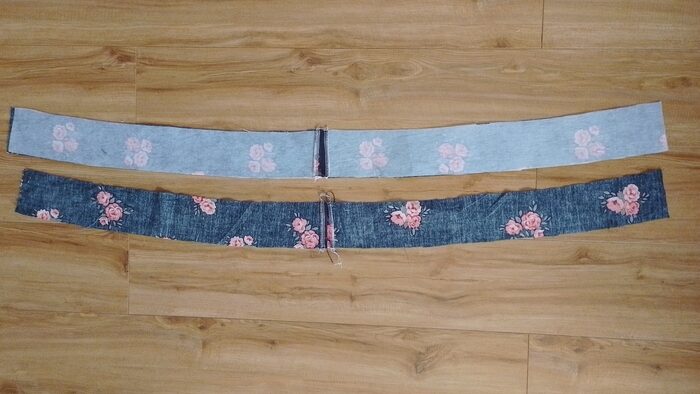
You now have two waistband pieces in total, the inner and outer.
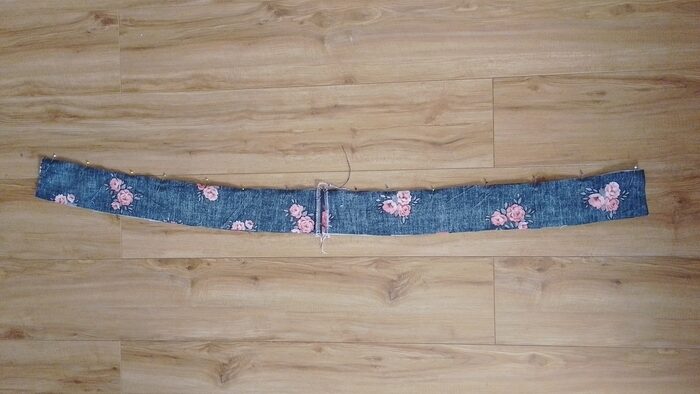
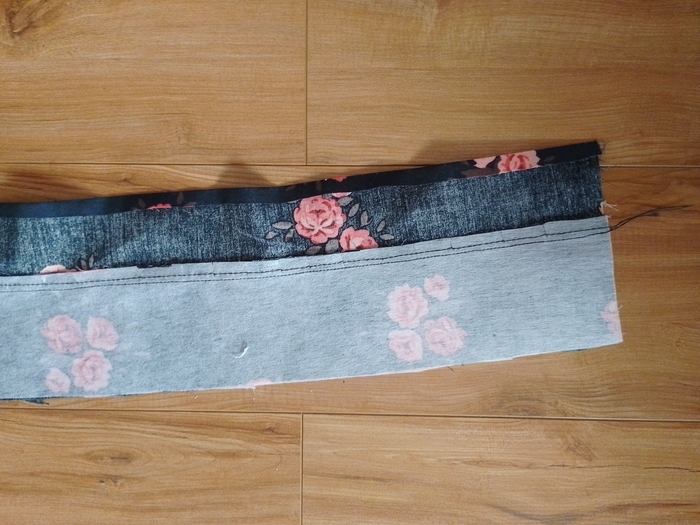
Take these two waistband pieces and line up their top edges, right sides together, starting from their center seams. Sew these together (preferably from their center seams out to each edge) and leave the seam unfinished.
Cut little snips into the seam allowance then understitch it onto inner waistband (non-interfaced waistband).
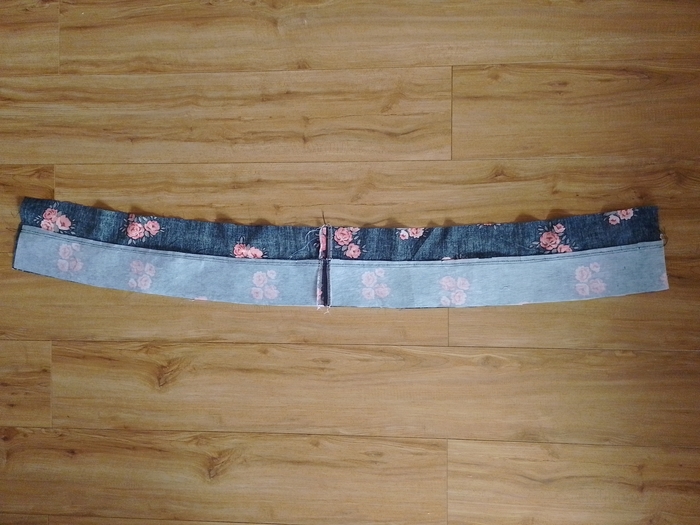
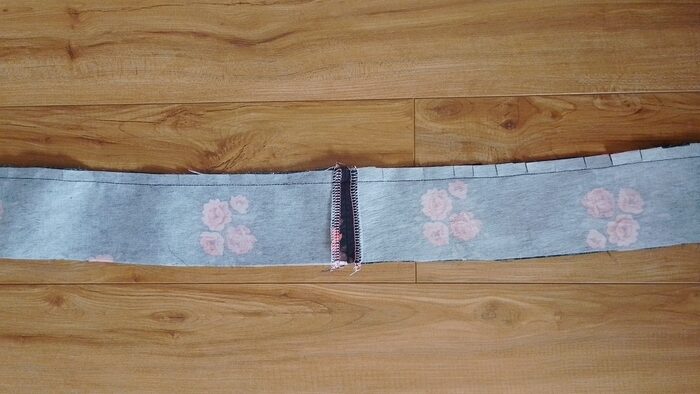
Prepare the bottom edge of your inner waistband by folding it to the wrong side just slightly less than the seam allowance. For example, I'm folding mine by 8 mm instead of 1 cm.
Learn the formulas behind circle skirt variations (half, full, third and quarter) and how they compare.
Read the Complete Circle Skirt Guide blog post →Step 3: Attaching the waistband to the skirt
With right sides together, place the outer waistband (interfaced side) onto the waist opening of your skirt.
Pin these layers together but start from the center (baiscally the side seams that you already sewed and pressed open) out to each free edge of both skirt and waistband.
This is to make sure that you're evenly easing the waistband edge to the much more curved skirt waistline.
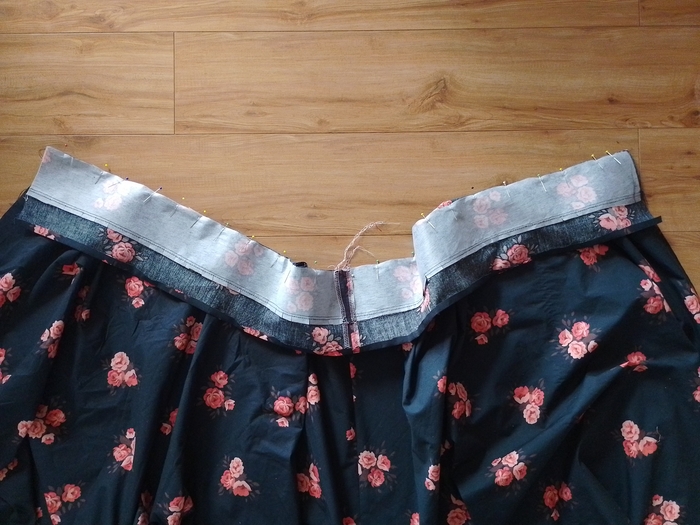
Sew these pieces together and press the seam allowance towards the waistband.
If you followed my drafting instructions for the skirt waistband the edges of these pieces should line up perfectly but depending on your fabric choice you may find that you have a little bit of excess fabric at the waistband. Just trim it off if this is the case.
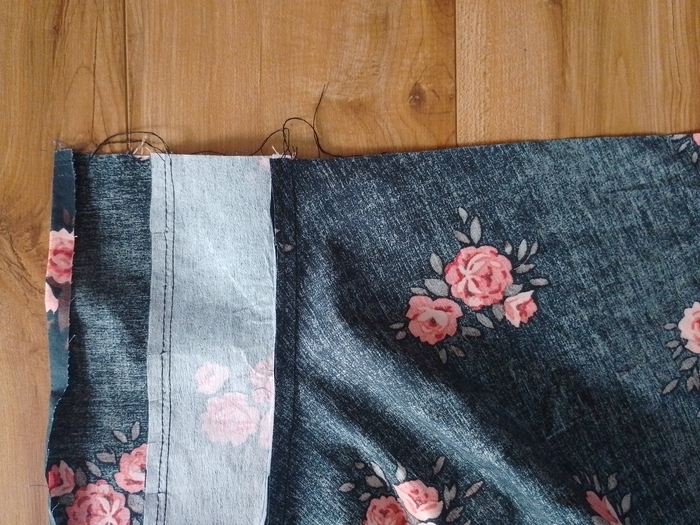
Step 3: Prepping for the zipper
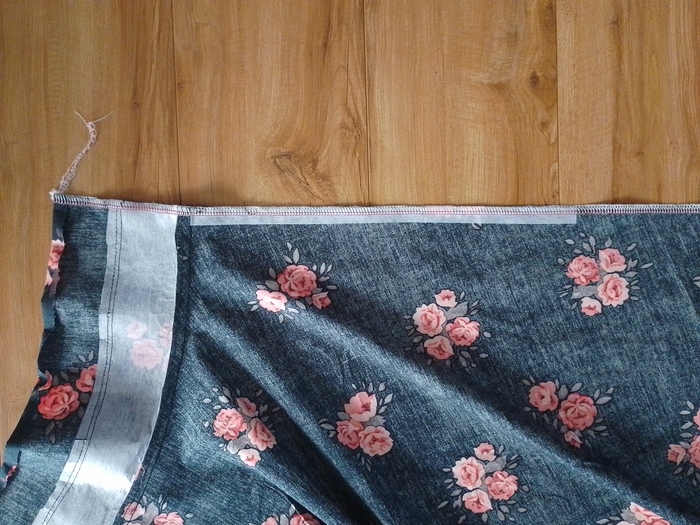
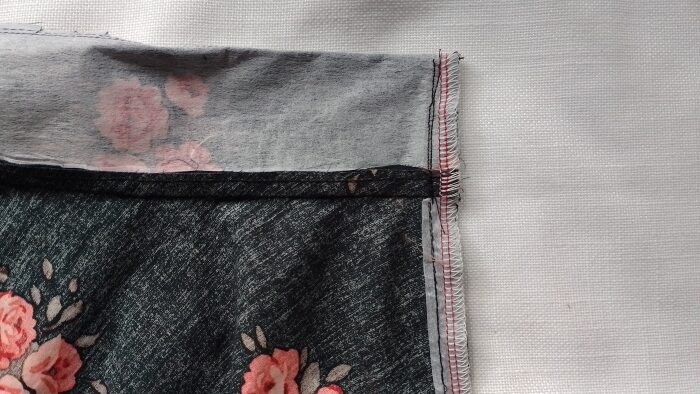
Prepare two narrow strips of interfacing slightly longer than your zipper. Apply these to the wrong side of the free skirt edges (just the skirt).
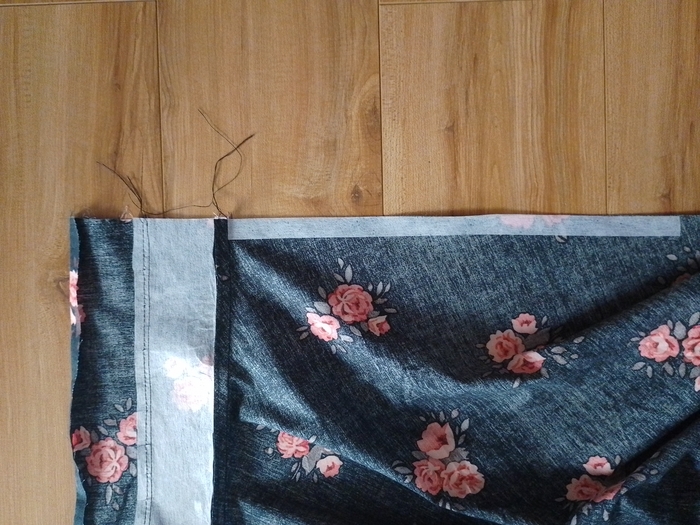
Now, finish the each entire edge of the skirt either by using a serger or your sewing machine's overlock or zigzag stitch. This is what each edge should look like.
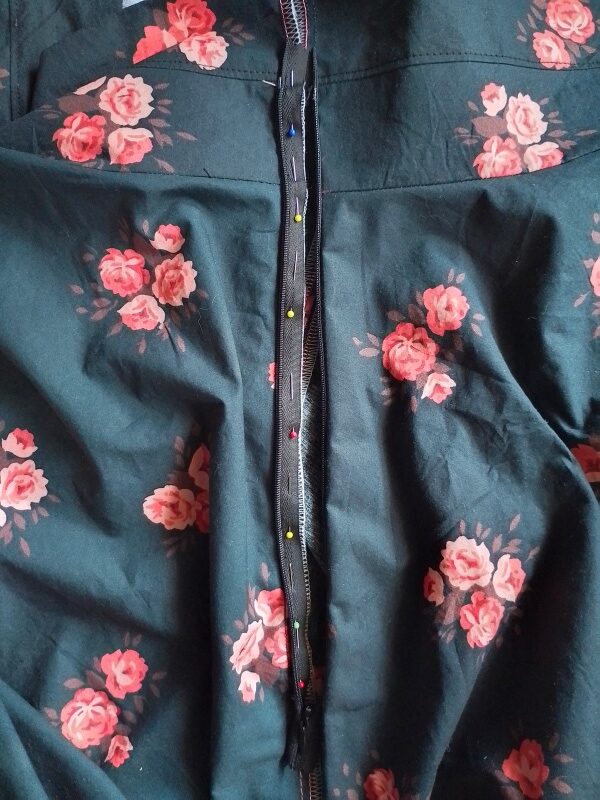
Step 4: Sewing the zipper
Bring the free edges of the skirt close together. This is optional, but you can sew a basting stitch from the top of the outer waistband down the skirt length at the with of your seam allowance. Doing this will help you sew the zipper on the actual seam line.
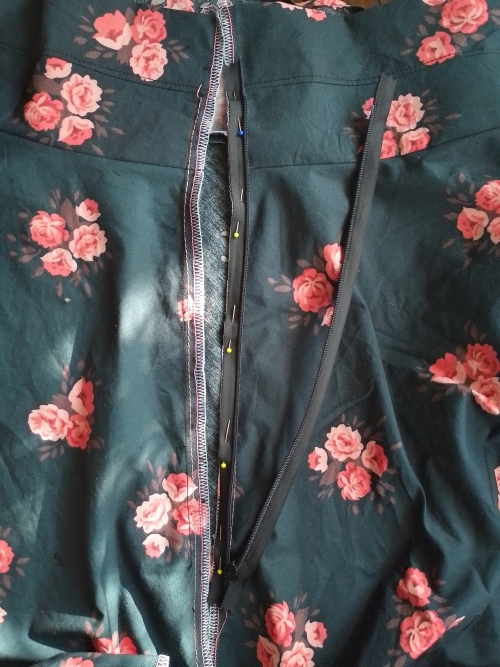
Place the zipper onto the skirt, right sides facing (the flat back of the zipper itself should be facing you).
Line up the left zipper tape (the left tape when your zipper is wrong side up) with right edge of skirt, making sure the zipper stop is lined just 1mm below waistband seam, and that coils are on seam line. Baste or pin in place.
Use an invisible zipper foot to sew the tape down down until you reach the tab. Close the zip completely and mark both zipper tapes at the waistband seam and at the seam of the waistband and skirt.
Open the zipper. Flip the remaining zipper tape onto the skirt such that its raw edge lines up with the edge of the skirt (see below). Use the markings you made in the previous step to help you get the alignment right. Baste or pin in place.
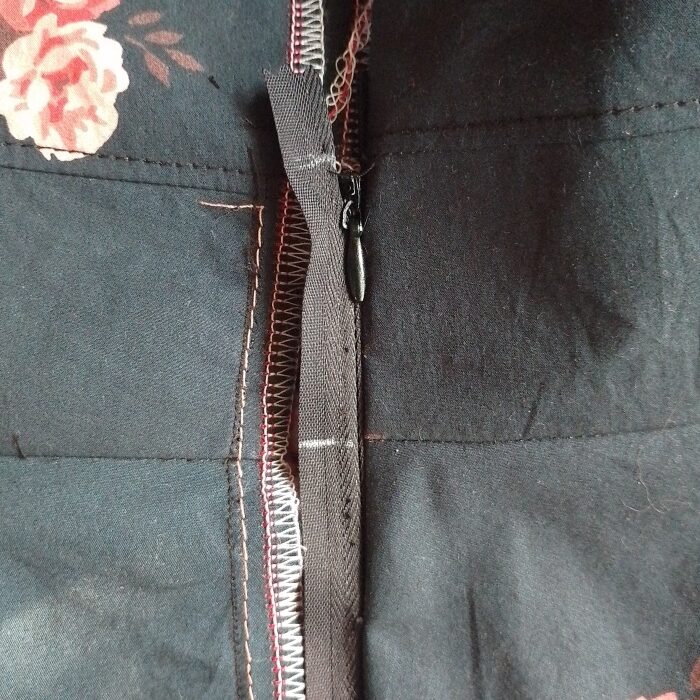
Use an invisible zipper foot to sew the tape down to the zipper tab. Once done, close the zipper.
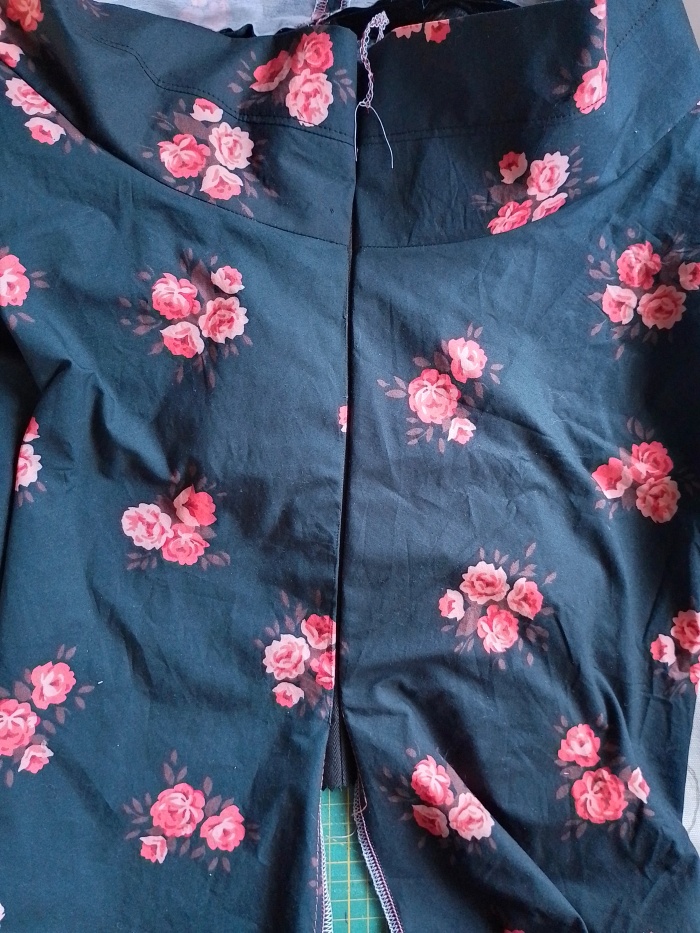
Place the remaining length of the skirt pieces right sides together. Pull the end of the zipper away from these pieces to keep it out of the way.
Pin these together and starting as close as possible to the end of the existing line of stitching (where you sewed the zipper to the skirt), sew the pieces together.
Step 5: Finishing the waistband
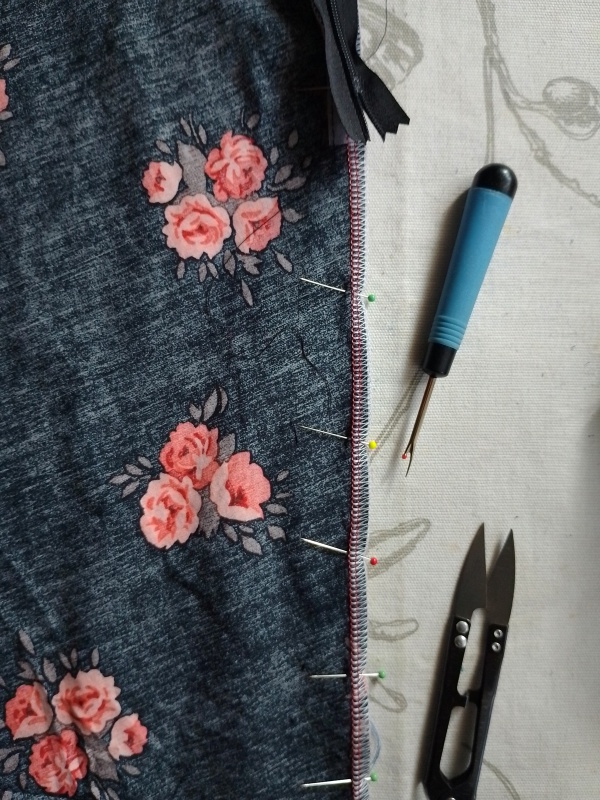
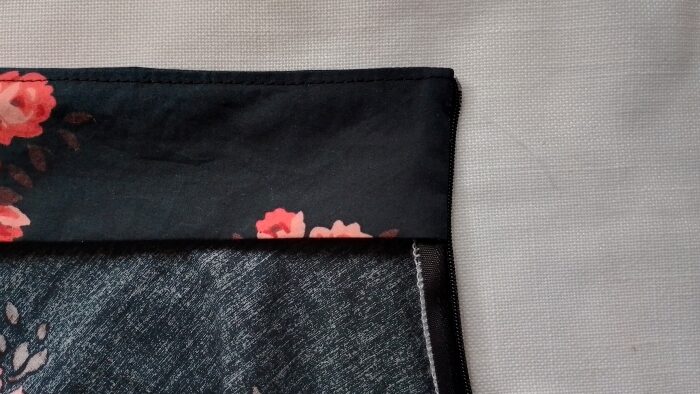
Fold back the inner waistband onto the outer waistband, with right sides facing. On each side of the skirt, fold away the part of the zipper tape that is above the zipper stop so that it's out of the way and then trim it off.
Pin this edge in place and use a zipper foot to sew as close as possible to the now enclosed zipper.
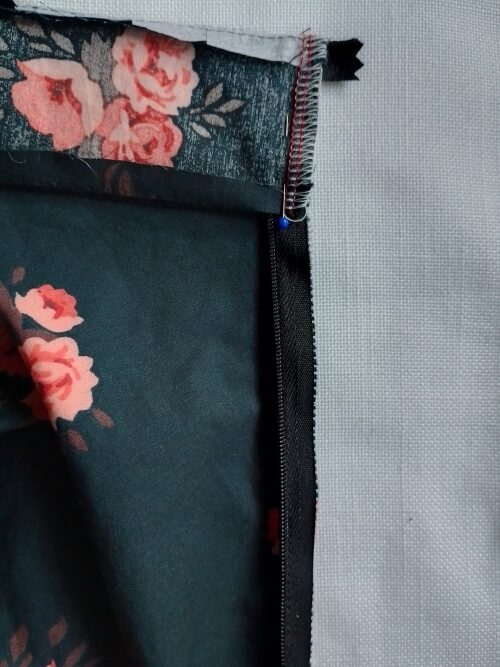
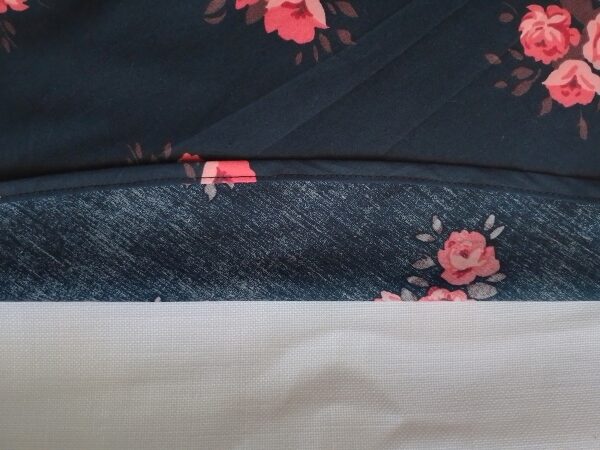
Turn the waistband right side out and use a blunt pointy tool to push out the corners. The photo below is what you should end up with.
Press the waistband to neaten it. Finally secure the waistband by stitching in the ditch (if you're brave!) or sewing just 1/8 in above the seam (this is my preferred choice).

Step 6: Hemming the Skirt
Let the skirt hang overnight or to let the bias stretch out.
Mark a new even hemline and trim of the excess fabric.
To finish the hem you have two options:
- Sew a basting stitch around the skirt about 0.6 cm or 1/4 in from the new hem.
- Using this as a guide, fold the hem towards the wrong side of the skirt and press.
- Fold the hem again to the wrong side of the skirt by 0.6 cm or 1/4 in and press again.
You could also
- Serge the edge and fold it towards the wrong side of the skirt and press.
- Fold the hem again onto the wrong side and press again

From the wrong side of the skirt, sew the hem with a regular stitch as close as possible to the edge of the hem.
Your skirt is complete; congratulations! If you'd like to sew a full circle skirt pattern, check out my free full circle skirt PDF sewing pattern or learn the easy circle skirt radius formula to help you sew any circle skirt.