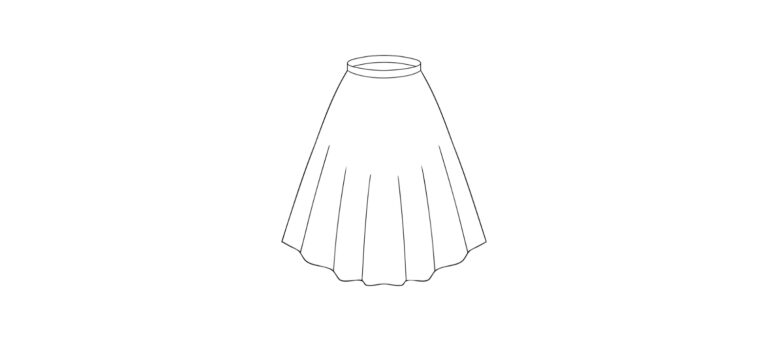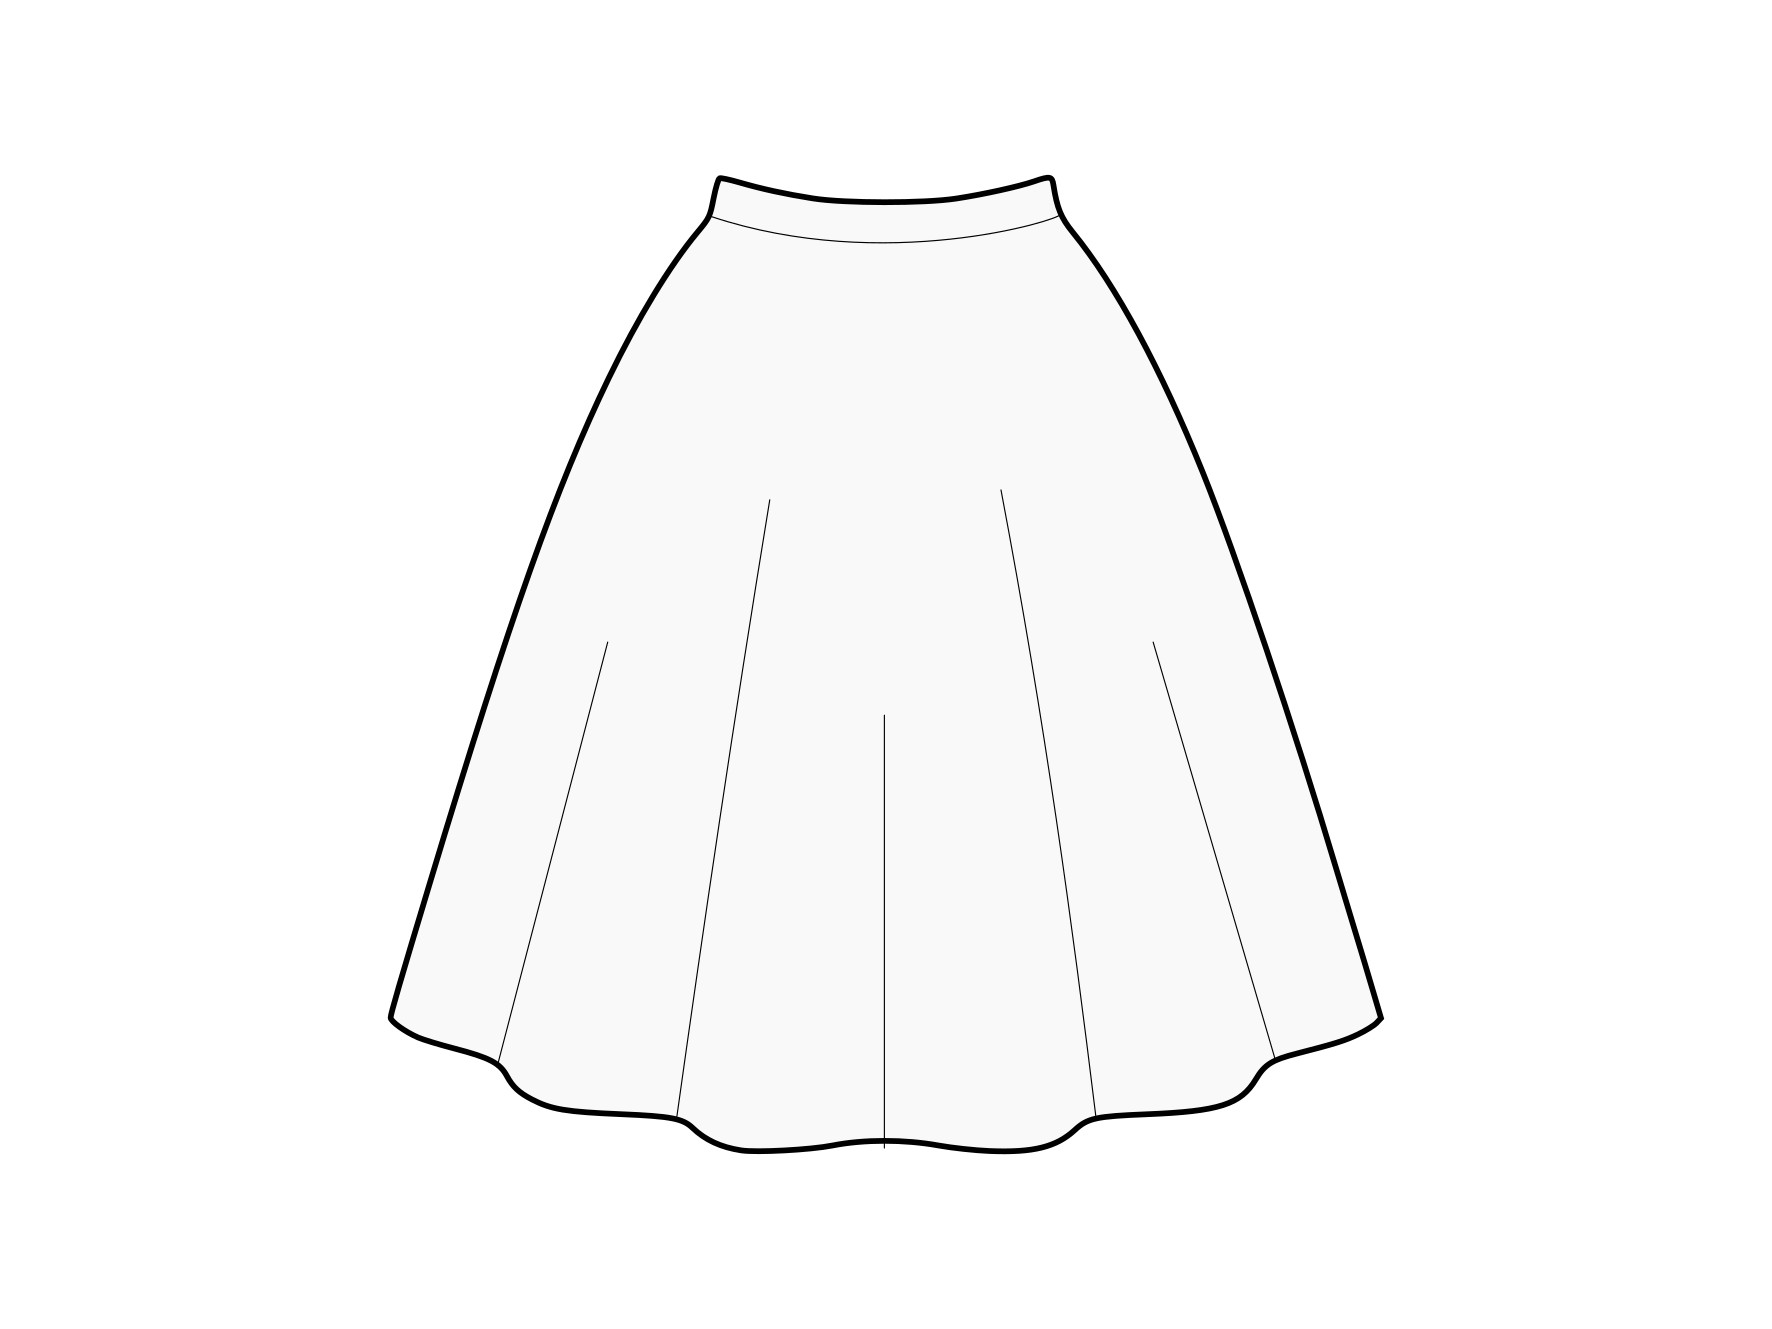
3/4 Circle Skirt Pattern Tutorial (with Calculator & Waistband)
In today’s tutorial, I’ll be showing you how to draft your own 3/4 circle skirt pattern. I don’t know about you, but full circle skirts have way too much volume for me, so I prefer to make a 3/4 skirt.
In this in-depth tutorial, we’ll go through the entire pattern drafting process. I’ll show you the simple 3/4 circle skirt formula, explain the basic math behind it (I also include a handy circle skirt radius calculator). Then, we’ll cover the step-by-step pattern making for the skirt and a contoured waistband, which offers a much better fit than a straight one.
Update: The follow up sewing tutorial on how to sew the skirt is now up!
Looking for the full-volume version? This post covers the specific formula and steps for drafting a full circle skirt pattern.
Read the Full Circle Skirt Tutorial →How to make a 3/4 circle skirt pattern
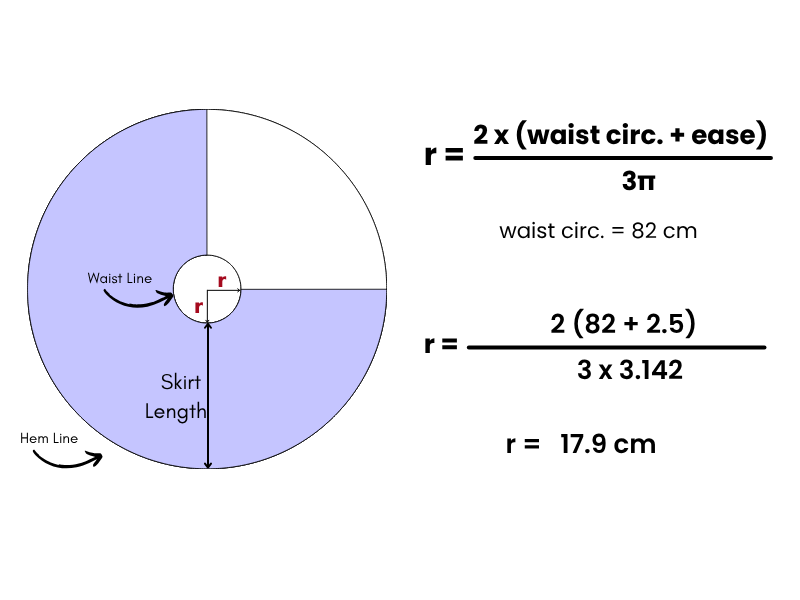
Circle skirts are exactly that. When drafting a 3/4 circle skirt, we’re working with three-quarters of the fullness of a circle, so we need to draw three-quarters of a circle. To this, we need to find the radius of the circle. You can use the calculator in the next section to help you find your radius.
The 3/4 circle skirt formula & radius calculator
I have a handy 3/4 circle skirt radius calculator below that you can use. But just in case you want to know exactly how the math works, feel free to read further as I take you through an example.
A note on ease: After sewing these for a couple of people, I’ve noticed that one may choose to omit ease based on the tightness of your waist measurement is. Reason being, when we measure our waist we’re likely wearing a top and already naturally will include ease. I’ve changed the calculator to include the option to omit ease
Skirt Radius Calculator
—
To find the radius for the skirt, we'll fit your waist measurement (+ 2.5 cm or 1 inch ease) into 3/4 of the circumference of a circle as follows.
\text{Waist Circ} + \text{ 1" or 2.5 cm} = \frac{3}{4}(2\pi r)The simplified version of this is:
r = \frac{2 \times (\text{Waist Circ} + \text{Ease})}{3\pi}If you have, for example, an 82 cm waist circumference, this will be your radius:
r = \frac{2 \times (82 + 2.5)}{3 \times 3.14} = \frac{169}{9.42} \approx 17.9 \text{ cm}Drafting the skirt pattern piece
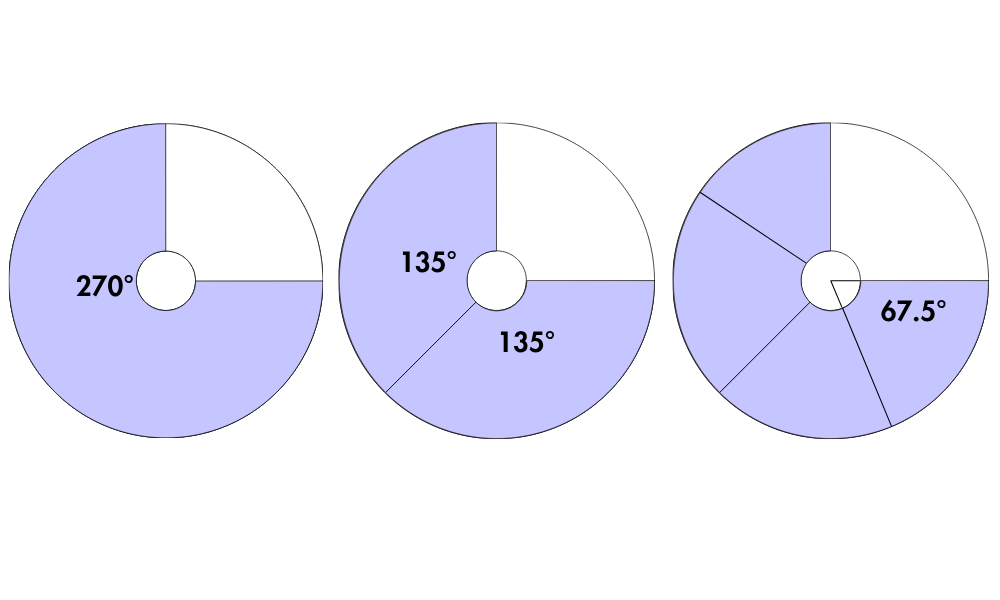
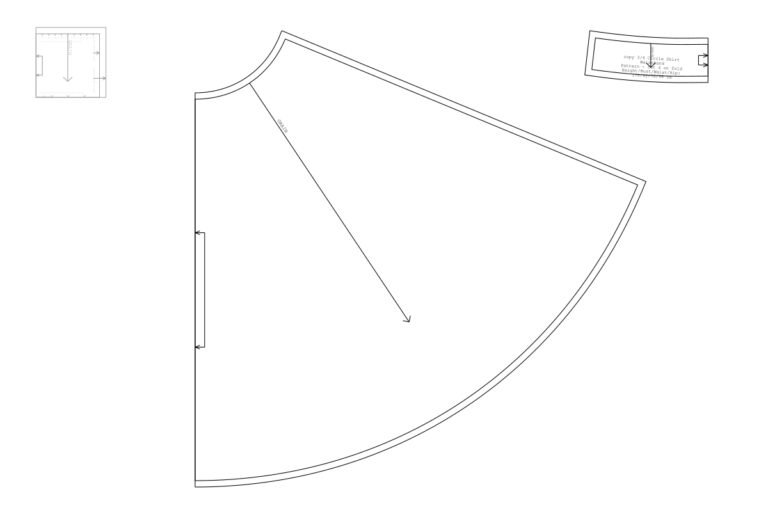
Technically, the entire three-quarters of a circle is your pattern. To make it easier for us to do the cutting we can use a smaller pattern piece and cut the fabric on the fold.
Three quarters of a circle is 270°. If we split that into two, we get two pattern pieces measuring 135°. But we can use even less paper by bisecting this further to 67.5°. This piece can now be cut on the fold twice.
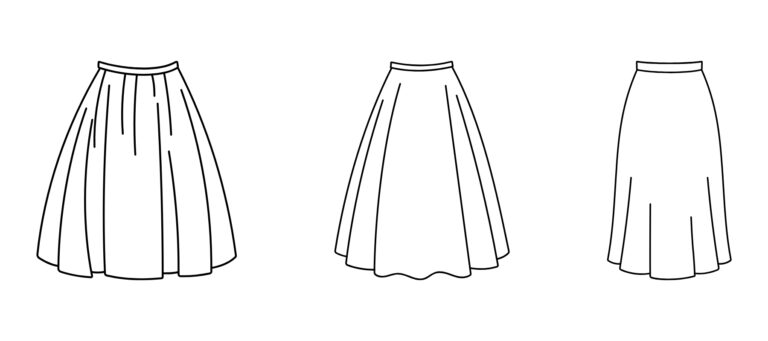
See the formulas for all circle skirt variations (half, full, third and quarter) and how they compare, all in one place.
Read the Complete Circle Skirt Guide blog post →Getting the angle of the pattern on paper
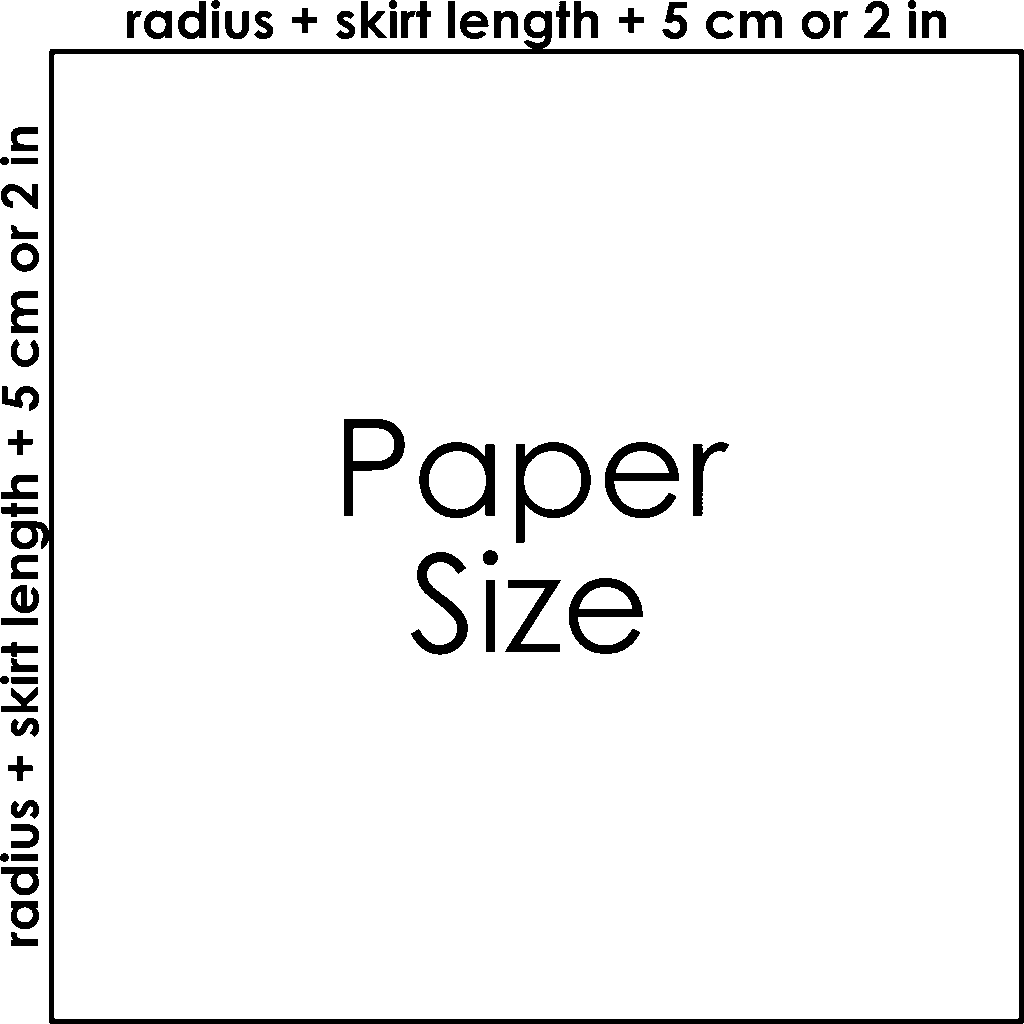
Now how to actually do this on paper. You will need a square piece of paper at least:
radius + desired skirt length + 5 cm or 2 in (width and length)
To get the 67.5° angle without a protractor or any sets of tools, we will fold the square and the use the creases to guide us.
- Fold the square in half from the top left corner to the bottom right corner.
- Fold it in half again, from the same top left corner.
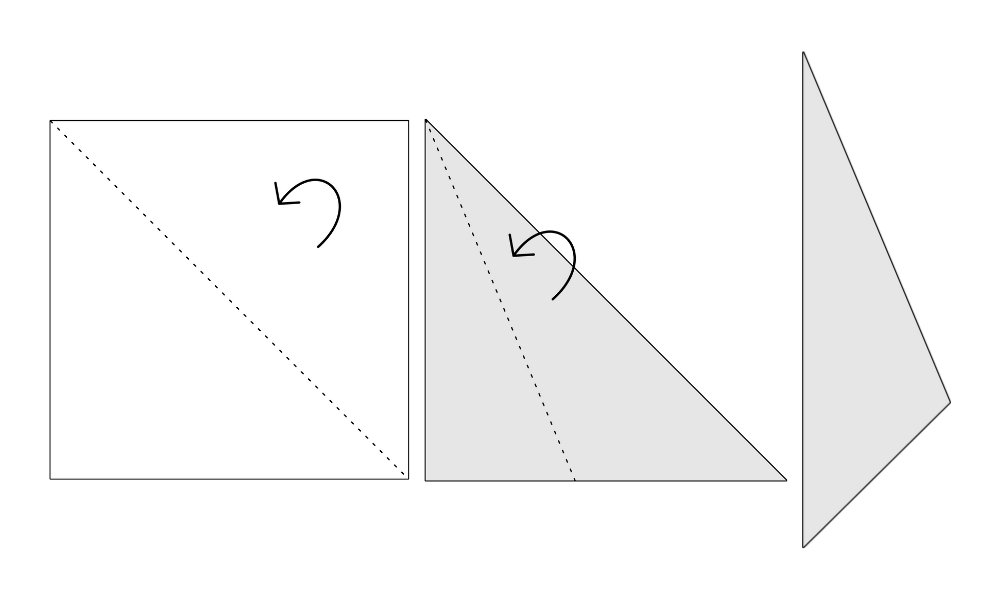
When you open it back out, you’ll see the crease lines dividing that corner into four equal sections. Each of those measures 22.5°.
To get 67.5°, count three of the sections from the left edge of the paper and draw a straight line along that third crease. This line is your side seam.
Now that you have the correct angle for a pattern piece, let's actually draw the curves of the waist line and hemline.
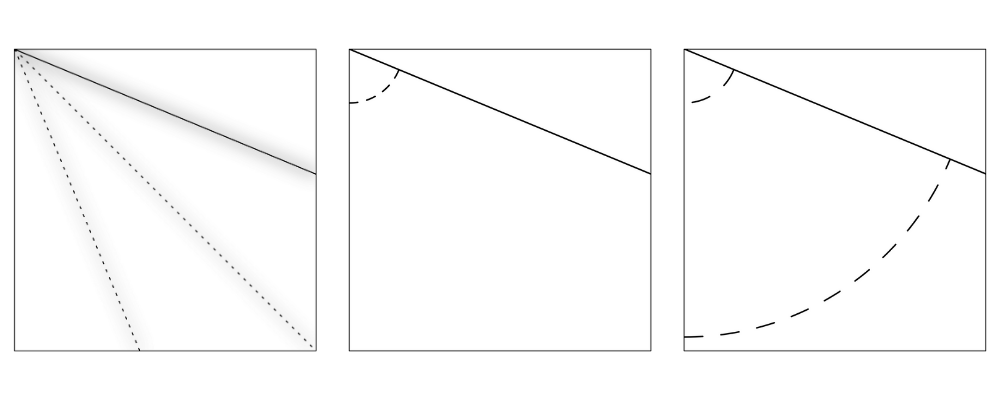
Drawing the waist and hem line
- From the top corner where all the creases meet, place the 0 cm/in end of your measuring tape. This is your pivot point.
- While holding the tape in place, swing it tape from one edge of the paper towards the side seam line, making marks at intervals using your radius as the distance from the pivot point.
- Join the marks to form your waist arc.
- Repeat the process but this time use the radius + skirt length as your distance. Join the marks to form the hemline arc.
This gives you the basic skirt shape but we still need to add seam allowances.
Adding the seam allowance to the skirt pattern piece
I like to use 1 cm but feel free to use whatever you're comfortable with.
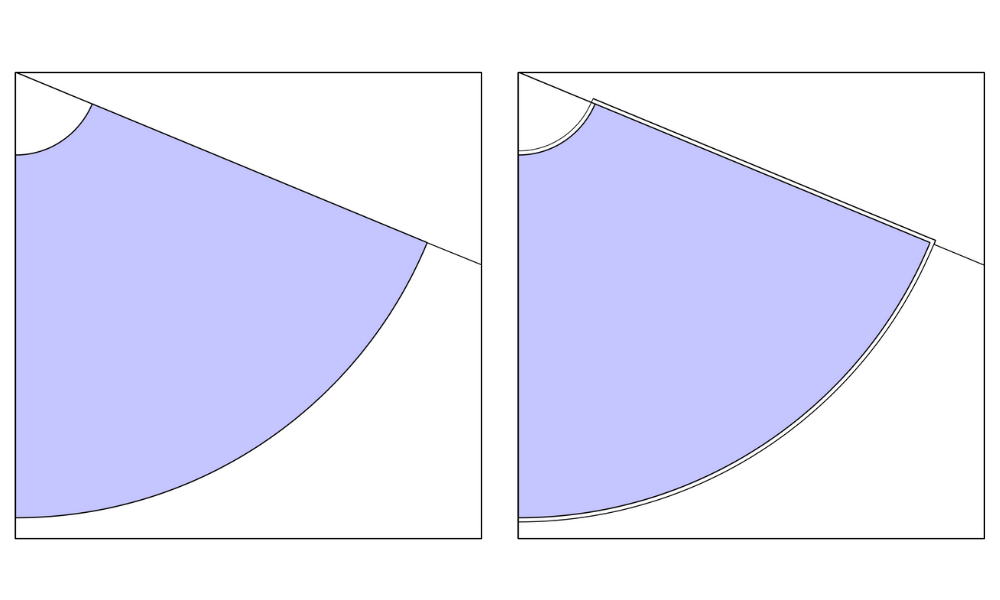
Add seam allowance above the waist arc, below the hem arc and at the angled side (seam line). Leave the straight edge as is as it's the fold.
Here is your basic pattern piece to be cut on the fold twice.
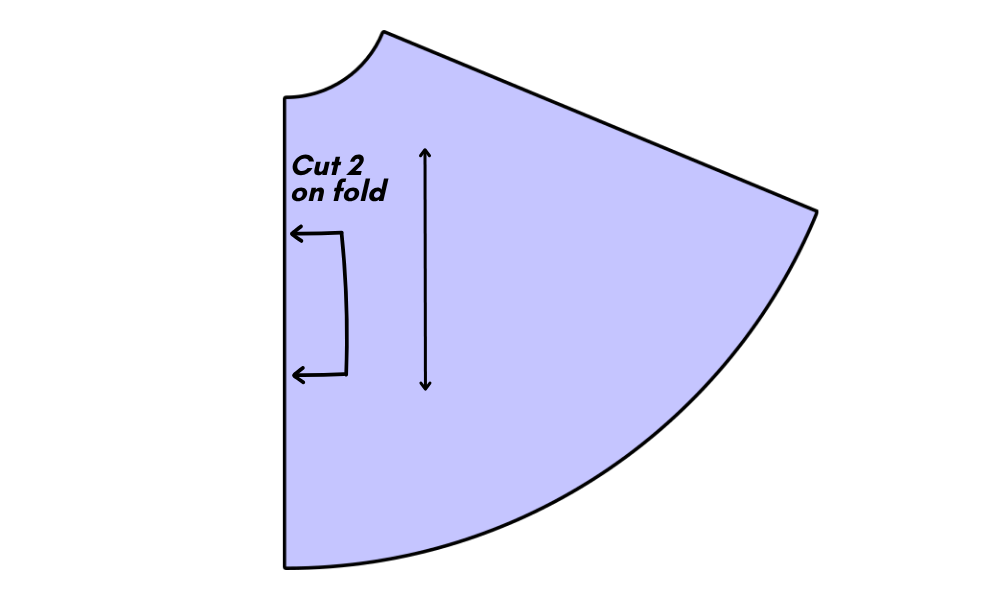
You can also download my free, ready-to-print pattern for a full circle skirt. The sewing instructions work just as well for this 3/4 skirt.
Download the Free Pattern →How to draft a contoured waistband
While straight waistbands are easier to draw, they might gape at the side and back. A curved waistband avoids this problem and is also easier to join to the waistline of the skirt. We'll be drafting a quarter pattern piece for the waistband which will then be cut on the fold.
Waistband dimensions
To start off, let's calculate the total waistband dimensions:
= waist circumference + wearing ease (1 in or 2.5 cm) + 1 cm (optional)
I like to add that extra 1 cm to ensure my waistband is never smaller than the skirt. This can be especially helpful when handling fabrics that stretch out easily.
Now divide this by 4 so we can work with just a quarter of the waistband.
length= waistband/4
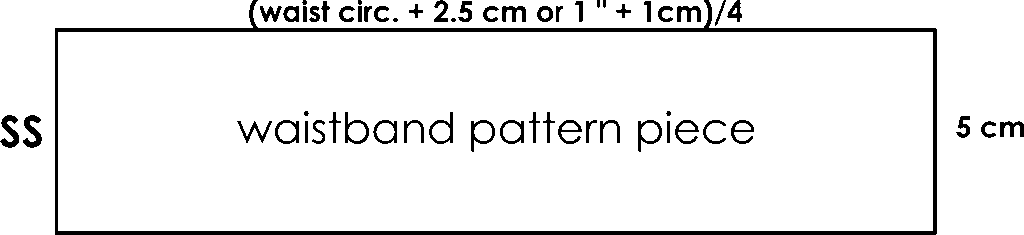
Draw a rectangle using this length and for the height use 4-5 cm (this is just what is fairly standard, use whatever you like).
Label leftmost short edge, SS (side seam). The other edge will be the fold line
Curving and shaping the waistband
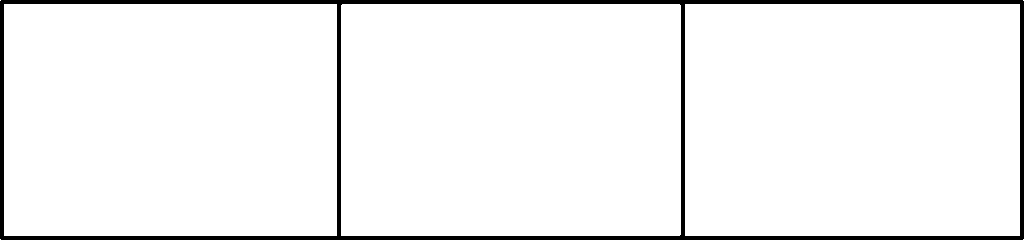
Divide the pattern into 3 equal pieces and draw vertical lines to mark these sections.
Cut down from the top of the waistband down the vertical lines and stop just before reaching the bottom edge of waistband.
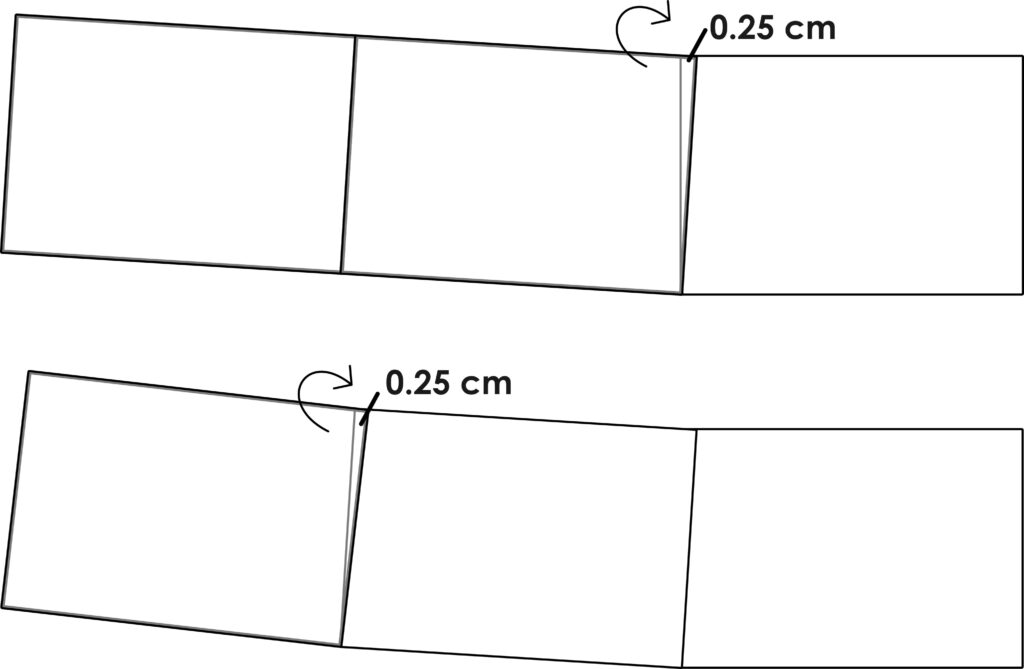
Starting at the slash line closer to the foldline, pivot the rest of the pattern inwards towards the fold line, so the top edge overlaps by 0.25 cm (1/8 in). Tape it down and repeat at the remaining slash line.
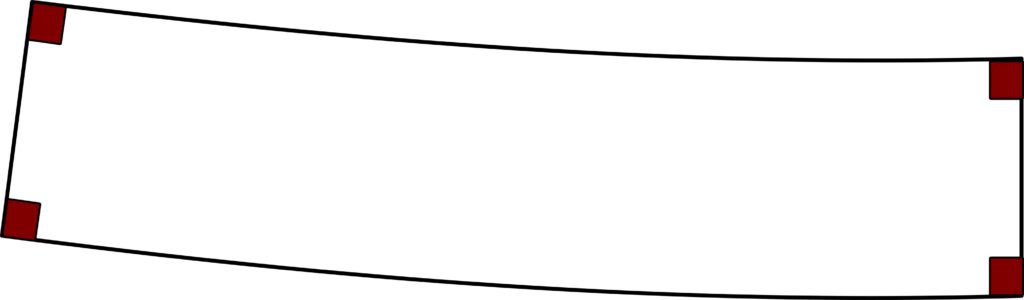
Redraw the top and bottom of the waistband so that you have nice smooth curves.
Adding seam allowance to the waistband
Now all that's left to do is to add the seam allowance. Again I'm using 1 cm or 3/8 ". Add seam allowance to the top and bottom curved edges and the edge of the side seam. Leave the fold line as is.
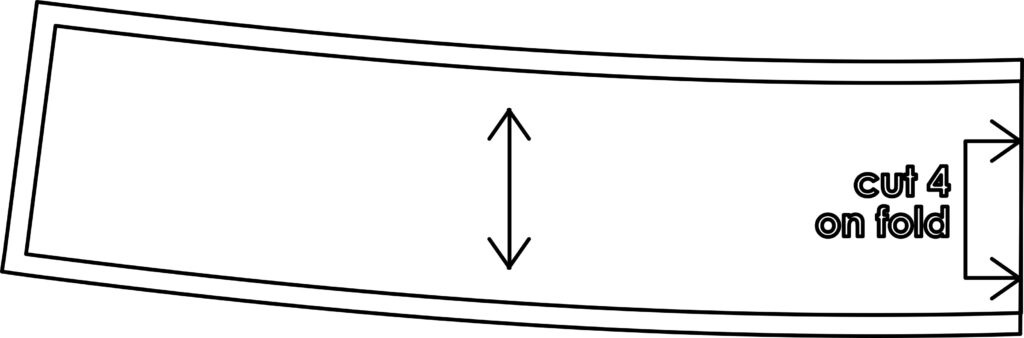
Draw the grainline parallel to the fold line. Near the fold line draw the fold symbol and write 'Cut 4 on fold'. This will give you two pieces for your outer waistband and two identical pieces for the inner waistband.
Sewing instructions
Ps! The follow up blog post is now up. Learn how to sew the skirt using this step by step tutorial.
You can download my free 3/4 circle skirt pattern if you'd like to skip the drafting or my free full circle skirt PDF pattern if you'd like to sew a fuller skirt or check out my circle skirt resource page for more on circle skirts.